How to carry out a pre-season check on a StocksAg seeder
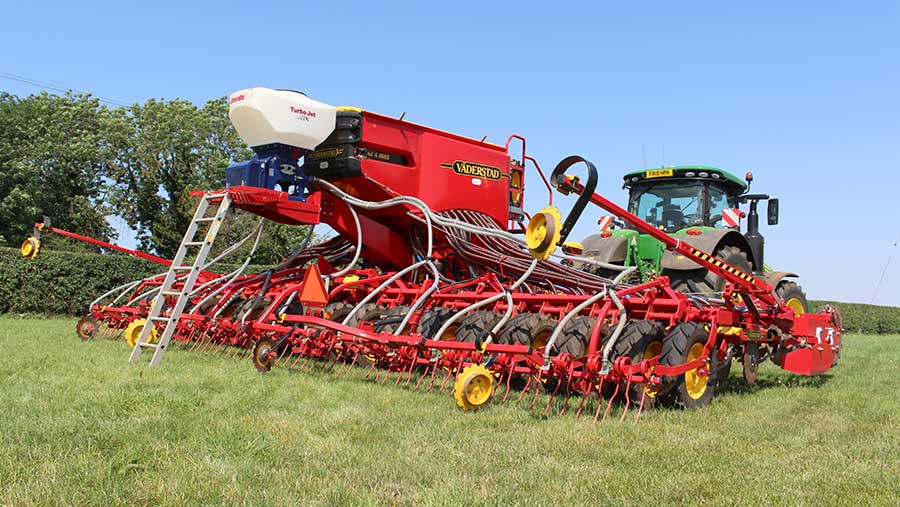 Brocks seeder © Edd Mowbray/proagrica
 It wasn’t long ago that the little applicator was a slug pellet only machine, but in recent years it has gained a new lease of life as a second seed vessel on many drills, establishing crops ranging from oilseed rape to stubble turnips.
These seeders are also allowing farmers to experiment with catch crops and companion drilling in a bid to boost soil health and give their main crops the best chance.
See also: Video: How to calibrate your slug pellet spreader
However, the increased and more diverse workload means maintaining accuracy when applying multiple seeds at varying rates can be tricky.
Accuracy is important, as over-applying is not just a waste of seed, over-thick oilseed rape canopies tend not to yield as well. Conversely, establishing too few plants can limit yields at the following harvest.
To ensure you are applying seed at the right rate, Symon Bradney, sales manager for StocksAg, runs through the common check points before you fill up the hopper and head out to the field.
Although we will be mainly focusing on the Turbo Jet i-Con drill unit, the checks are broadly similar for the smaller VS-2 models and Fan Jet spinning disc broadcasters.
Symon Bradney
Electrics
If you’ve dragged your hopper out of the shed and it’s lacking any life, the obvious port of call is the electrics.
The brushless fan can draw 30amps on start-up whereas duo units can pull 60amps, so having the right cables and connectors is key.
Ideally, using the ring connectors directly on to the battery will guarantee an uninterrupted power supply.
A common quick-release connector such as a crocodile clip can drop the power needed for running the machine, so it’s worth spending some time making sure the correct cables are on your machine.
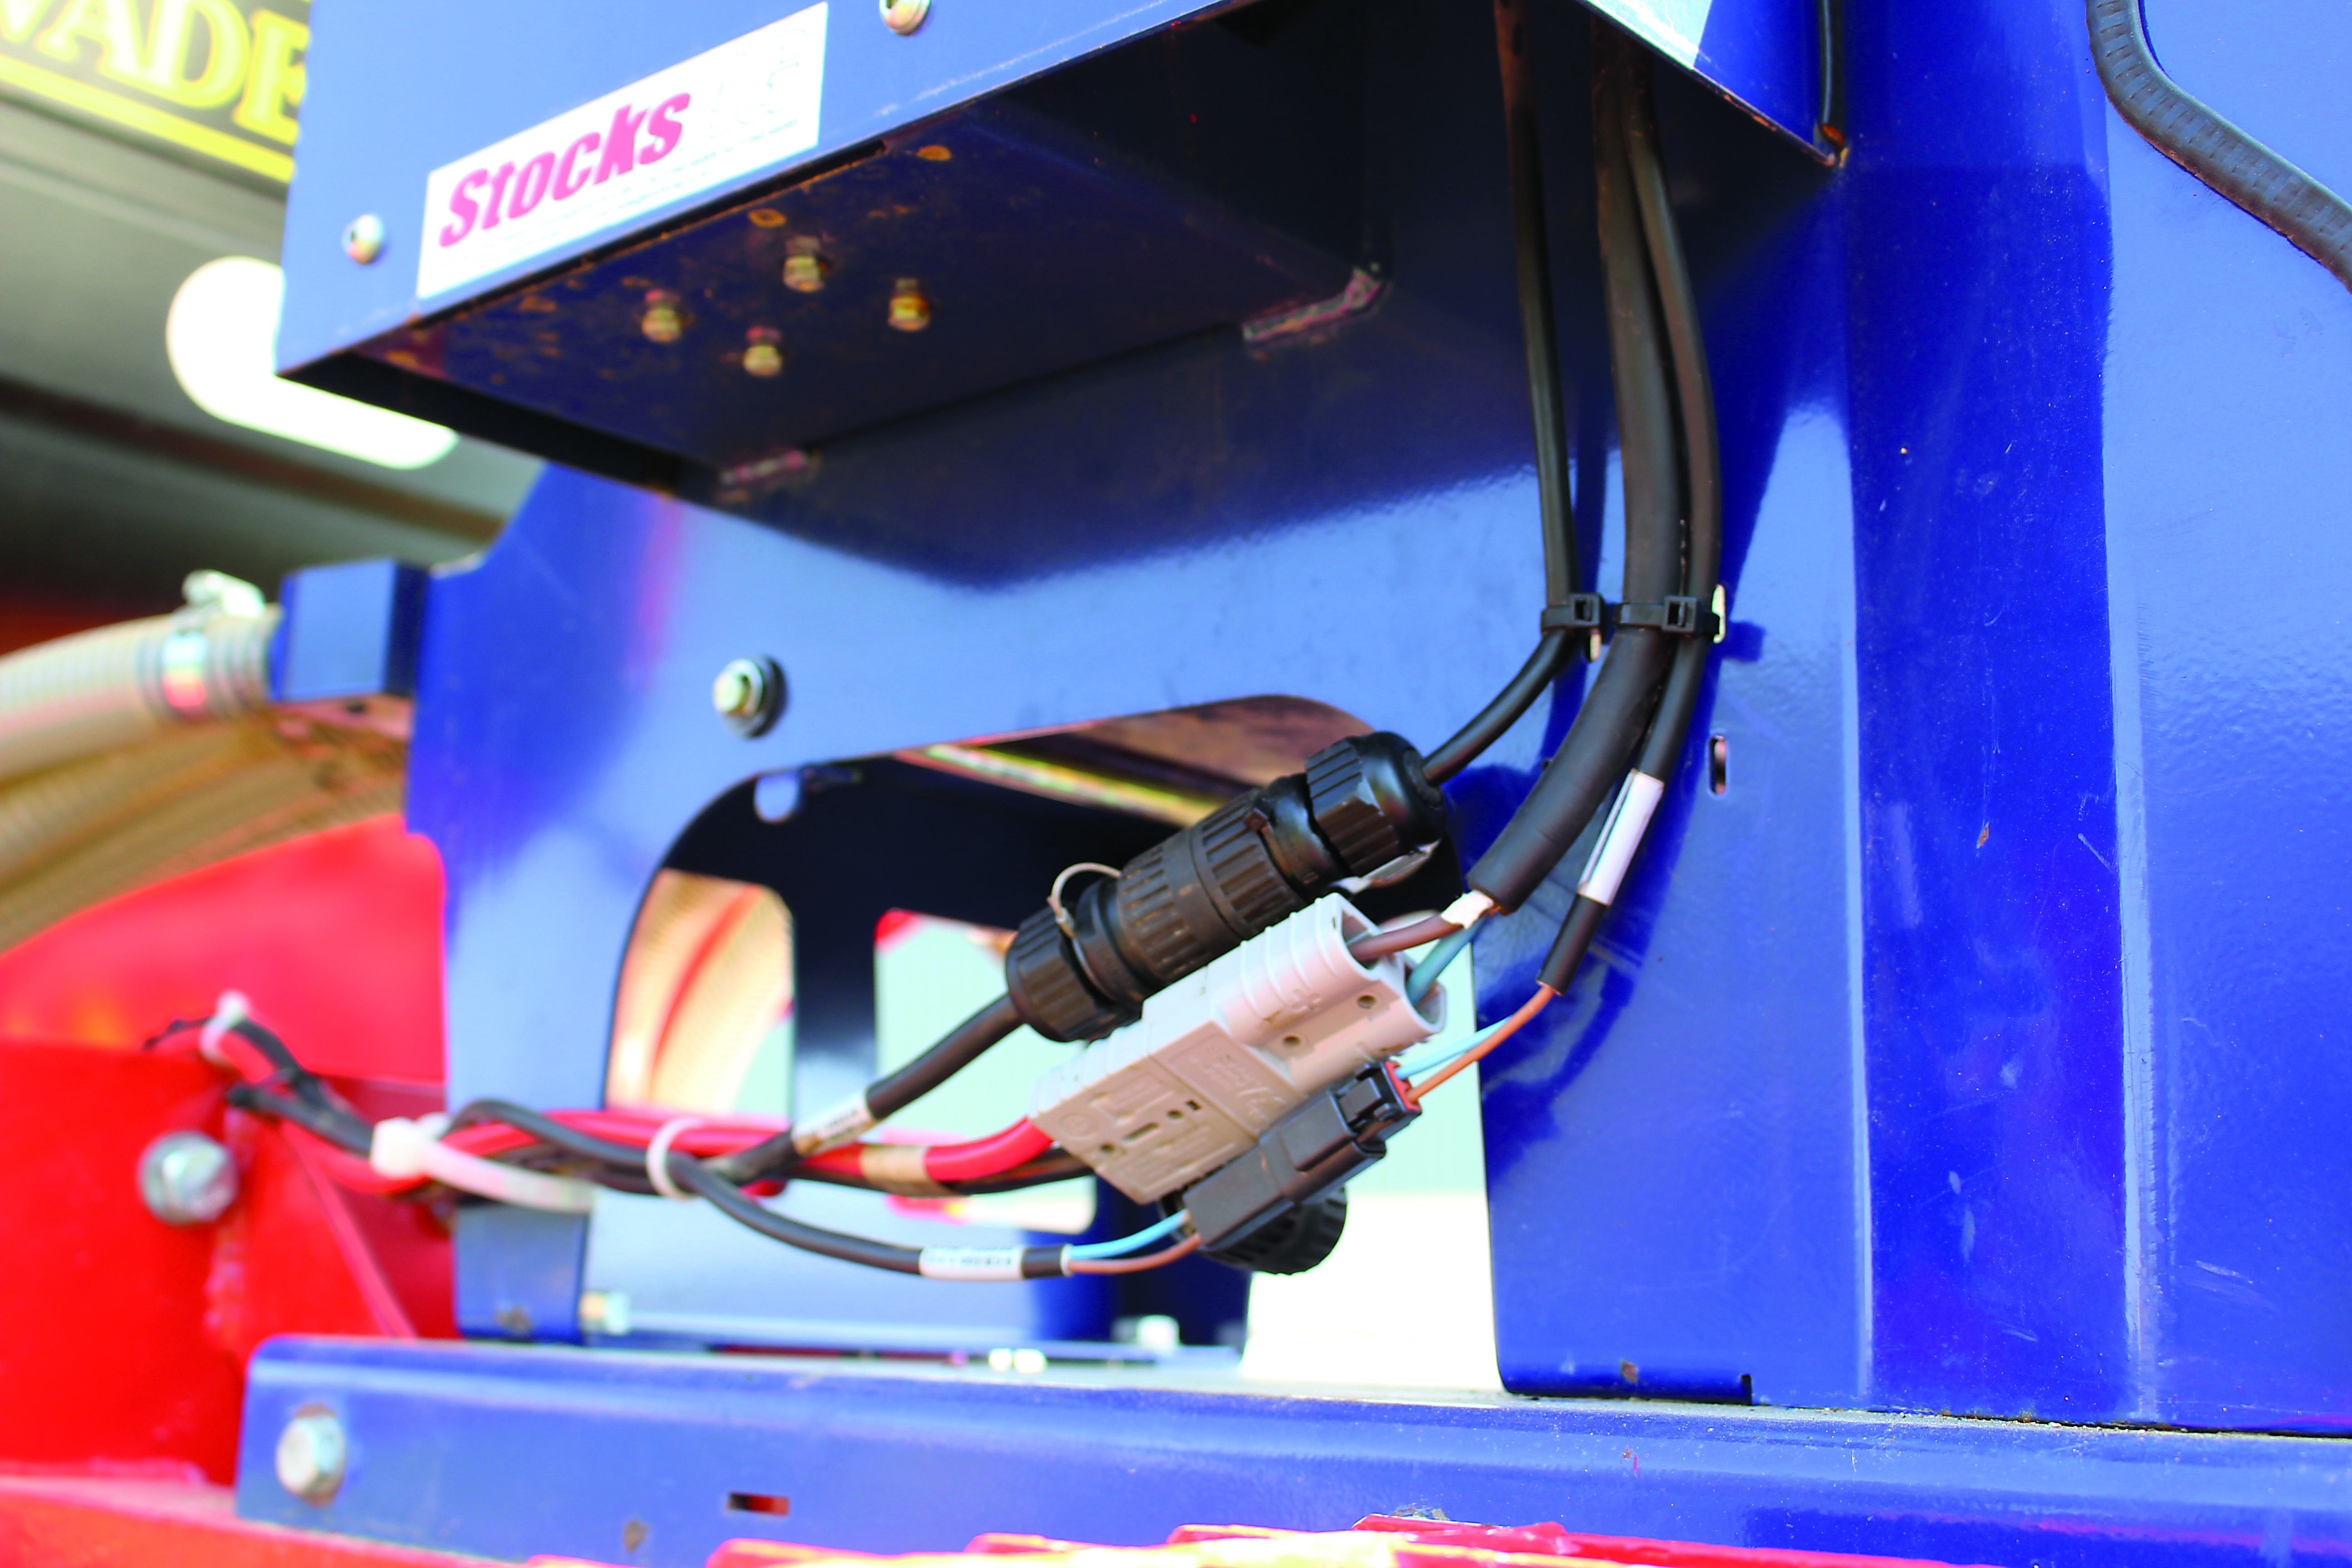
Wires can be easily damaged
The communication lead has a joiner to allow quick removal or installation. Inside are a number of fine pins that locate into corresponding holes, however, these pins are easily bent out of line, and if they are, can stop signal being sent from the cab to the machine.
It’s worth taking a few minutes to line up the holes correctly and check for any damage, and squirting some contact spray on to the pins to clean any grime off.
If you regularly swap the applicator between machines, check all the cabling is in good order and the routeing is as straightforward as it can be.
This may seem like an obvious point, but it doesn’t take much for poorly routed cables to cause issues and become snagged on moving parts or rub against chassis, causing internal damage.
Clean fans
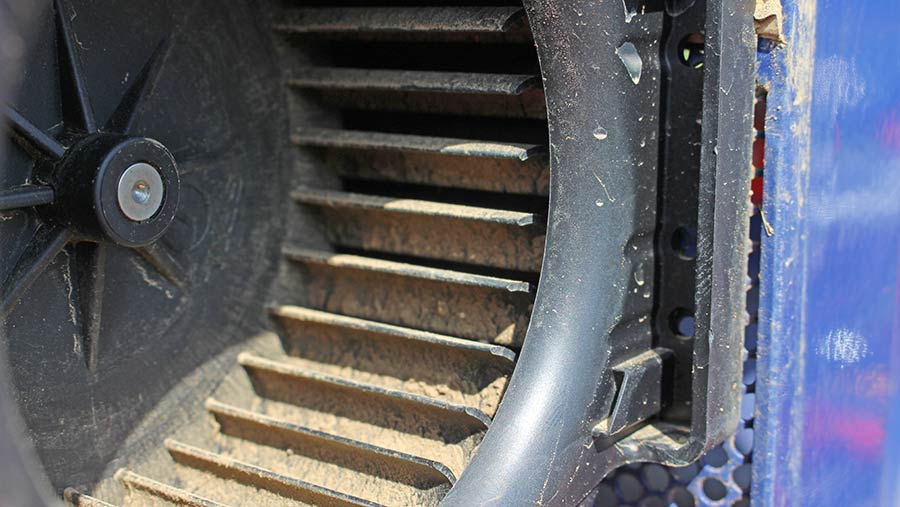
Fans need to be kept clear of dust and debris
Keeping the fans clean from dust and debris is key to keeping fan speed running where you set it – any slight drop will have adverse effects on the product being delivered to the spreader plates and will compromise the spread pattern.
Dust builds up on the fins of the fan, which increases the power draw from the motor.
The i-Con Turbo Jet uses a brushless fan, which continually monitors for damage and if the build-up of dust is too much, it will simply shut down as it thinks something is wrong.
Most spreaders are mounted on the back of drills, UTVs or rolls, all of which kick up plenty of dust, which inevitably lands around the applicator. A simple blow down with an airline around the intake fans will stop any resistance from muck, although be careful to never wash the applicator.
Feed blocks and rollers
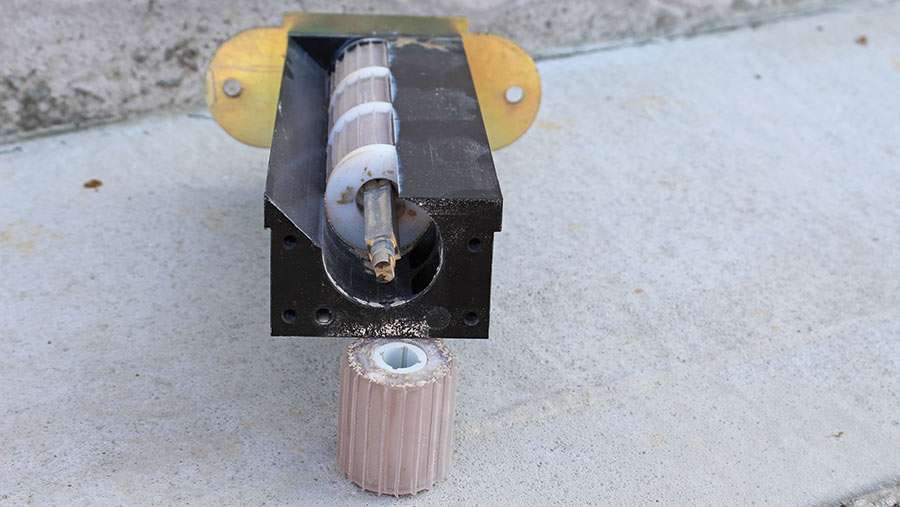
Rollers and discs can build up with debris
One common problem is operators reporting the seeding block and discs not turning, which is usually down to a simple belt and braces clean down of the internals.
Even if they do turn, there might be debris stopping it flowing freely which will increase the load on the motor.
See also: Video: How to properly set up a fertiliser spreader
There are varying rollers and discs for different products and it’s vital to have the correct size of roller in for the product you are spreading, or else calibration is futile.
Once the block is out, undo the four Allen key screws at each end while making a note of how the rollers and white spacers are arranged before you start dismantling, as they have to go back the same way.
A simple blow down or brush of each part should clear the worst of any debris that has built up in the block.
Best practice would be to do this before it goes back in the shed, as dust can attract moisture. Check for wear on the inside of the block and rollers, as excessive grooves will alter the flow of products.
Chamber
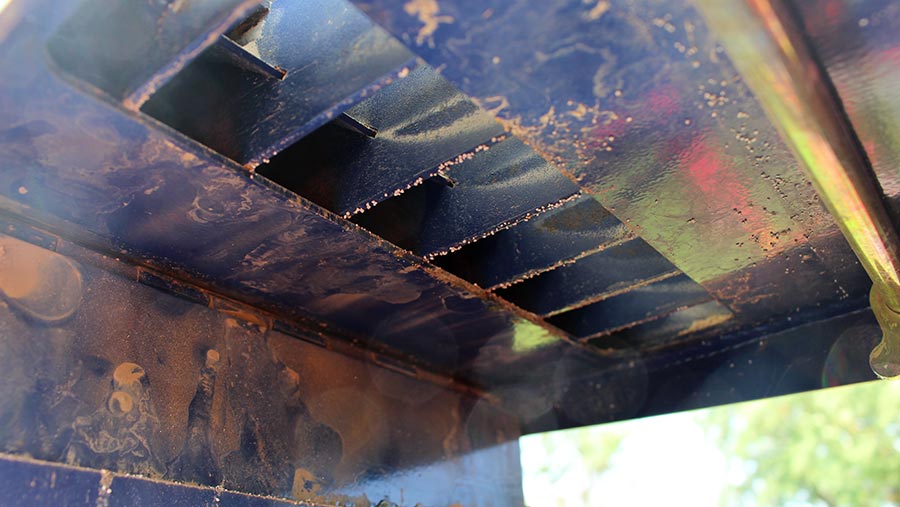
Chamber can build up with unwanted items to restrict air flow
Often forgotten, the chamber sits below the block and is the place where the seed meets the air flow of the pipes.
The seed drops down in the centre of the chamber on a curved ledge, but behind this can become a nice resting spot for rouge pellets to gather and slow the air flow down.
A simple blast with an airline should cure any problems. Be careful not to dislodge the gasket on the edge of the chamber as this will cause pressure drop.
Once this is done it’s worth a quick check to make sure the rollers are turning, and the seed is coming out using the prime button on the side.
This is also a good moment to peer inside the hopper and check the agitators are rotating if they are meant to.
Air leaks
Seal around the lid should be undamaged
The Turbo Jet range of applicators is designed to run from a sealed, pressurised hopper so any slight leak can reduce the spread rate by as much as 10%.
This is noticeable after calibration has been carried out and you find that your spread rate drops once the fans are running.
It is caused by air leaking into the hopper through the feed rolls – effectively lifting the product off the feed block and reducing the application rate.
Most operators will be unaware as the rate displayed on the screen will be the same, but your hopper will still have some product left in it when it should be empty.
One key area is the lid – the seal around it must be in good condition, with no snags or gaps around the circumference. It also needs to be tightly sealed, so a bit of elbow grease is required when putting it back on to get that final quarter turn.
Older machines will need careful attention around the block, as there has been recent upgrades to this seal.
Before filling up for the first time, give the hopper a shake and check it is still fixed to the chassis.
There are a number of coach bolts holding the hopper to the internal plate with a silicone seal, although it only takes a small knock for this silicone band around the join to become broken, so make sure nothing has unsettled the seal.
The air pressure generated by the electric fan doesn’t have the same power as a hydraulic fan, which forces seed down the pipes like a distribution head on a drill.
It’s more gentle persuasion from the small fans, so mounting pipes in the most straightforward route to limit any resistance is essential, even the slightest kink can drop air flow significantly.
Other things to be aware of:
Spreader plates – these must all be equally spaced apart, set at the right angle for the product, clean, undamaged, and be set at the correct aperture to achieve an even spread – they are designed for 38mm, +/-1mm.
Damaged product plates will cause an uneven spread and may lead to striping.
Implement switch – tells the spreader when the machine is in work, make sure this hasn’t been knocked out of line or any wires broken.
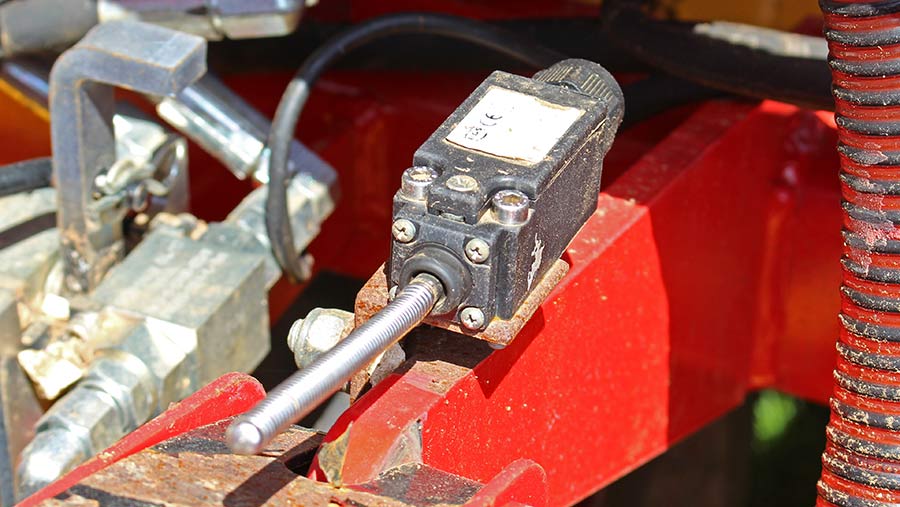
Implement position switch can get knocked easily
GPS – this is a standard feature on the I-Con units, but it’s worth making sure the ground speed is matched on the box.
Hopper level sensor – if there is one fitted, when the machine is switched on before filling the alarm should continue.

