
Video: How to calibrate your slug pellet spreader
Slug pellets and the potential harm they can cause to watercourses is under intensifying scrutiny. Making sure pellet spreaders are properly set up will be vital to avoid breaching the rules on metaldehyde getting within 10m of a watercourse.
Growers should have tested slug pellet applicators aged five years and over before 26 November last year to ensure slug pellets are being spread evenly and accurately.
Trailed, mounted and self propelled machinery with a boom width over 3m will need testing again by 2020 and then every three years thereafter while kit under 3m will get away with a retest every six years. Newer equipment should be first tested on its fifth anniversary.
The Sustainable Use Directive states that all active applicator equipment, including slug pellet spreaders, need a National Sprayer Testing Scheme (NSTS) certificate.
See also: 9 top tips for better cereals establishment
Farmers Weekly teamed up with the Rob Foxall of SCS Spreader and Sprayer Testing to get a step-by-step guide to properly testing and calibrating your slug pellet spreader to comply with the directive.
Watch the video tutorial with Mr Foxall and see a step-by-step below.
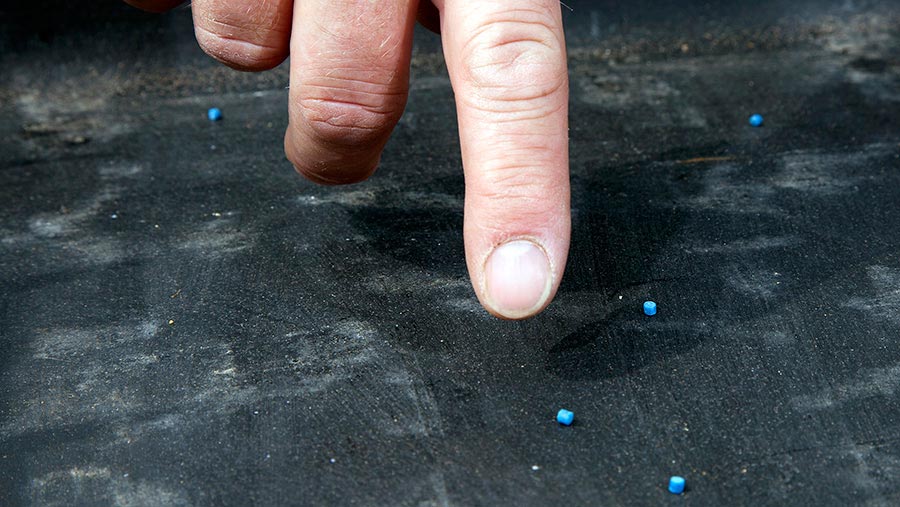
1. Assess slug pellets

© Jonathan Page
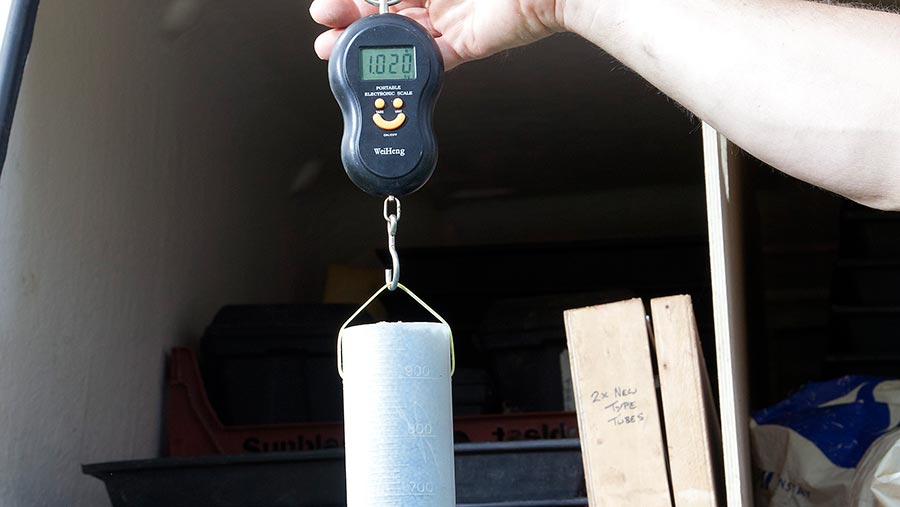
There are four characteristics that affect the spreadability of slug pellets: weight, size, strength and shape.
“We can’t measure shape, but the other three we can,” explains Mr Foxall. “Using dummy pellets that have no active ingredient, first measure the bulk density by filling a litre tube with pellets, remembering to deduct the weight of the tube.”
© Jonathan Page
Knowing the bulk density of the product to be used helps to accurately calibrate the machine, as weight will determine how far the pellets can be thrown by the spreader.
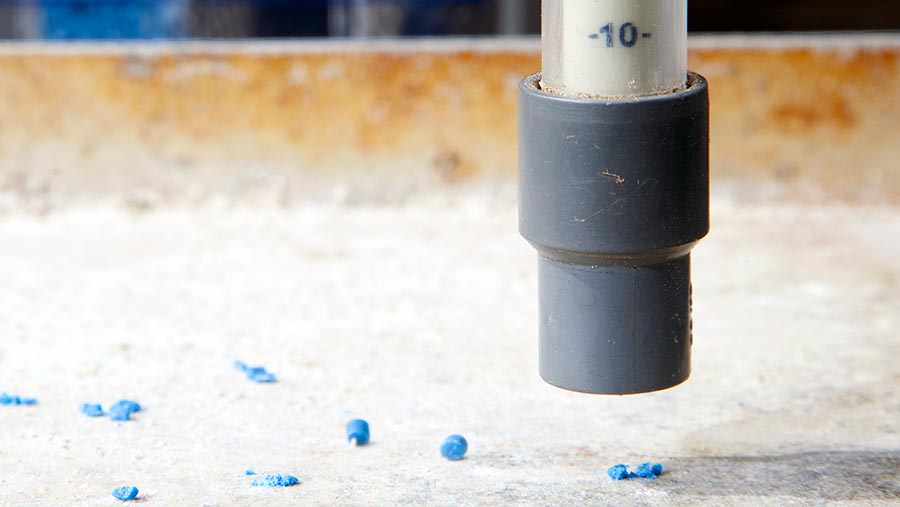
Next, check the pellet size by filling a grader box and shaking until all the pellets have settled in one of the four grade categories.

© Jonathan Page
“Obviously if all pellets were in Section A (less than 2mm) that will restrict how far the spreader can throw them – the smaller they are, the shorter the distance they can be spread over.”
To measure pellet strength, use a strength indicator to gauge how easily they break under force. A good, strong pellet will withstand a lot of force as the disc vane hits it, says Mr Foxall.
© Jonathan Page
“The pellets should be hitting a strength of about 8 [units] and that means they can be propelled to a decent width.”
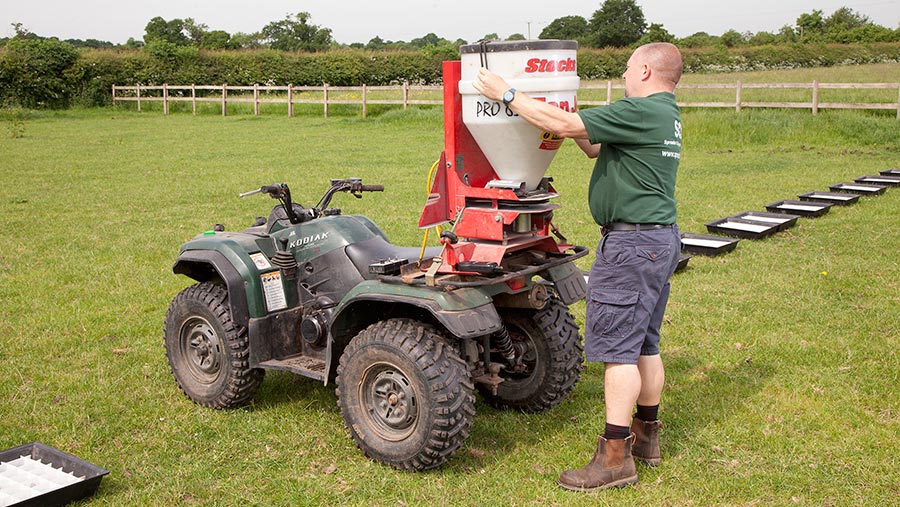
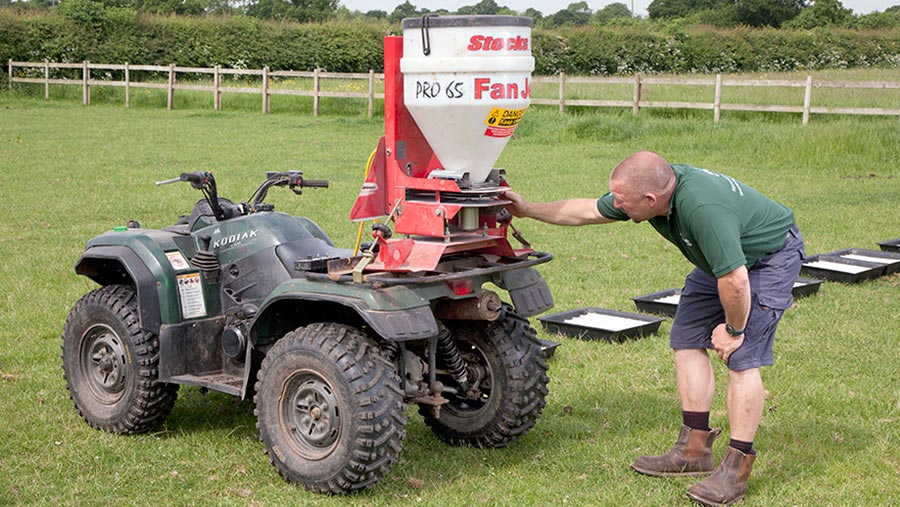
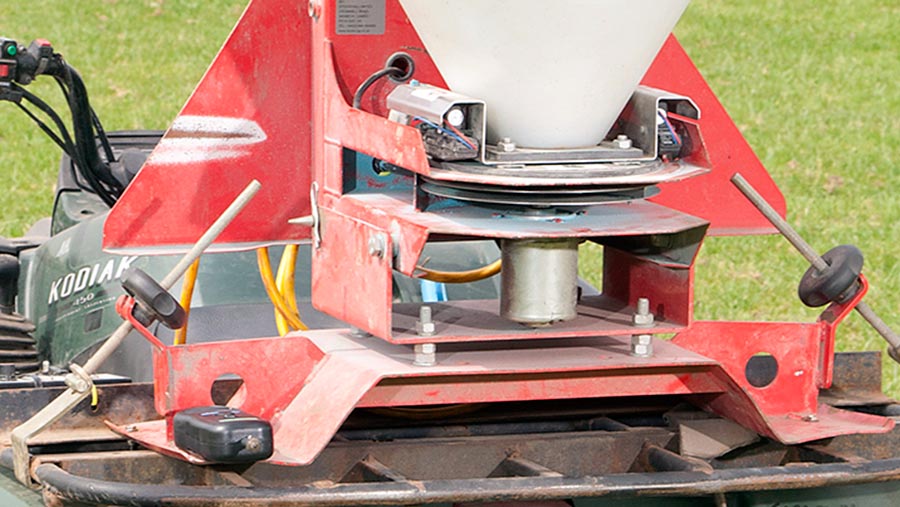
2. Ensure machine is mounted securely
© Jonathan Page
A slug pellet spreader mounted to a quad bike is the most common outfit on farm. Mr Foxall says the first job is to check that the spreader is mounted securely by making sure the brackets on either side are tight.
Before filling the machine for testing, ensure the hopper lid fastenings are capable of holding the lid on. While the lid is off, also check the agitator bar in the bottom of the hopper is intact.
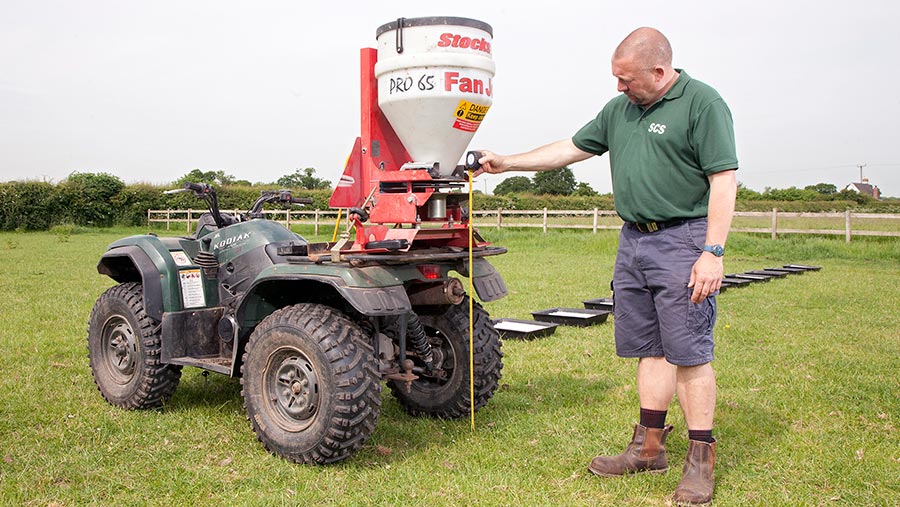
3. Measure ride height
© Jonathan Page
When assessing the ride height of the machine, bear in mind that the quad bike will likely lower once the operator is on board.
“It’s important to check the height with the operator on. If the machine does tip back then adjust the machine by tilting it to throw the pellets further and account for this,” says Mr Foxall.
4. Check spreader disc and vanes
© Jonathan Page
The most vital part of the machine is the disc and vanes. Check that the spreader disc is not warped and that the vanes are not bent or worn through if they are the older, plastic type.
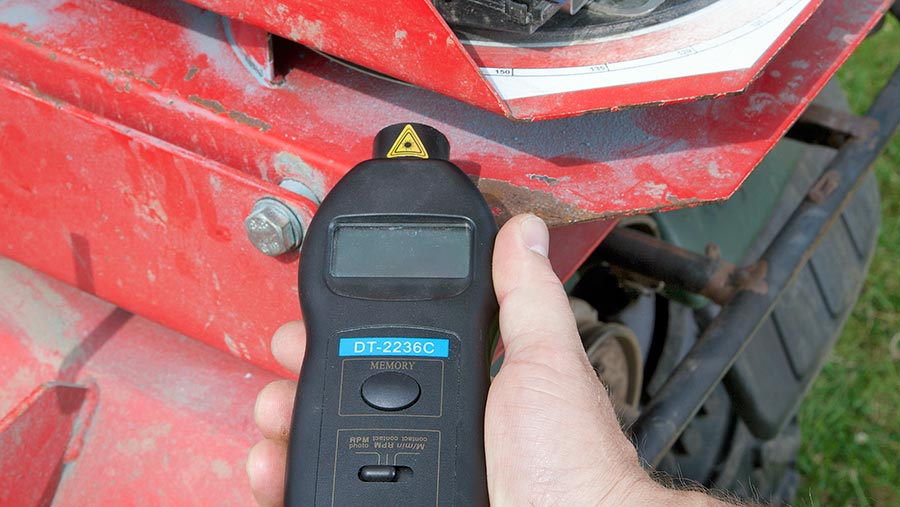
© Jonathan Page
Next start the quad bike, put the disc into gear and use a tachometer to check the disc speed. Target disc speed under no load should be about 3,000rpm.
5. Set spread rate and bias
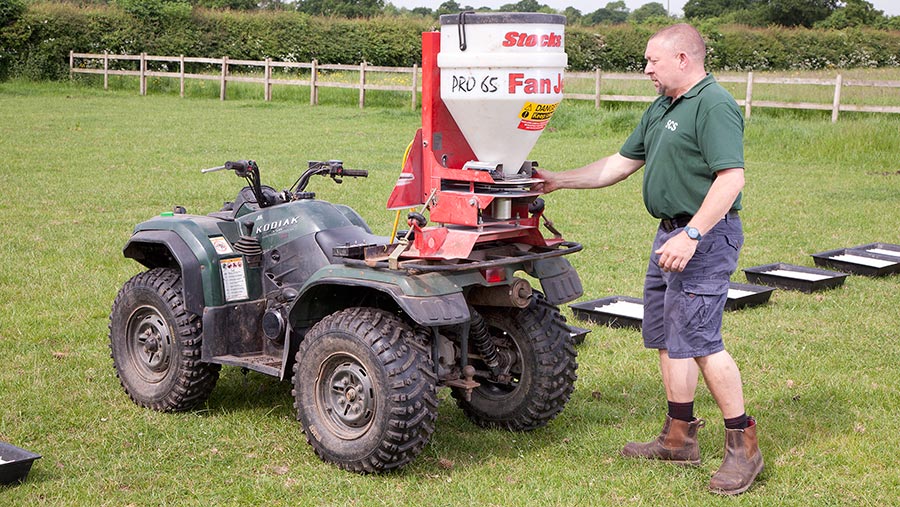
© Jonathan Page
Set the rate using the scale between the hopper and the spreader disc. Make sure you can slide the scale plate all the way backwards and forwards to get the correct rate.
“It is possible that broken pellets, mud and damp have built up and it may be that you need to clean this off using some WD40,” cautions Mr Foxall.
For the initial test run, set the spread bias at 90deg. The bias of the machine can be adjusted depending on the spread pattern thereafter, if required to get a more even spread from left to right.
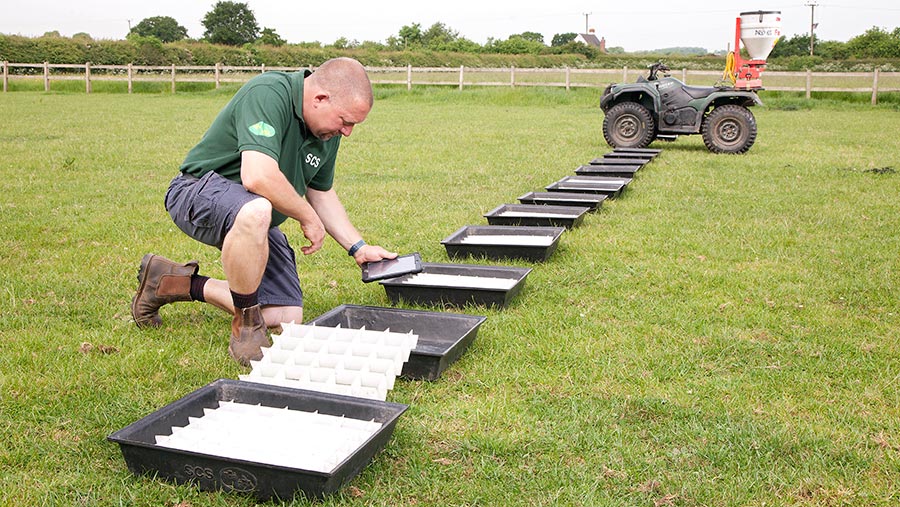
6. Spread pattern assessment
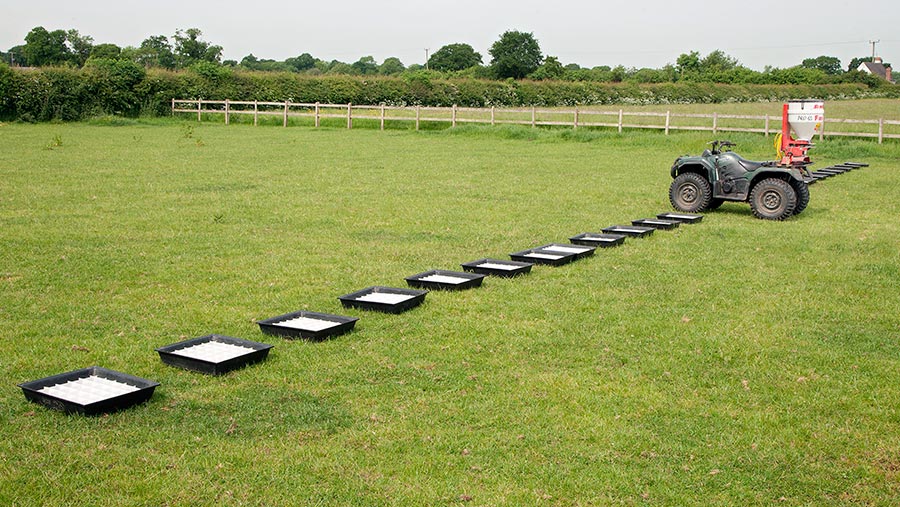
© Jonathan Page
Set the pellet trays out 6m either side of the quad bike to give a 12m total width. Make one pass through the centre, then count and record the number of pellets in each of the trays individually.
At the halfway point of counting each side, fold the pattern back on the inside to replicate driving the next tramline over.
This is because pellet numbers naturally tail off towards edges and by overlapping with the next pass in the field, an even covering should be achieved.
© Jonathan Page
This will be seen as roughly the same number of pellet being seen in each tray either side of the machine after accounting for this.
7. Adjust spreader bias
© Jonathan Page
Compare the pellet spread patterns on the left and right. The National Sprayer Testing Scheme (NSTS) standard allows for a 15% variation.
If the spread pattern is not within this then the bias of the machine will need to be adjusted towards the side with fewer pellets.
© Jonathan Page
Make another pass through the trays and repeat the spread pattern assessment until you have an even pattern left to right that is within the 15% leeway.
For more information on slug spreader testing and calibration, visit the SCS Spreader and Sprayer Testing website.
