Nutrient leaf tests: When, how and why to do them
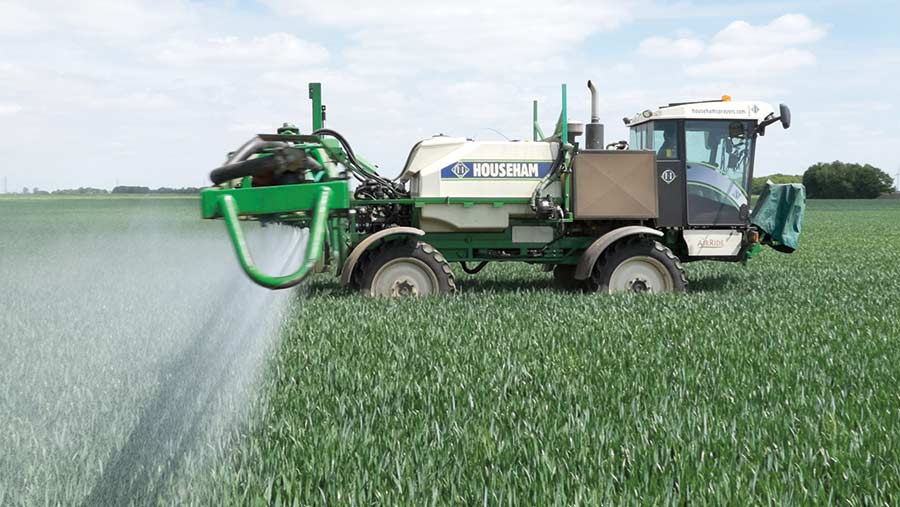
 © Tim Scrivener
 There are a number of micronutrients that are essential for crop growth. By testing plants for them early in a season, farmers can rectify any problems with foliar applications before they lead to any yield losses.
It might be the case that these elements are available in the ground (with soil tests suggesting adequate levels), but are not being taken up by the plant.
This could indicate an inhibiting factor, such as poor ground conditions impairing root uptake or elements being “locked up” and difficult for the plant to extract. In these situations, crops would benefit from foliar applications.
Simon Pogson, business manager at Yara, likens tissue testing to ag-sensors. “We’re using the plant as the ultimate sensor.”
See also: How to correct micronutrient deficiencies in arable crops
Effectively, its a tool to drive productivity rather than to rescue a crop in trouble, he says.
So what are the likely improvements in productivity by taking this proactive approach and correcting any problems with foliar nutrient applications?
Mr Pogson says there are a range of benefits. “They can range from preventing added costs to a crop, to achieving a typical increase in yield of one-third to half-a-tonne on wheat.”
When to tissue-test
Traditionally farmers have tissue-tested crops that are already starting to show problems to find out what’s going on, explains Mark Tucker, agronomy manager at Yara.
However, growers should be testing before any physical symptoms appear, advises Caroline Hobson, business development co-ordinator at Yara.
“Farmers should take samples to look for deficiencies before they become a problem. If symptoms appear, then you can’t rectify them before seeing a yield loss.”

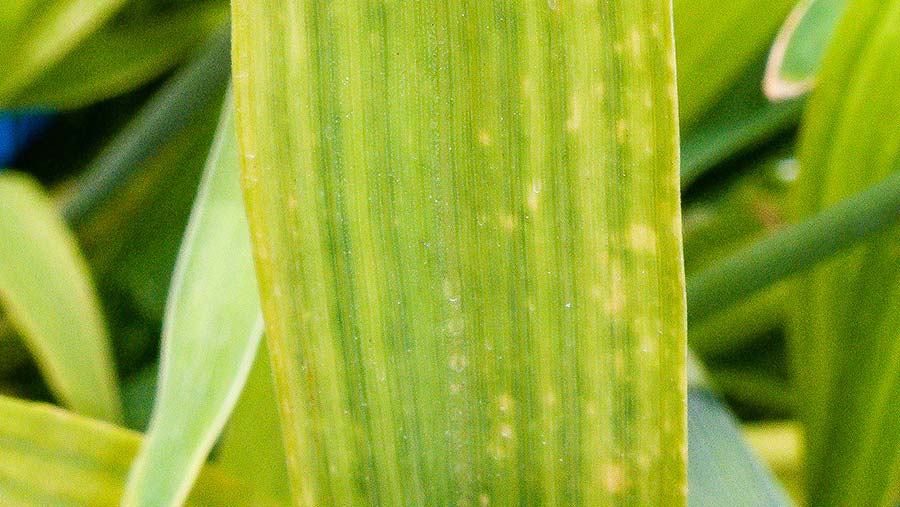
Wheat leaf showing magnesium deficiency © Blackthorn Arable
Understanding underlying deficiencies also means growers can benchmark against crops that might look okay and not just those with visible signs, explains Mr Tucker.
“Very often we don’t see the physical symptoms, but will notice that there is less biomass in the lab – which you won’t see in the field unless it’s next to a perfect field.”
Using soil analysis can give a broad-spectrum view and a good, wide indication of the issues across the farm, he adds.
“Soil testing can be used as a base and then tissue testing can follow and track this to see if the risks come through in the crop.”
Miss Hobson recommends soil testing once every three years and then leaf tissue testing every year to support this and see which nutrients are not entering the crop – something that could be down to conditions.
Is it worth testing?
However, there is the question of whether it’s worth testing tissue samples. Mr Tucker recommends that farmers assess whether they are prepared to take any measures if deficiencies do show up.
“If you’re not prepared to act, it will only have limited value.”
Miss Hobson points out that having the data can still be useful in terms of historical records and can be something that farmers could act on in the future.
“If you don’t want to use it as a diagnostic tool this season, use it for data collection.”
Grain testing
It’s already been identified that soil and tissue-testing analysis can go hand in hand to create a good management tool for farmers, but adding grain testing to the mix could make the holy trinity of crop management.
Though in the early stages of being investigated, Adas is in its third year of analysing grain testing as part of its YEN project.
Most nutrients from a crop end up in the grain, explains Roger Sylvester at Adas. “It gives a picture of how successful a crop was.”
Adas is welcoming participants to get involved with YEN. If you are interested and would like to send grain samples to the project, please find further information on the YEN website.
What nutrients to test for
A broad-spectrum analysis will include testing 12 nutrients:
- Nitrogen (N)
- Phosphorus (P)
- Potassium (K)
- Calcium (Ca)
- Magnesium (Mg)
- Sulphur (S)
- Boron (B)
- Copper (Cu)
- Iron (Fe)
- Manganese (Mn)
- Zinc (Zn)
- Molybdenum (Mo)
An advance package for grassland or maize silage would include all the above, plus iodine, cobalt and selenium.
A further heavy metal nutrient test will identify:
- Lead (Pb)
- Nickel (Ni)
- Arsenic (As)
- Cadmium (Cd)
- Chromium (Cr)
- Mercury (Hg)
- Copper (Cu)
- Zinc (Zn)
A heavy metals test could be particularly useful for vegetable growers or for those using organic inputs.
If farmers are unsure on what to test for, it’s advisable to contact a lab and get guidance on what is appropriate.
When to sample
Miss Hobson advises farmers to always go early with testing. “Don’t leave it too late because that’s when there is a reduced value.”
She suggests that growers first ask themselves a number of questions. “Have I done a soil test? Have I tissue-tested before? Which fields should I sample? Do I want a generic field or a problem one. How much detail am I looking to achieve?”
It’s also advisable to think about the next trip through the crop, says Mr Tucker. “Ideally you’ll want to sample so it gives you enough time to order product to put on the crop. So you’re probably looking at two weeks in advance of application timings.”
With oilseed rape there are two key times to tissue-test, he says. These are the end of October to early November as the crop goes into winter, then in February/March before step extension and big canopy growth.
Wheat and barley both fall under the same practice. It’s advisable to only tissue test early-drilled wheat before winter as there will be enough canopy to identify deficiencies.
“This should be tested in November and later-drilled wheat should be prioritised around March to enable you to respond to any results at the T1 timing,” explains Mr Tucker.
“Then test again at the flag leaf stage, as this contributes 75% of the yield.”
Growers will want to time their second test about two weeks in advance of the T2 fungicide.
It is more useful as a proactive tool, adds Mr Pogson. “The sooner you can do it from a foliar micronutrient point of view, the better.”
How to sample
Samples should be taken in a W-pattern across a field of up to 10ha, with about 25 samples taken at regular intervals, explains Miss Hobson.
“Take samples from three to five plants around you at each point, always selecting the newest fully emerged leaf. Avoid any cross-contamination, dry off excess moisture and put in a sample bag. Then pop this in the post.”
Growers could also take samples from the best fields in order to compare results.
Ideally take samples between Monday and Wednesday, says Mr Tucker. “It’s best not to do it on a Friday, as the samples will sit in the bag and sweat over the weekend.”
Mr Pogson also suggests looking at linking soil, tissue and grain testing, as farmers can use the information to make a more informed decision for the next season.
Tissue testing should be seen as an investment to improve the crop quality and yield, says Mr Tucker. “But growers need to invest the time to improve things, or it’s dead money.”
