Hired-in trencher offers cheaper way to improve drainage

After a series of waterlogged patches started appearing across his 450ha Northamptonshire farm, Bob Chapman quickly realised he had to tackle his drainage problem head on.
Not only did the mysterious wet areas make the task of cultivating his heavy Hanslope-series clay soils far more challenging, but they were also providing ideal conditions for blackgrass to take hold.
“Blackgrass absolutely loves these areas and it grows like a thick carpet right the way across them,” he says. “This then keeps the seed bank topped up and the problem has been gradually spreading out into the rest of the field.”
See also: Shelton launches cheaper trencher for DIY field drainage

Bob Chapman
With chemical controls next to useless on his soils, Mr Chapman has made a number of major changes to his cropping regime in a bid to get the weed under control.
This has included gradually increasing his spring planting area over the past five years, making use of stale seed-beds where he can and using rotational ploughing. He has also just started strip-drilling this spring with a McConnel Seedaerator.
But the heaviness of his soils and the fact the ageing land drainage system was starting to give up the ghost meant he was fighting a losing battle.
So in the winter of 2015 he decided he had to do something about it. The first task was to find out where all the existing drains ran.
Finding the drains
Luckily, there were a few maps of previous drainage projects that gave him a decent place to start.
Farm facts: South Lodge Farm, Barnwell, Northamptonshire
- Size: 450ha
- Soil type: Mainly Hanslope-series clay
- Cropping: Winter milling wheat, winter oilseed rape, winter oats, spring wheat, spring beans
- Tractors: John Deere 7930, 7530, 6210R, Claas Arion 420, Caterpillar D8 22A
- Cultivation kit: 6.6m and 4.6m Simba Xpress, Lemken seven-furrow plough, Kverneland six-furrow plough, Vaderstad Rexius Twin press, plus some homemade items
- Drills: 6m Lemken Solitaire, 3m McConnel Seedaerator
These showed the area had been drained fairly comprehensively in the 1900s, with a few upgrades in the 1960s and 1970s, the latest of which were with plastic pipe.
But he also managed to find a few outlets that didn’t correspond with the maps. To work out where these ran, he headed out to the field with a set of metal divining rods.
“I found out I could use them when I was playing around years ago with some mates and it’s surprisingly accurate,” he says. “Every time I crossed a drain the wires crossed and we would dig down and find it – it worked almost every time.”
Together, all this information gave him a pretty good idea of where all the drains ran, so he set about working out where he would need to install replacements.
Hired-in trenching machines
Rather than get a contractor in to do the job, he thought he would have a crack at it himself. “To be honest, I didn’t really consider getting anyone else in, as I wanted to investigate the problem myself and make sure I got it right.”
Although he already had a 360 digger, he thought this would be far too tedious for the amount of pipe he needed to install. So he went in search of a second-hand tractor-mounted trencher.
“This was a bit of a nightmare as they all seemed to have something wrong with them and I didn’t really know what I was looking for,” says Mr Chapman. “I also didn’t want to shell out the best part of £30,000 to buy a new one.”
Then, while visiting the Midlands Machinery Show at Newark, he came across Lincolnshire drainage equipment specialist Shelton.

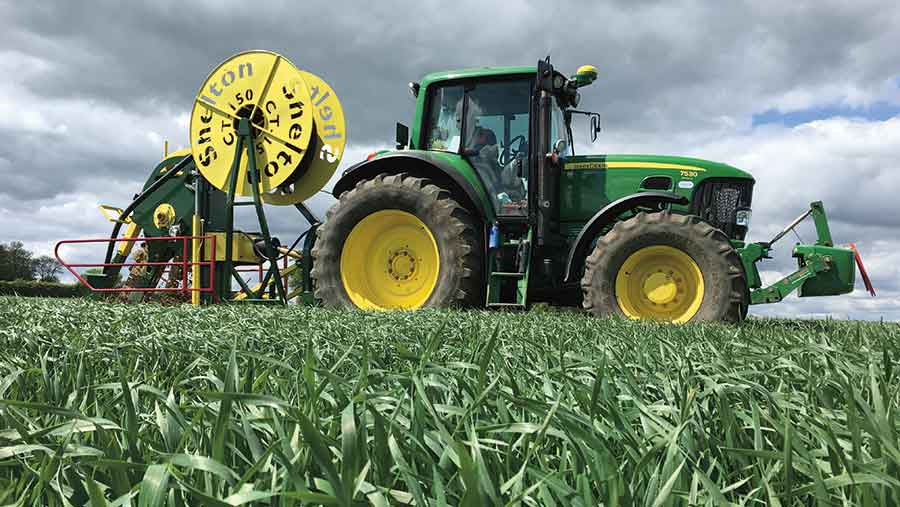
It was offering tractor-mounted chain trenching machines for hire at £350/day and all that was required to pull it was a 150-200hp tractor with stepless transmission or creeper box that could travel as slow as 0.3kph.
With all his John Deere tractors running Autopowr infinitely variable transmissions, he knew he would have a number of options for running it. So he decided to give it a shot and hired a Shelton CT150 chain trencher to arrive on the farm in April 2016.
Doing the work
The plan was to install the pipes into fields that had been planted with spring wheat. “We decided to go into the standing crop as soil conditions were ideal, we had a bit of slack time after drilling to do it and we thought the damage would be minimal.”
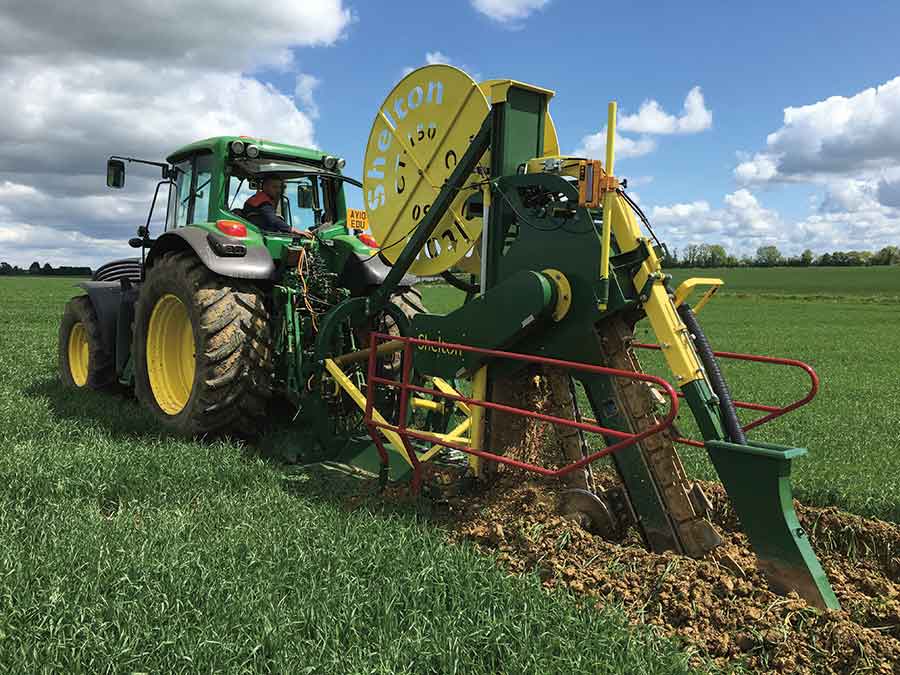
Patches in five fields were earmarked to tackle and with the CT150 hooked to the farm’s 180hp John Deere 7530, they began setting up its built-in laser levelling system and keying in the fall they wanted to put on the pipe.
“We thought this might be a bit tricky, so we paid a bit extra for one of Shelton’s guys to come out and point us in the right direction,” he says.

The first set-up job was to place the tripod-mounted laser in one corner of the field. This finds the levels and sends constant signals to the trencher, which then automatically adjusts its depth to keep a steady, consistent fall on the pipe.
Then, with the corresponding laser receiver set on the trencher, they were good to go.
“We had set out a series of canes across the field where we wanted the drains to run and then just steadily worked our way across the field,” says Mr Chapman.
The trencher turned out to be pretty easy to drive and the 7530 was able to run comfortably on the 540e pto setting. The laser levelling system also worked as it should and kept tweaking the depth without any input from the driver.
Shelton CT150
- What is it: Tractor-mounted chain trencher with integrated pipe dispenser
- Tractor needed to pull it: 150-200hp with CVT transmission or creeper box
- Max depth: 1.5m
- Grade control: Built-in laser system with automatic adjustment
- Purchase price: £34,900 including laser system (£29,950 without laser)
Hire prices
- £350/day for machine only
- £495/day with a tractor
- £695/day with a tractor and operator
- Wearing parts are on top of this and cost roughly £50/day
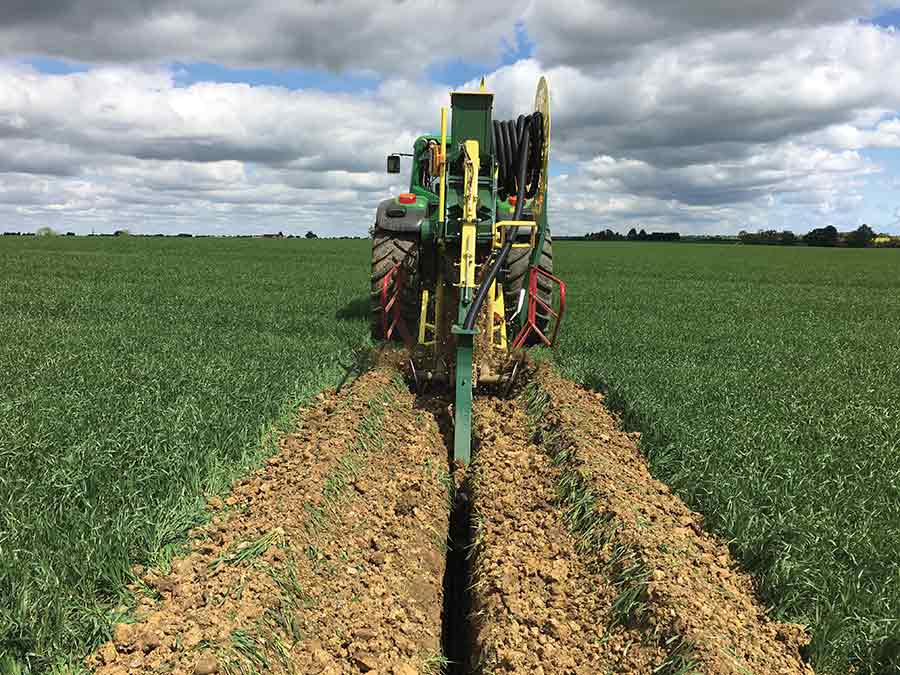
Meanwhile, the CT150’s pipe layer automatically reeled the pipe into the bottom of the trench and they only had to stop when they needed to join on a new roll using the snap-on quick connectors.
“I’m not sure how fast we were going, but we set a steady pace that the trencher seemed happy with and it was surprising how quickly we covered the ground,” says Mr Chapman.
Backfilling the trench
Once the pipe was laid, Mr Chapman hired a side-discharge gravel cart to backfill before filling the trench back in.
For this task, he relied on some slightly older technology – a Fordson Super Dexta and a 1950s Ferguson grader. With the grader set at an angle, he ran up both sides of the trench and steadily pushed the soil back in.
“It was ideal as it was light, narrow and meant we didn’t do any more damage to the crop,” he says. “After we finished we had only destroyed a 2.5m strip up the field and even that started to fill in as the crop tillered out.”
In total Mr Chapman laid 1,600m of pipe in two-and-a-half days and the total cost was £2.90/m including trencher hire, pipe, backfill, fuel and a charge for labour.
He shopped around for the best prices and at the time paid £74/100m for the pipe, and 18/t for the backfill, including delivery.
Next year he plans to repeat the process, but now that he knows what he’s doing, he will probably up the distance to 2,000m. “If I can carry on at that rate I should have sorted out most of the problem areas by 2019.”
He’s also considering getting some of the 1960s and 1970s drains jetted or inspected for damage as he’s convinced some of them are bunged up.
“If we can shift some of the blockages that will be a good bit cheaper than having to rip them out and start again.”
Mole draining is also an important job and he tries to do this every seven years at a depth of 54cm. However, he says it’s only worth doing if the conditions are just are right.
“You need to make sure it’s dry enough, but you still need some moisture there for it to pull through and do a decent job.”

