Gaspardo maize drill maintenance

Getting maize off to a flying start this season is going to be a tricky task given the wet, sticky soils and heavy compaction. Nick Fone gets some tips and tricks on setting up a precision drill
Richard Charman knows a thing or two about maize drills. For over 20 years he has been selling Gaspardo precision seeders to customers across the country through Glos-based Claas dealer Mill Engineers.
Viewed as straightforward, mechanically simple machines, he has sold over 500 of the Italian maker’s drills in the UK, most of which are still working, he believes.
With those sorts of numbers under his belt, we quizzed Mr Charman on how best to set up a seeder to cope in this year’s sticky, tricky conditions. While we’ve used a Gaspardo as an example, most points will be applicable to machines of all shapes and colours.
Most precision maize drills in the UK use conventional coulters with double-disc openers running ahead of them. However in the last four years there’s been a shift across to disc-coultered units capable of penetrating and maintaining an even seed depth more in uneven seedbeds.
“Disc drills now account for virtually all our new sales and that’s what I always advise,” explains Mr Charman.
“They’re more expensive to buy but with fewer wearing parts they’re cheaper to run. They’re also worth more second-hand so the depreciation doesn’t hit as hard.”
Here we concentrate on advice for setting up a coulter-type drill with double-disc openers.
1. Discs
Worn discs simply won’t rotate in wet, sticky soils. When the discs’ radius is diminished they have a tendency to stall and struggle to penetrate to the right depth.
As a guide, replace them when they’ve lost more than 25-35mm (1-1.5in) of their total 375mm diameter. Cost is £46 each
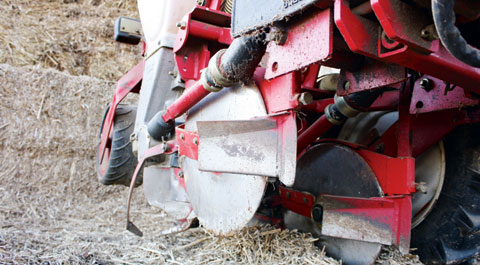
2. Bearings
Spin each disc and check for any that feel a bit gravelly. If you’re changing discs then it generally works out cheaper and quicker to fit the complete ready-made assembly.
Then it’s just a case of removing two bolts to change the mounting bracket, double-discs and bearings all in one hit. It’s £180 for each unit.
Time spent trying to evict seized, rusted bearings and pressing new ones back in their place is expensive.
3. Scrapers
In the wet, scrapers need to be in particularly tight against the discs. Straighten any bent mounting brackets and chuck any in the scrap-bin that have run out of adjustment on their slider slots.
Cost new is £10.87/scraper.
4. Coulter bottoms
Critical in keeping the drill slot open long enough for the seed to drop to its ideal depth before the seed coverers fill it in, the coulter bottoms need to be in good nick. Crucially, in the wet, they need to be sharp on the underside to avoid smearing.
Once they’ve lost more than 25mm (1in) of their depth replace them. Cost is £23.28 each.
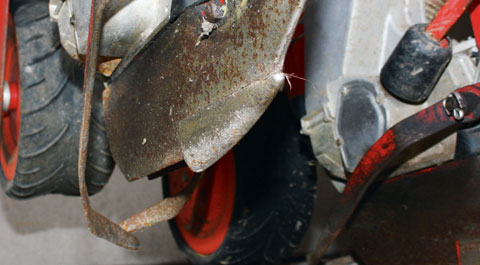
5. Seed discs
Swing open the vacuum units and check the seed-carrying discs for ridges and scoring. Set the fan going and run some seed through each unit.
If seed pick-up isn’t one-for-one then the vacuum isn’t as good as it should be. Replace the seals and see if that rights the problem.
If the discs are excessively ridged, change them too. Cost is £17.96 for the disc and £7.30 for the seal.
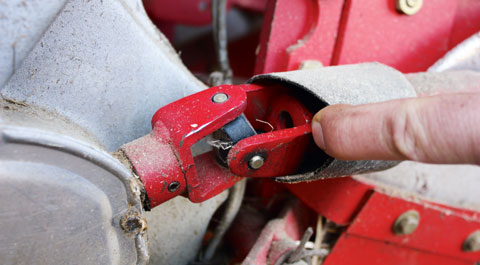
6. Driveshafts
Slop in the individual driveshafts that run off the main cross-shaft to the seeder units can cause irregularity in seed spacing. Simply grasp each shaft in turn and rotate backwards and forwards to check for slop.
Replacing the crosses and yokes in the joint that allows for the units to rise and fall is a simple enough job. Cost is £7.41 for each cross.
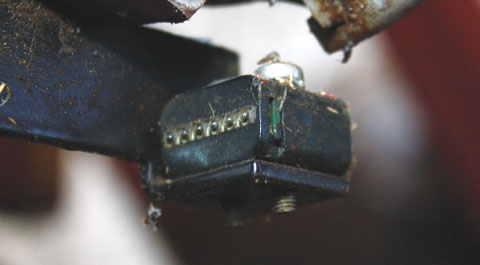
7. Blockage sensors
Gaspardo drills have a simple control box that effectively constitutes a blockage sensor system. Go around each unit and clear off the sensor eyes at the back out the coulter.
Then press the ‘Service’ button on the control box and wave a hand across each sensor to break the beam. You should be rewarded by a bleep to say it is working.
8. Clod-clearers
The clod-clearers that run ahead of the coulters and disc openers are responsible for keeping the path clear of debris. However in the wet they’re more likely to cause trouble than help. Lift them right out of work until they’re just scuffing the surface and can’t start bull-dozing.
That said, in the dry they can be very useful on exposed sites where erosion is an issue. By setting them to work slightly lower than the seedbed surface they create a channel to provide shelter for the young seedlings.
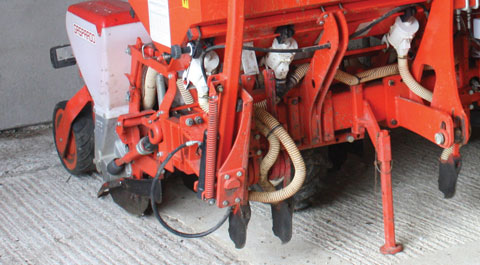
9. Seed-coverers
The sprung arms that follow the coulters to pull tilth back over the seed need to be free and working. In the wet they’re going to have to work even harder than usual.
They’re easy to adjust – the coil springs that put them under tension run in three different holes. Simply move them up one or if they’re worn out replace them. Cost is £31.43 each.

10. Track eradicators
In the wet, tines designed to pull out wheelings ahead of the seeder units can end up pulling wet, sticky clods back up to the surface.
A retro-fit option on later Gaspardo drills is a wavy disc running ahead of the seed-coverers. These won’t bring up lumps but open up the soil behind the wheels.
With a welder and some angle iron it’s possible to adapt the retro-fit units to work on older machines but they must be attached to the parallelogram linkage to ensure they follow contours accurately.
11. Depth/press wheels
Most UK-spec drills will be fitted with Farm-flex rubber press wheels which provide depth control and allow contour-following as well as firming the soil behind the coulters. Make sure the threaded adjusters are completely free.
As a general rule of thumb seed needs to go down into the moist layer of soil at least 25mm (1in). That means the actual depth will obviously vary depending on conditions but as a minimum seeds need to be in at least 50mm (2in) deep to keep out of the way of crafty crows and to ensure decent seed-to-soil contact.
However don’t go mad – the deeper they go in this year the colder the soil will be. This season the trick will be to keep drilling depth as shallow as possible especially as a lack of moisture is unlikely to be an issue.
12. Fertiliser coulters
Most precision drills will have some sort of fertiliser application system. Generally anything up to a 6-row unit will have a full-width box with individual metering units running on a ground-wheel driven cross-shaft.
For 8-rowers and bigger there are front-tanks with material blown by a fan to the individual seeder bodies.
Di-ammonium phosphate (DAP) is the most commonly used fertiliser and with this it is critical that it is placed just below the seed in the rooting zone.
However that presents a problem in the wet because the fertiliser outlets (which are much like a standard Suffolk coulter) have a tendency to bring wet sticky stuff to the surface. Bringing them up shallower to avoid this means that the young plants won’t be able to make the most of these valuable nutrients.
Critically it is this one element that is usually the main factor in stopping drills working in the wet. Disc coulters are an option but are often too expensive as a retro-fit option. (they cost £310 each)
13. Fertiliser metering
Individual fluted rubber rollers meter out fertiliser to each coulter. Enclosed in a plastic canister, these tend to suffer wear from the corrosive material and split around the base.
They can be flipped over to extend their life but will need changing once that has been done once. Cost is £14.59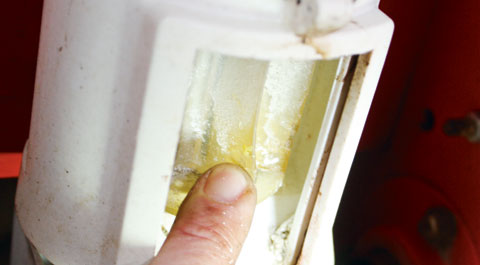
More workshop tips

