How to build the perfect livestock fence
Do it properly and a livestock fence can give as many as 20 years of trouble-free service. James Andrews spent the day with champion fencing contractor Mike Ford to see how it should be done.
Almost anyone can have a stab at putting up a livestock fence, but to do a proper, long-lasting job requires a sizable amount of skill and know-how.
Devon-based Mike Ford is one of the UK’s top fencing contractors and has a trophy cabinet brimming with awards from fencing competitions to prove it.
See also: Sheep crushes go head-to-head in on-farm test
Having been in the game for more than 25 years, he is in big demand and criss-crosses the country carrying out major fencing jobs. Who better, then, to show us how it is done.
Building it
1. Planning
Before you start, get a rough idea of where you are going to put in your straining posts, turning posts, gateways and any stiles. It is worth doing this before you place your fencing order so you don’t have to keep nipping back to the supplier.
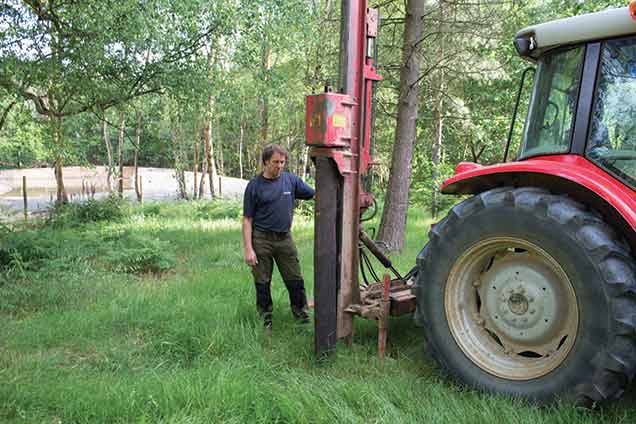
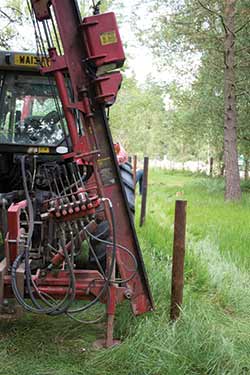
2. Straining posts
It is crucial to get a solid straining post at each end of the fence that won’t move when you crank up the tension on the wire. Use 8ft posts with a 6-7in diameter and drive them in with the post-knocker to the desired depth. For a decent cattle fence you will need about 45in of post sticking out of the ground.
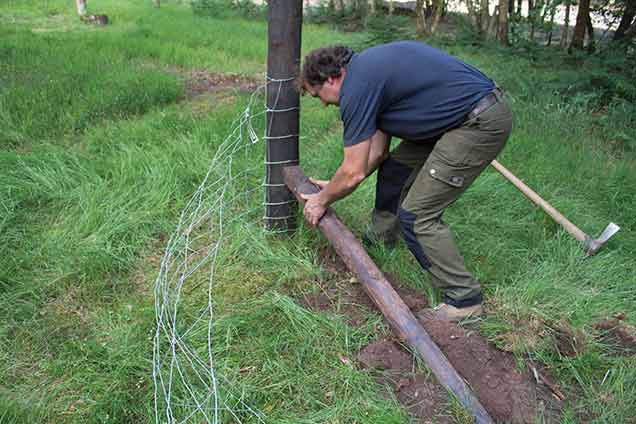
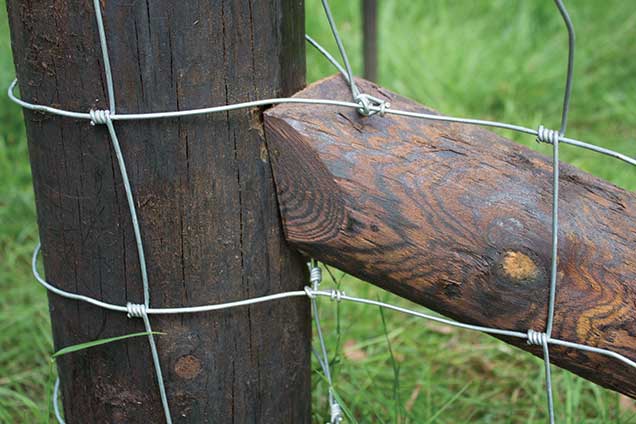
3. Struts
Cut a shallow notch in the strainer post about 18in off the ground. Don’t put this too high or it is likely to jack the post out of the ground rather than support it. It is also vital to ensure the notch is shallow; this keeps the post strong and doesn’t expose the untreated core of the timber.

Next dig a T-shaped trench about a foot deep for the strut to sit in and cut a length of rail to use as a bearer. This should be at least a foot in length or longer if ground conditions are soft.
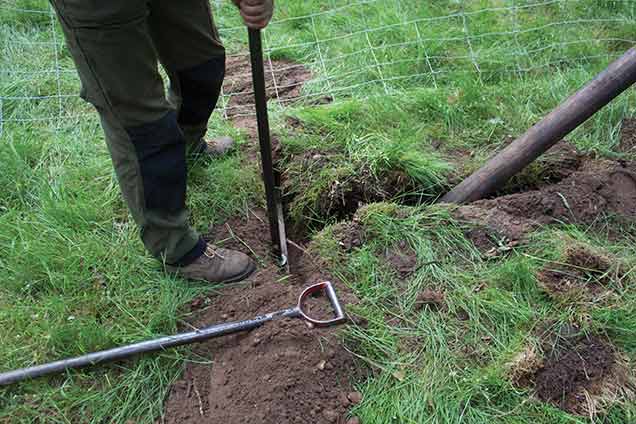
Then shape the end of the strut to correspond with the notch in the strainer. Wedge it in between the bearer and the strainer post – it should be a tight fit. A common mistake is to brace the strut against the first fence post, but this won’t last. Box struts can also be used, but they tend to not be as strong as a properly executed diagonal one.
4. Turning posts
You should use a turning post for every direction change – never attempt to make a turn on a standard post. Use the same technique as a strainer post, but you can get away with smaller 7ft posts with a 5-6in diameter.
5. Bottom strand
Once you have your strainers and turning posts in place, run a strand of plain wire between them about an inch off the ground. This gives you a line to work to for the rest of the posts and is also a cheap way of raising the fence height.
Space posts
6. Main posts
Post spacing varies according to the conditions and the type of wire used. For standard mild steel wire, posts should be no more than 11ft apart, but a good contractor using high-tensile wire could happily up this to 20ft.
However, 13ft is the most common spacing used. If you are fencing into a pronounced dip, use a 7-8ft post to stop it jacking out when the wire is tensioned. Line them up by eye and follow the ground contours to make it look natural.
7. Gate posts
Fences should never be strained off a gatepost as they will get pulled about over time. The correct technique is to put in a strainer post about 3ft away from the gatepost and fill the gap with rails.
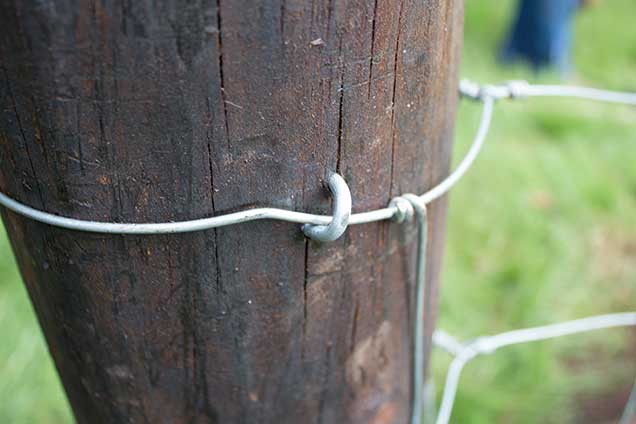
8. Wrapping netting
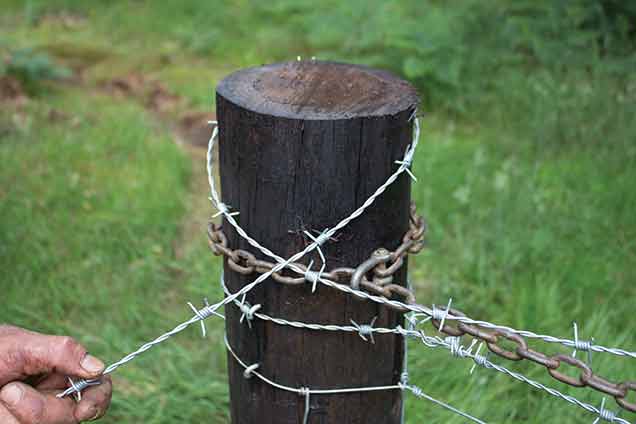
Always use high-tensile wire if you can afford it and start by wrapping this around the first staining post. Leave long tails on the wire and tie using a half hitch knot – this allows the wire to slide and tighten around the post as it is tensioned.
Also make sure the wire is positioned in the middle of the post and cut out the vertical strand next to the strut so that it can pull neatly into line.
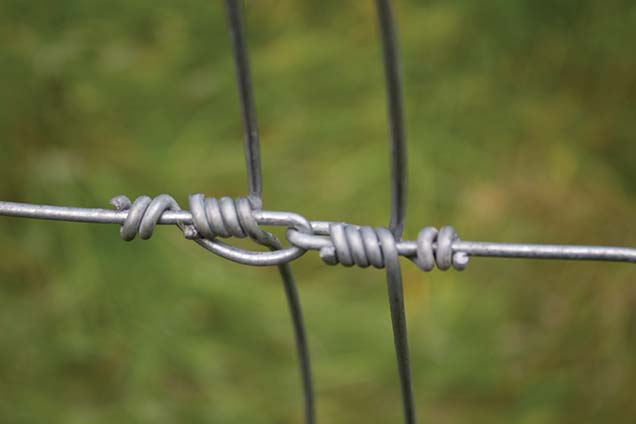
9. Joining netting
Tie a series of loops using half hitch knots down one of the pieces of wire to be joined. Then thread through the tails from the second piece of wire and tie off also using half hitch knots. The join should be neat and even and there shouldn’t be any kinks in the wire.
Tension netting
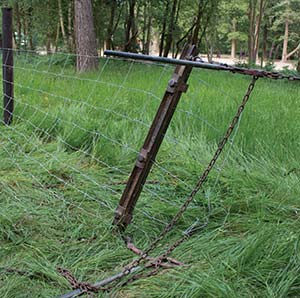
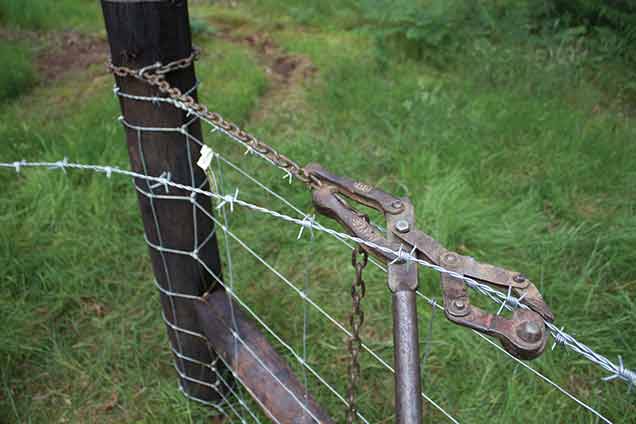
10. Tensioning netting
Only use ratchet clamps and chains to tension the wire as it is the only system that gives you the control to get accurate wire tension. For pulling in a 300ft run of fencing you will need to leave a gap of 6-9ft and for longer 1,300ft runs you will need to allow 23-26ft.
To get the correct tension, keep an eye on the kinks manufactured into the wire. When these have been pulled out by two-thirds the wire is at the correct tension. If it is pulled until the kinks disappear, the netting will lose its spring.
11. Staples
Secure the fence with barbed staples and make sure you don’t hammer them in far enough to crimp the wire. This will damage the galvanised coating on the wire and it could cause it to snap over time.
12. Barbed wire
Again, opt for high-tensile wire and run two strands for cattle fencing. You can get away with one for sheep if you are looking to cut costs. Position the first strand 2in above the stock netting as it stops cattle pushing their noses in the gap and flattening the netting. Then leave a 5in gap to the second strand.
Tension the wire using a monkey strainer chained around the post before tying off.
13. Stiles and wickets
Build or slot any pre-made stiles or hunting wickets between two straining posts and never tension wire off them directly.
Materials
Posts
The best posts are pressure-dipped creosote and they are still available in the UK. These will last at least 20 years and are well worth the extra money. If these aren’t an option, go for redwood tanalised timber.
Redwood is a lot harder than the cheaper softwoods and less susceptible to rot. Also make sure all timber that comes into contact with the ground is rated as HC4 or UC4.
Cheaper HC3 and UC3 timber should not come into ground contact.
Wire
Stock netting is available in standard mild steel or much tougher high-tensile wire. If your budget can stretch to it, always go for the high-tensile version as it is stronger, lasts longer and can be pulled tighter, meaning you need fewer posts.
Staples
Always go for barbed staples as they are a lot less likely to pull out of the posts and they don’t cost much more either.
Tools
- Post-knocker
- Spade
- Fencing tool
- Quality wire cutters
- Preservative
- Straining clamps
Creosote queries
Creosote is the undisputed king of timber treatments and many posts that were put in more than 30 years ago are still rock solid.
In 2003 retailers were banned from selling creosote and coal tar creosote to the general public, however it is still available to professional operators, which includes farmers.
It is also still permitted for industrial use, meaning fencing suppliers are still able to pressure-treat with creosote as they always have.
There are a number of companies pressure-treating posts with creosote in the UK, as well as imported Norwegian Octoposts.
UK creosote suppliers
Pressure-treated timber:
- Calders and Grandidge – Boston, Lincolnshire
- Batsford Timber – Warminster, Wiltshire
- HJ Webb and Son – Longcot, Oxfordshire
- Fence ’n’ Forget – Aberystwyth, Wales
Guideline prices:
- 8ft posts with 5-6in diameter – £12.50
- 5ft posts with 3-4in diameter
- – £3.15 to £3.50
- 7in square gateposts with pyramid top – £33
- 25 litres of creosote – £52
Ex-VAT prices from HJ Webb
The crew
With thanks to Mike Ford (right) his son Jordan (centre) and nephew David, who are based in Devon and specialise in all forms of agricultural fencing.