
4 areas to focus on when rearing broiler chicks
 © Cobb Europe
 Chick start has been proven time and again to be the most important element of broiler production.
Birds reaching at least target weight by seven days are more likely to end up healthy and productive for the rest of the crop.
Only with a faultless first few days will the best performance be achieved in later life.
Key to those early days is the proper management of feed, water, air quality, temperature and lighting, both when preparing the shed for birds to arrive, and throughout their first seven days and beyond.
See also: How to use data to get broiler chick start right
A chick should record a minimum of a 4.6-fold increase in bodyweight by the end of its first week, according to Nigel Strain of genetics specialist Cobb Europe.
That translates to a 42g chick achieving more than 193g. “The better your average daily weight gain, the lower your FCR,” he says.
But just as important is aiming for a uniform flock, and much of the advice he offers is about helping slower starters catch up with their faster-growing peers.
“Ninety percent of the chicks might be fine. It’s the other 5-10% that will give you a better performance and a more uniform flock if you help them along – they are not unviable chicks, they are just slower to get started and will catch up, with support.”
A chick that has got off to a good start will have consumed about 24ml of water and 12g of feed in the first 24 hours.
Once it begins to eat and drink, it no longer relies on nutrition from the yolk sac, kickstarting its development and growth. It will also start to develop its ability to thermoregulate and generate its own body heat.
Mr Strain breaks brooding in the first seven days down into four key areas for focus. Each needs to be “faultless” to achieve a healthy and efficient flock, which translates into good bird performance.
1. Air quality and temperature
While feed and water are both important, birds simply won’t be active and maximise consumption if the shed environment is not right.
Concrete should be at least 28C when chicks are placed, and the top of litter needs to be above 30C.
It is important not to rely on one set of thermometers, particularly those connected to computer systems, which can become uncalibrated over time.
Another key thing to keep an eye on is carbon dioxide levels, which should be kept below 3,000 parts per million (ppm) – ideally close to 2,000ppm.

© Cobb Europe
Decisions about how to adjust temperatures after birds have been placed should be driven by cloaca temperatures (see table). Mr Strain says at least 15 birds should be checked in different areas of the shed.
It is also important to be aware of where chicks are within the shed – a lot by the walls could indicate it is too warm, or that carbon dioxide levels are too high.
Body temperature at one day old |
|
| Body temperature (C) | Behaviour |
| 44+ | Death |
| 42-43 | Heavy panting – loud chirping |
| 41-42 | Beaks open – rapid panting |
| 40.6-41 | Walking – spread wings and legs |
| 40-40.6 | Normal – content chirping |
| 38.5-40 | Huddling – soft chirping/quiet |
| 37-38 | Large groups huddling – very quiet |
| 36 | Sleeping – very quiet |
| Source: Cobb | |
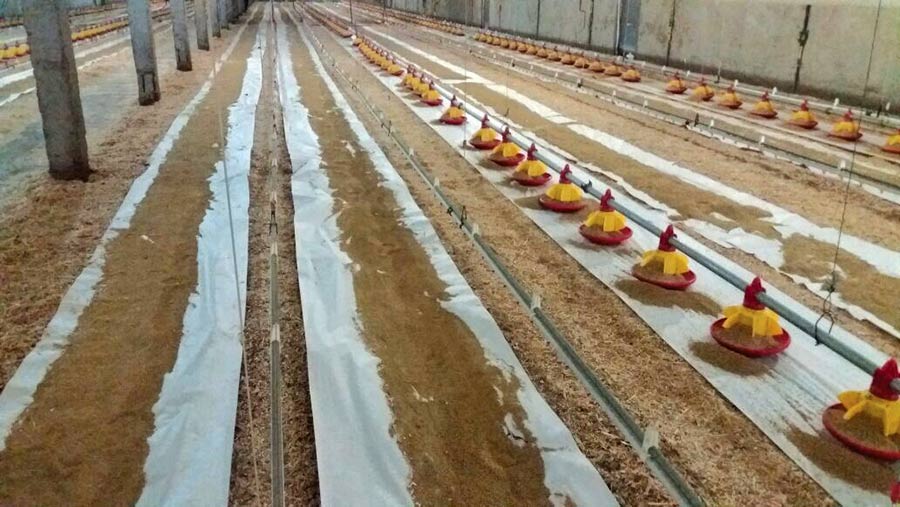
2. Feed
Cobb recommends that a minimum of 75g of feed a bird is placed on chick paper, which Mr Strain says should be placed either side of drinker lines where possible. “You want chicks to be able to go from feed to water and back again easily,” he explains.
In addition, chick feed on the papers should last for the first three days, so the paper needs to be strong enough to last too.
“A lot of farmers use a thinner tissue paper because it breaks down and disappears very quickly, making it easier to manage. While that’s easy when it comes to litter management, it’s not necessarily the best thing for the young chicks.”
Having feed easily accessible on chick paper beyond the first 24 hours, up to about 72 hours, helps the lower quartile of chicks access feed, aiding uniformity, he says.
The feeding system should be cleared of any finisher or withdrawal feed from the previous crop, and pans flooded with good-quality starter feed – all before the birds arrive on the farm.
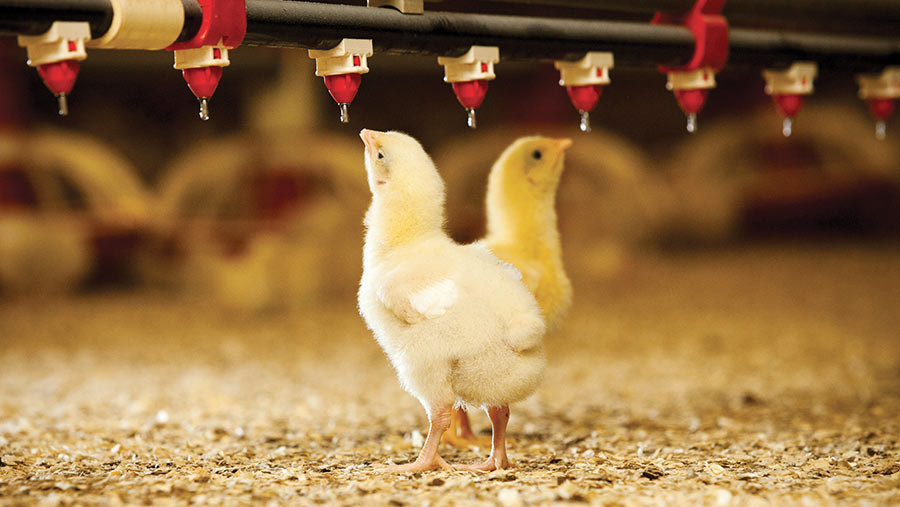
3. Water
Water consumption is perhaps the best indicator that a flock is performing well in its early days. Birds should be drinking on average 1ml an hour for the first 24 hours.
“You can’t know how much feed is being consumed on the floor, but if you’re achieving water consumption and the environment is right then birds will be eating. It’s water consumption that drives feed consumption,” Mr Strain says.
Ensuring birds have clean, potable water they can access is also crucial, he adds. It should be tested at source twice a year for chemical and bacterial content.
At turnaround, a terminal disinfection with a hydrogen peroxide product should be standard practice, and the more you can flush systems to keep water cool and fresh during the crop – particularly in the early days – the better.
© Cobb Europe
Farmers should aim to keep water temperatures below 25C where possible during brooding and below 20C thereafter. “If it’s not good enough for us to drink, then it isn’t good enough for the chicks,” he says.
Pressure being too high is a common problem he sees; weaker birds cannot activate nipples if the weight of water behind them is too high.
If they do manage it, then the water comes out so quickly most of it goes into the drip tray or on to the litter, says Mr Strain.
That can make consumption appear normal when in reality there is a lot of waste.
Mr Strain recommends testing water flow rates and aiming for about 40ml/nipple a minute in the first week.
4. Lighting
“You want it to be as bright as possible,” says Mr Strain. “But more important is uniformity of light distribution.”
Farmers should target at least 40 lux, with minimum 25 lux in the darkest parts of the brooding area, when birds are placed and gradually reduce the intensity after seven days.