
A step-by-step guide to cleaning your poultry shed
 © Tim Scrivener
 Cleaning sheds and equipment between flocks is critical to reduce the presence of viruses, bacteria and protozoa, which are all potentially pathogenic to incoming stock.
“The previous flock will have been exposed to micro-organisms that may have caused disease in more mature birds, which chicks or young birds will not tolerate so well,” says Helena Brewer, vet at Poultry Health Services.
If there has been a disease such as coccidiosis or viral challenges, specific disinfectants can be applied to reduce the risk of recurrence.
See also: Advice on cleaning free-range poultry sheds
In the case of notifiable diseases, special attention will be required for the muck out, cleaning and disinfection, according to Animal and Plant Health Agency (Apha) guidance.
One organism which may not cause disease in birds but is concerning for human health is salmonella.
“If a flock is positive for Salmonella enteritidis or Salmonella typhimurium, stringent cleaning and disinfection will be required to prevent recurrence,” says Miss Brewer.
Non-reportable types of salmonella, known as exotic salmonella, may also be present, particularly in broilers and turkeys.
“These exotic strains do not typically cause disease in birds or humans, but abattoirs prefer to slaughter these birds last to reduce cross-contamination. This might cause issues with the slaughter schedule.”
It is not just the shed environment that should be tackled between flocks. There are potential pathogens in water lines, such as pseudomonas, which can accumulate in biofilm. If water lines are not cleaned properly during turnaround this can be a large risk factor for mortality in young chicks.
Step-by-step guide to key target areas
1. Walls, floors, panels
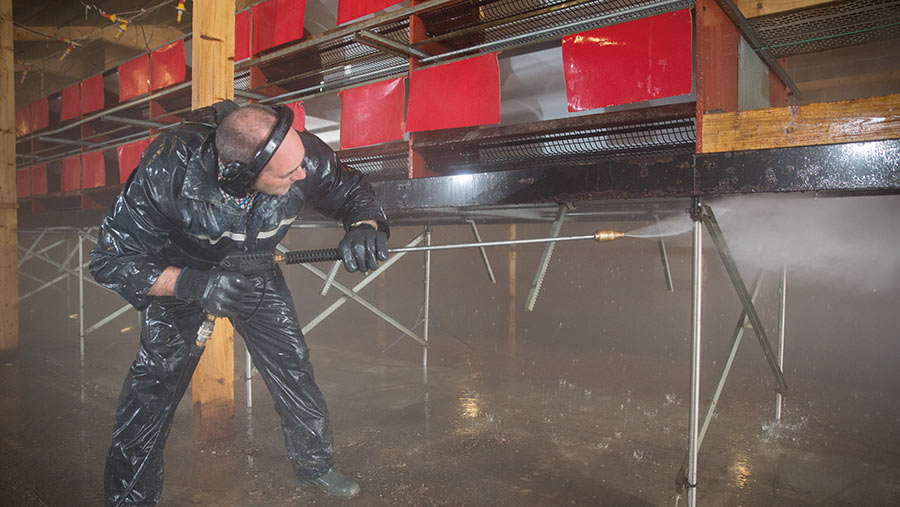
Blow down the walls and ceiling, then pile the litter in the centre of shed. Brush the floors and remove the muck. Next, foam the shed with detergent, working from the ceiling down the walls to the floor – a foaming lance which reaches the ceiling should be used.
After leaving for the correct contact time, wash using a spray lance from top to bottom. Allow to dry and remove excess water from the floor.
Once dry, apply the first disinfectant. Many accreditation schemes require at least one Defra-approved product to be used.
Choose a first disinfectant which has a quicker kill action to reduce the microbial load, then use a second disinfectant with a residual action. Insecticides should then be used for sites with litter beetle issues.
2. Feed equipment
Tip feeder pans with any leftover feed before raising the lines for muck-out. Ideally, remove the remaining feed from feeder lines – however this can be difficult at broiler sites with a short turnaround.
3. Drinking equipment
Drinkers must also be raised for muck out. Afterwards, prime the water lines with disinfectant – ideally one known to clear biofilm. This solution is often at a much higher concentration than used throughout the flock, so it must be drained before birds go back in.
© Tim Scrivener
4. Internal fittings
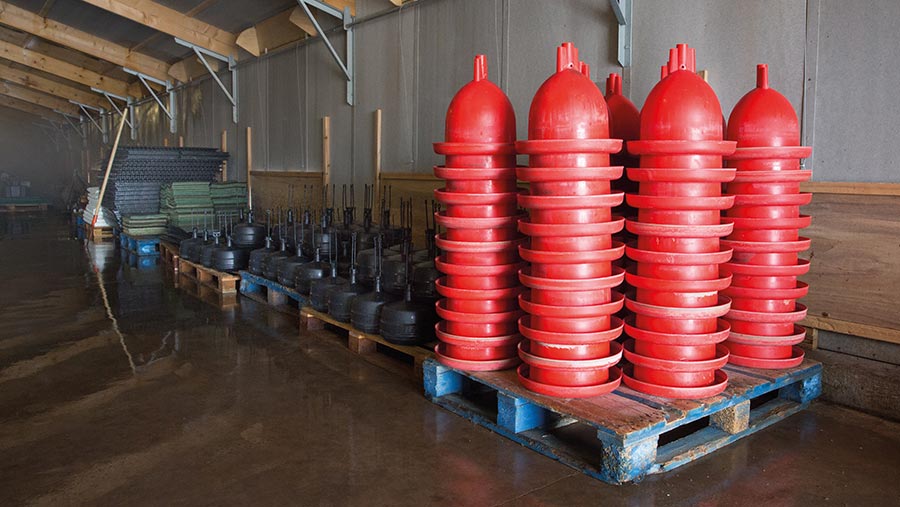
If possible, take removable equipment out of the shed to wash, or wash in the shed next to a drain. This prevents debris from the fittings contaminating a clean floor.
Nest boxes are not generally removable, so must be washed and disinfected in the shed. Flat-deck layer farms should deconstruct and wash the slats – some have slat washers, others will wash and disinfect slats individually.
5. Electrical fittings
Often these areas are treated with caution as water and electrics don’t mix, says Miss Brewer. “However, most electric points have covers, and the covers should be wiped down with disinfectant wipes. They should then be opened to check that there isn’t an accumulation of dirt under the covers.”
6. Ventilation
Blow down or wash fans into the shed and then disinfect them: Fans can collect dust which harbours pathogens such as salmonella.
7. Pests
Insecticides can be used for red mite control. One method is to spray the shed with an insecticide shortly after the birds have left the shed, when it still has some residual warmth and the mites are active.
8. Check the quality of the clean
This can be a visual inspection or swabbing of the shed to assess the clean. Some accreditation schemes require monitoring of turnaround hygiene – take swabs for laboratory analysis to assess what the microbial load is. If poorer results are obtained this can be flagged for improvement for the next flock.
Hygiene audits during mucking out and washing can also be performed by chemical companies, vets or a pharmaceutical company.
Common mistakes
- Not allowing enough time. Having an organised plan for turnaround is critical – without proper planning, corners will be cut, to the detriment of the next flock.
- Not being present. If employing contractors, it is recommended that someone is on site to monitor the work.
- Inadequately blowing down the shed. Not all contractors will routinely do this, so request it. If there is a lot of organic debris left in the shed before the detergent is used, it will bind to the debris and become difficult to remove.
- Poor mucking out or very wet litter from the last flock. This makes muck removal more challenging, leaving organic material behind. Washing and disinfection will reduce microbial load, but chemicals cannot fully penetrate significant amounts of organic material – a pre-soak of the floor will help the wash.
- Having the pressure on the wash too high, causing splashback. The splashback contains debris, which will dry on the walls and equipment, acting as potentially pathogenic organic material.
- Forgetting the control room. Dust can carry pathogens – which could contaminate the newly cleaned shed. Don’t forget about wellies: they need a good clean too.
- Not using recommended dilution rates or contact times for detergents or disinfectants, rendering them ineffective or wasting money.
- Letting the water pool outside. A lot of water is used during the washing process – plan where the wash water will flow to stop it pooling outside sheds and contaminating the range. Ensure drains are kept clear of debris.
Disinfectant application procedures
Disinfectant procedures depend on the product used, so follow manufacturer’s guidelines for maximum efficacy. “Speak to the vet or chemical company representative about which combination of products would be most beneficial depending on the history of the farm,” says Miss Brewer.
This may be a general broad-spectrum programme or a combination of products that target specific pathogens such as coccidial oocysts, for example.
Some disinfectants work better at warmer temperatures while others work regardless. Adequate application of detergent is critical, as disinfectants will be inactivated quickly by heavy organic debris: When applying detergent the foam should look like it has snowed.
Health and safety
It is important to know the safety procedures required for each product.
Most products have a safety data sheet which must be followed.
Some disinfectants such as formaldehyde are carcinogenic (cancer-causing) – so care is always required.
Diluting neat chemical products requires very careful handling.
Different chemical agents should not be mixed unless authorised and stated by the chemical manufacturer.
If products are used incorrectly, they may damage equipment or leave chemical residues in the shed which could have adverse effects on the birds. For example, leaving chemical in the water lines will taint the water, stopping the birds from drinking, with resulting mortality.
Use of these chemicals comes under legislation set out in the Biocidal Products Regulations.
Anyone who has a concern about a biocide should contact the Health and Safety Executive using the online form.