Advertiser content
How to optimise your diet feeder
You can have a significant effect on mix quality. With only minor adjustments, you can achieve great results from your diet feeder.
This will make your farm more efficient and, of course, the cows will show you the real results. Watch the video and read our top 10 recommendations below.
1. Attaching the wagon
Let’s take a look at how to attach the mixer wagon to the tractor. Position the mixer straight behind the tractor. Make sure the wagon is level to prevent feed moving to the lowest point of the mixer and accumulating there.
A level mixer wagon makes it easier for the feed to move through the mixing vessel and for the auger knives to cut a textured product and ensure better mixing.
2. Auger knives
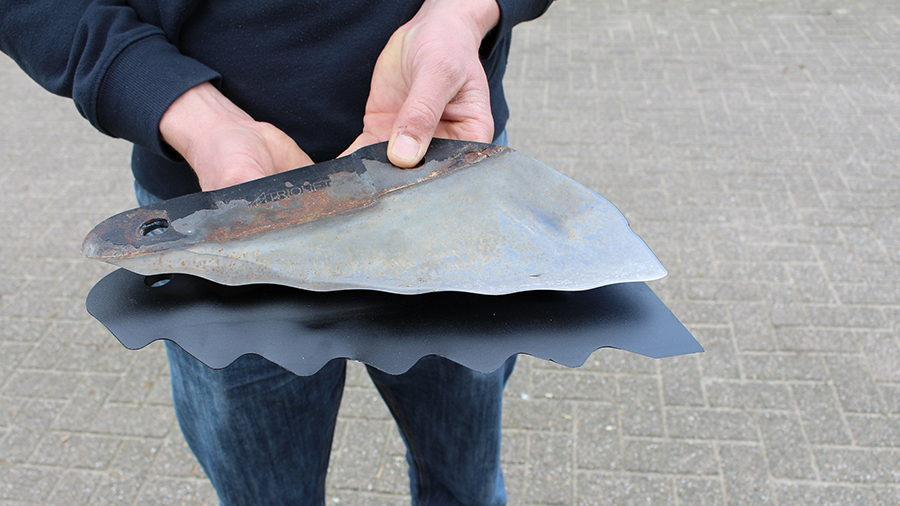
The auger knives need to be kept in good condition. Sharp knives ensure better cutting, better mixing and less power usage. This makes the diet feeder last longer and saves on fuel.
Regular checks on knife sharpness are recommended.
© Trioliet
Here’s a comparison of a new auger knife and a worn auger knife. The edges of the used knife are clearly blunt. This knife can no longer process the feed properly.
For the best mix, we recommend checking the auger knives on a regular basis.
What is the best knife position?
© Trioliet
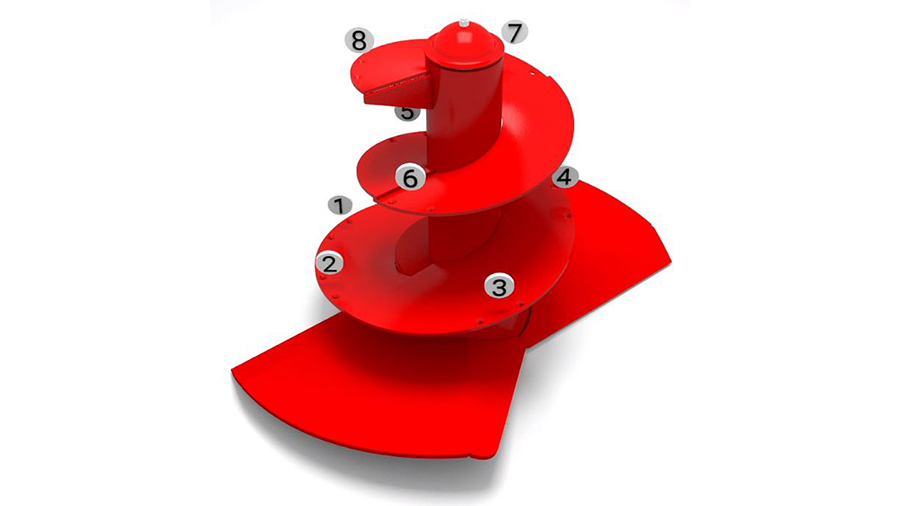
The knife positions on the auger are also important for a well-mixed ration. The position requirements for assembled auger knives depend on the ration and the mixer wagon model.
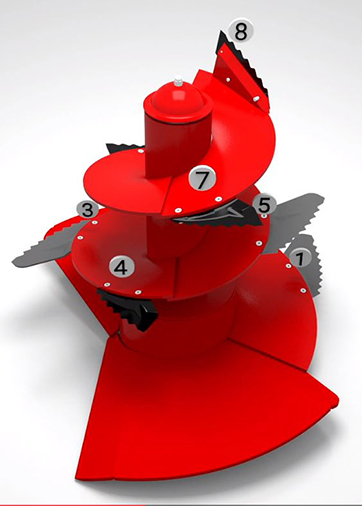
We assume a ration with short grass by default. In that case, short knives are installed at the following positions: 3, 4, 6, 7 und 8. The maximum number of knives that can be installed on each auger depends on the machine model.
Use one or more long knives if the ration consists of long materials such as grass from a loader wagon or round bales. In this case, always ensure a long knife is assembled right behind the auger wing.
Please note that long knives should never be positioned immediately above the auger wing.
A third long knife may be necessary for extremely long forage. In this case, the long knives should be distributed evenly around the auger: in positions 1, 3 and 5, for example.
Remember that extra auger knives will affect the tractor’s power consumption. A long knife will consume an average 3 to 5 horsepower more than a short knife.
When do you use counter knives?
For long feed such as hay or straw, we recommend using counter knives. Counter knives improve the cutting performance of the mixer. Remember this is only the case with long feed components.
Using counter knives for short, chopped feed could have a negative effect on the mixing result.
3. Silage extraction
© Trioliet
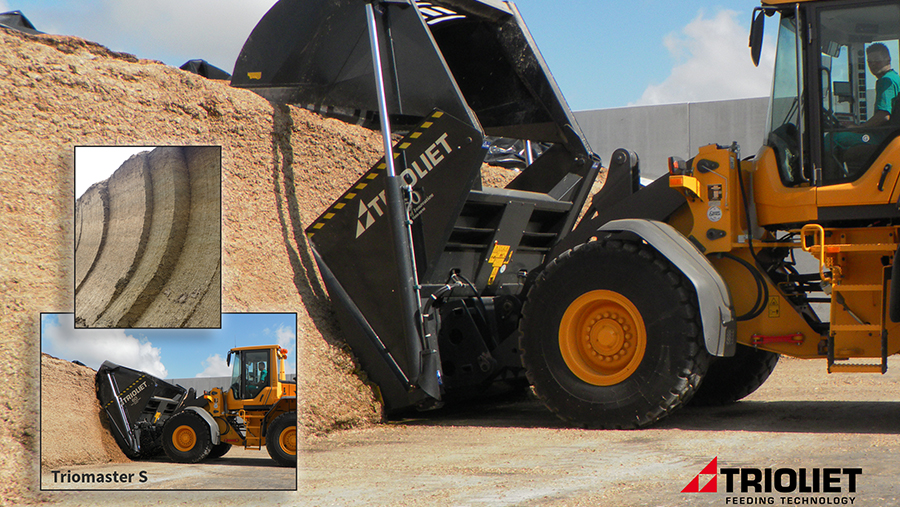
During loading, always try to position the mixer wagon as close as possible to the silo pit to reduce the driving distance from the loader and limit any feed loss due to spillage.
By using equipment with a cutting knife, you will not affect the feed structure. You will also leave the clamp behind with a clean, closed surface.
This prevents silage from heating up and retains the quality of the feed. Wind, rain and snow will also have less impact on the silage quality.
4. Loading order
© Trioliet
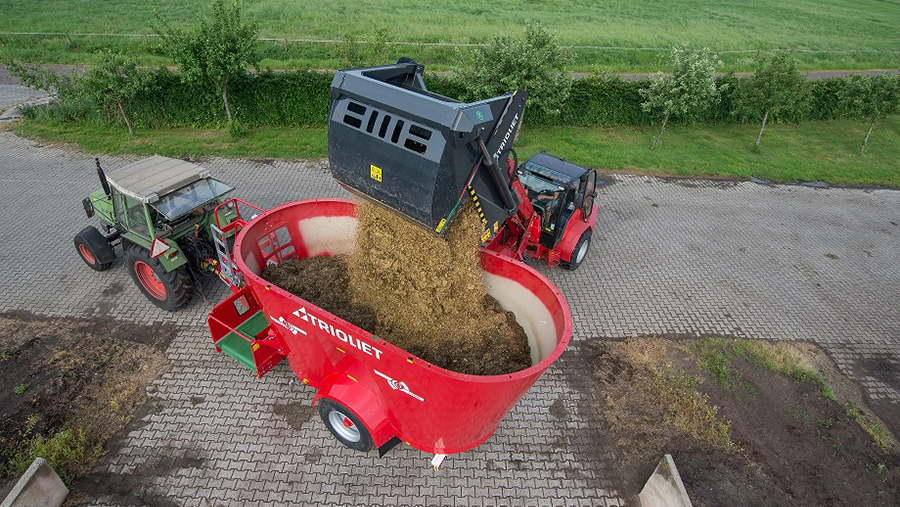
For a good mixing result, it is important to load the various feed components in a specific order. The video shows a sample ration, but the general rule is: ‘from long and dry to short and wet’.
So straw and hay first, followed by grass, cereals, minerals and proteins. Then wet by-products, like brewer’s grain or beet pulp, then corn silage and finally possibly water or other liquids.
Components that need more cutting, such as round or square bales, should be loaded first.
Make sure the feed is loaded in the centre of the mixer wagon between the augers. This guarantees rapid distribution. Creating a pre-mix in advance saves time, improves loading accuracy and allows the concentrates to be more evenly distributed among the other feed components.
5. Processing bales
© Trioliet
Processing bales requires a different approach. Long, fiber-rich feed is more difficult to process and mix. It is important to adjust the positions of the auger knives accordingly.
Shown here are the recommended knife positions for optimal processing of bales or other long, dry feed. Install long knives at positions 1, 3 and 5 so the bale will loosen up at the bottom of the mixing tub.
For extra cutting performance, a top knife can be placed at the top of the auger to create a vertical cut for faster processing. To improve bale processing even more, we also recommend using counter knives.
These knives provide counter pressure to create a better cutting result from the auger knives.
Remember that the use of counter knives will require about 5 horsepower more from the tractor. It is important to load bales right in-between 2 augers and to run the augers at high speed to process the bale more easily.
6. Maximum filling level
© Trioliet
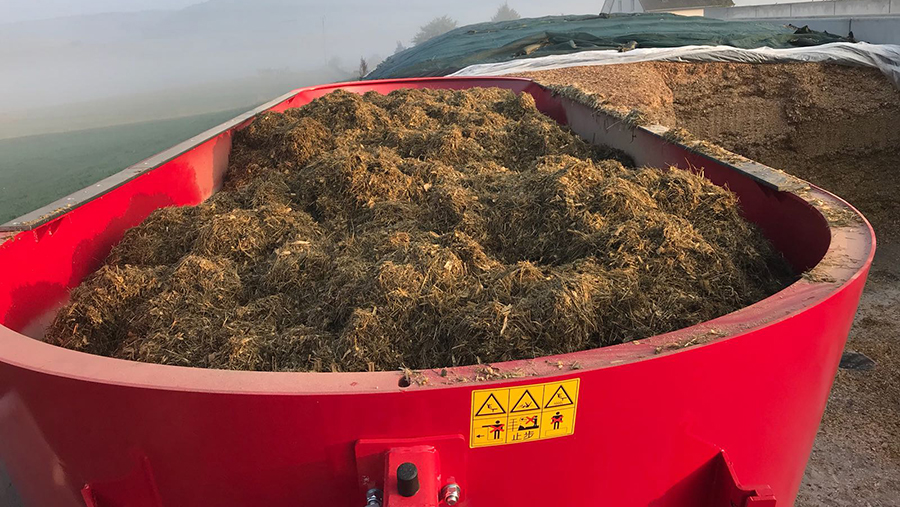
The diet feeder can be filled up to ten centimetres (or 4 inches) below the edge. Overloading the diet feeder has a negative impact on mixing time and mixing quality.
7. Auger speed
Proper management of the tractor’s power requirements and the mixer wagon’s auger speed will improve the mixing result and save fuel.
To achieve the best mixing results, the PTO speed should be at least 400 rpm with a 540 rpm drive line or 750 rpm for 1000 rpm drive lines.
To process and mix silage or other rough feed components, we advise a high auger speed of around 31 rpm, until the material has separated. To mix in the other components, you can reduce the rpm on the augers to around 23.
When using a reduction gearbox, it is important to load in high gear so the augers are running fast enough to process the feed. The feed loosens up easily at a higher auger speed.
If your tractor does not have enough power to handle the load, the reduction gearbox can be shifted back to a lower gear during loading. The reduction gearbox can only be shifted when the PTO is switched off.
A Shifttronic automatic reduction gearbox enables shifting while the PTO is running. The auger speed will automatically adjust based on a previously set loading weight.
8. Mixing time
© Trioliet
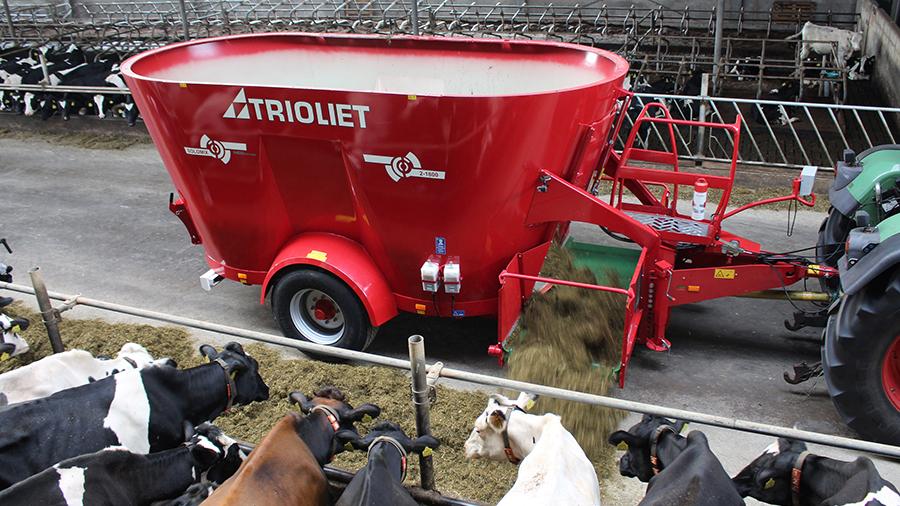
When all the components have been loaded, it is important to take enough time to mix before starting discharge. This sample ration requires final mixing for at least three and at most five minutes at 23 auger rpm.
With a manual reduction gearbox, shift to a lower gear to make it easier to start up.
9. Discharging
To ensure a consistent discharge the driving speed and the height of the discharge door should be closely controlled.
When the diet feeder is two-thirds empty, we recommend switching to a higher gear and increasing the engine rpm to maximum speed to completely empty the tub. With a Shifttronic gearbox, this will be controlled automatically.
10. Maintenance
To ensure optimal mixing performance and a long service life the TMR mixer should be maintained on a regular basis. This is what you can do:
- Check the oil level of the gearboxes regularly. Change the oil after the first 500 operating hours if using a drive line running at 540 rpm and after the first 200 hours if using a drive line running at 1,000 rpm. Please consult the user manual.
- Lubricate the augers’ glide bearings while the augers are turning. Eight strokes from the grease gun every twenty operating hours.
- Regularly grease the mixer feeder wagon’s PTO shaft. The interval depends on the type of mixer wagon and PTO. Please consult the manual for the appropriate intervals. Make sure the tractor is turned off.
- The accuracy of the weighing system should be checked regularly. If the weight on the indicator is no longer accurate, please contact your local dealer or distributor.
- Check the tire pressure regularly. The required pressure depends on the type of tire, the machine and the conditions at the farmyard. Please consult the user manual.
- For a smooth and even discharge, the discharge unit must be kept in good condition. Regular checks are recommended. Check the cross conveyor belt for misalignment or feed build-up underneath the belt every two weeks. The user manual shows instructions on the required tension and cleaning.
For more information on the use and maintenance of your TMR mixer feeder, please read the user manual or contact your Trioliet dealer.
Learn more
Provided by
The first Triomatic feeding robot started feeding in September 2006 at the dairy farm of the Petter family. That means the robot has provided more than 150,000 feed turns in the past 15 years. Henry Petter: “It has brought us more than we could have ever imagined.”
