
What are the three best DIY soil health tests?
 © Adobe Stock
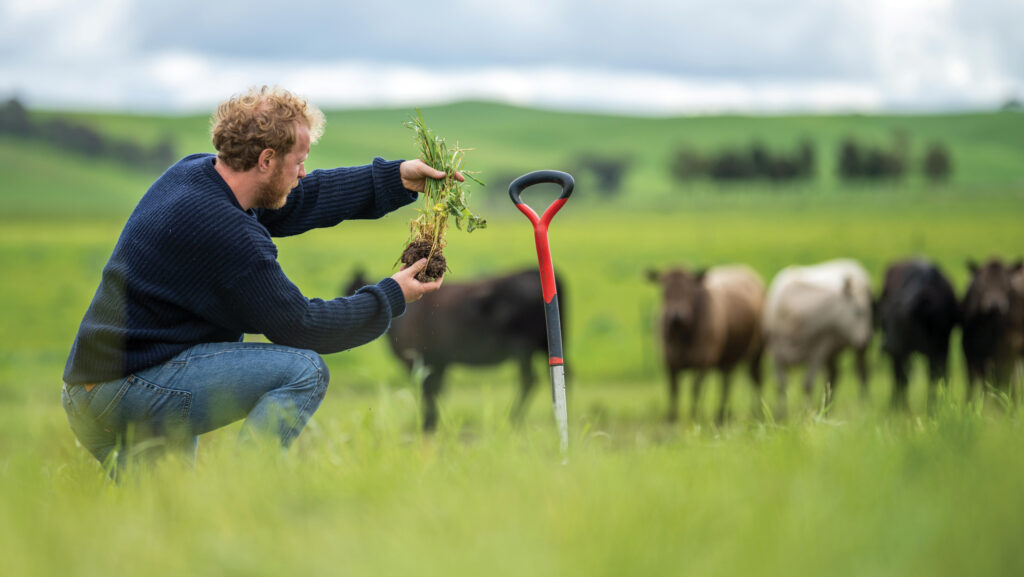
 Interest is growing around testing the ability of soil to harbour life above and below the sward, and its resilience to cope with weather extremes.
Some tests require laboratory analysis, while some are easy to do on farm. Farmers Weekly asked soil health adviser and farmer Abby Rose for her favourite soil health tests.
Abby developed the Soilmentor app, a knowledge exchange package with a built-in soil health log to compare fields and track soil health from year to year.
The app has a geo-positioning feature allowing changes in soil characteristics to be charted, and room for pictures to be added to illustrate the physical characteristics of the soil.
See also: Soil test launched to help farmers monitor carbon capture
1 Rooting depth
Abby says rooting depth is possibly the best and most simple test to assess how a farming system is interacting with the soil.
Roots need to pass through soil unimpeded, extending their reach as far and as wide a possible, to ensure that soil is full of life.
Why Roots feed soil biology, so anything which limits rooting depth can limit soil health. Measuring rooting depth can identify issues such as compaction/hard pans, salinity, sodicity (high presence of sodium ions), nutrient deficiencies, toxicities, low oxygen levels or fluctuating water tables.
How
- Dig a section of soil (about 20cm deep, more if necessary)
- Estimate the depth at which 80% of plant roots are concentrated in the soil (this rules out the odd longer roots)
- Record this and contrast year to year and field to field. Generally speaking, the deeper the roots go, the better.
Record Take photos and log them. Measure the depth at which 80% of the plant’s roots reach into the soil in cm.
Equipment Spade and ruler/measuring tape.

© Adobe Stock
2 Rhizosheath survey
Second is a rhizosheath assessment. This is where soil particles coat/cling to plant roots, making roots look brown instead of white, because biotic glues bind soil particles to the root structure.
Why Rhizosheath development helps plants cope with water, nitrogen and phosphorus deficiencies, and soil acidity. Exudates and lifeforms around the roots that form the rhizosheath can buffer plants up to two pH units. Note that brassicas, allium and asparagus families do not form rhizosheaths.
How
- Select a sample site. Using GPS to map your sampling allows year-on-year comparisons
- Dig out a section no wider than a spade (20x20cm)
- Break soil away and lightly shake to allow loose soil to fall away
- Observe for light soil attached around the roots
Record There are three scores: 2 = all roots are fully coated; 1 = some roots are partially coated; and 0 = no roots are coated and appear white.
Equipment Spade and possibly gloves.
3 Infiltration rate
Rain should be retained in the soil profile, not running off into watercourses. Water infiltration tells you how well the farm is soaking up rain.
Why A quick infiltration indicates topsoil structure is good, with stable aggregates, allowing water to percolate into the soil profile.
Slow infiltration may mean topsoil aggregates are unstable and compact, blocking water from percolating downwards. This means water leaves the farm, taking topsoil and nutrients with it.
How
- Locate a site. Remove all vegetation and other matter. Cut grass with scissors or a knife to leave a bare-ish looking soil.
- Insert a cylindrical tube into the ground to a depth of 75mm.
- Gently firm the soil on the inside of the tube.
- Pour 450ml of water (corresponds to 25mm/1in of rain) and start a timer.
- Observe, and stop timer when all water has disappeared into the ground and the surface is just glistening. Record the time to the nearest half minute and record it as the “first inch”.
- Repeat steps 4 and 5. Record the time as “second inch”. This is the better indication of your soil’s infiltration rate.
Record The time it takes for 25mm (height) of water to infiltrate the soil. Record two separate pours.
Equipment 150mm long tube with 75mm marked; stopwatch; wood block and mallet to help knock pipe into soil.
More soil health tests
Easy to do at home
- Slake tests Place fist-sized soil clods in glasses of water and compare how they break apart over time to assess how well the biological glues (such as glomalin) are holding the soil together. Healthy soils have good organic matter content and are full of glue-secreting micro-organisms.
- Percentage of bare earth An assessment of a soil’s exposure to sun, wind and rain and therefore drought and erosion. This estimates how much soil is covered by root mass, not just covered by a canopy.
- Worm count Inspecting a 20x20x20cm sod of soil for worms. This is done in a field that has been exposed to no sudden changes in environment, such as heavy rain, drought, or a recent application of manure/compost.
- Soil insect score Dig a 20cm square of soil and assess it for insect pests (wireworm, leatherjacket, root weevil, and so on). This requires a trained eye.
- Legume nodulation Counting the swollen rounded lumps on washed legume roots indicate how much atmospheric nitrogen is being fixed by pasture. Nodules form when symbiosis happens in the root zone with nitrogen-fixing rhizobia. Clovers, vetches, peas and so on should be assessed.
More specialist
- Carbon stocks A laboratory analysis of soil organic carbon as measured in the top 30cm of the soil and recorded in g/cu cm.
- Brix barometer A comparison of plant sugars present in productive species and weeds. This is measured by light refracting through dissolved solids and sugars by using a Brix refractometer, bought online for about £25-£50. If weeds have higher Brix readings than your “desirable” plants, this indicates that soil needs some support.
Testing advice
What fields should be monitored?
- Enough fields to account for the different soil types and farming methods, to understand the soil’s variability.
- For example, a farm might have rotational grazing, set stocked pasture, min-till arable and ploughed arable: it makes sense to test all these areas.
- If the farm has heavy clay, a free draining area and a sandy area, test all of these and compare.
When can I do the Soilmentor tests? |
|||||
| Best | Good | ||||
| General observations, photos and notes | Weekly | Monthly | |||
| Soil pit tests | Monthly* | Twice a year | |||
| Soil lab tests | Yearly** | Every two years | |||
| Basal ground cover transect | Monthly | Twice a year | |||
| Biodiversity monitoring | Quarterly | Twice a year | |||
| Grazing tests (sward, plate meter, dung quality) | Weekly | Fortnightly | |||
| Brix testing | Monthly | Twice a year | |||
| *Only in the months where it is possible to dig holes **Best done in spring or autumn | |||||