Getting more from clamped silage

When it comes to producing top-quality clamped silage, location, location, location is just as important as top-notch management, reports Debbie James.
With variants ranging from the growing season to clamp preparation and management, silage can be a challenging crop, but making the time and effort to get it right will benefit cow rumen health and lead to improved feed intakes and productivity.
Chris Duller, DairyCo extension officer, cites good-quality silage as an important factor in feed conversion efficiency.
“By improving quality so as to yield 1.3 litres/kg DM instead of 1.2 litres/kg DM, the milk production of an 8,000-litre cow can be increased by 8.5% – or the amount of feed needed to support this yield can be reduced by more than 1kg DM a day. It’s all about attention to detail, from start to finish,” he says.
Storing and managing silage correctly is key. Silage quality is often compromised by aerobic spoilage and mould, but with foresight and management, this damage can easily be avoided.
From selecting the right site for a clamp and the materials used to cover it, through to feeding the silage correctly, there are many factors farmers should take into account.
Siting a clamp
The most important consideration when siting a clamp should be access – both for ease and speed when filling and feeding silage out:
• Ideally the clamp should be under cover to protect the exposed face from weather and to prevent rain from pooling on top. This will also mean less water will enter the slurry store.
• All water falling on an outside pit is classed as dirty water and needs to be collected.
• One of the downsides of an indoor clamp is the sides are frequently poorly rolled, as the eaves of the shed prevent the tractor getting tight to the edges.
• One cheap option for expanding silage storage is a field clamp, which has no form of wall or construction.
• The Environment Agency rules require it to be at least 10m away from any watercourse or land drain, and it is best to avoid siting it near a hedge line, as this tends to attract vermin.
• The EA should be notified of plans for a field clamp no later than two weeks before it is used.
Preventing the clamp from heating
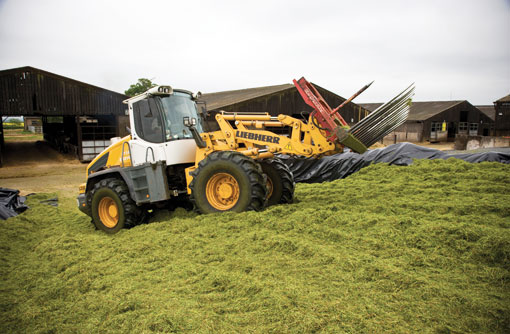
Taking the time to compact silage as it comes in will keep air out and prevent it from heating. Rolling a 9in wedge each time is the ideal, says Mr Duller.
“The man on the clamp must not be rushed. The contractors may want to get to the next job, but if it means paying them extra to slow down the loads, or paying to have another tractor on the clamp then it is a sound investment.”
Depending on the size of the clamp, there should be at least two tractors rolling, each fitted with narrow wheels, he says. And by rolling in the shape of a saucer, it will keep the edges firm and prevent them from heating.
Chop length is also important and the dry matter content of silage should dictate the length. When silage is wet and cut short, it will compact too tightly and when dry and too long it will be difficult to consolidate. Mr Duller recommends cutting grass with a 25-27% dry matter content at 1in, and longer if it is wetter.
Preventing spoilage
Additives are cost-effective when silage quality and clamp management are good. Research shows that returns on investment are about £5 for every £1 spent on an effective additive.
Producing high-quality silage relies on encouraging a healthy population of beneficial bacteria – predominantly lactic acid bacteria – to multiply and use up oxygen in the clamp to transform grass sugars into lactic acid.
Bad bacteria such as coliforms and clostridia will disrupt the fermentation, raising the pH and reducing the nutritional quality and intake potential of silage.
Inoculants are designed to help dominate the fermentation with the beneficial bacteria and to drive down the pH. Inoculants will help to prevent bad bacteria multiplying, thereby reducing butyric and acetic acid production.
“When silage is wet and contaminated with soil, then an inoculant is unlikely to improve fermentation, but using an acid will stabilise the silage and at least make it edible,” says Mr Duller.
Covering the clamp
He also says speed is the most important factor when it comes to covering the clamp, which should ideally be done immediately.
“If the contractor finishes at 11pm don’t leave it until the morning, do it straight away. The sooner the oxygen is out of the system the sooner the clamp will stabilise.”
He favours keeping the clamp airtight with a layer of clingfilm topped with silage wrap. “I’m a big fan of clingfilm. All the air is drawn out by the bugs pickling the silage, and as they do their work the film gets tighter.”
Alternatively, two layers of silage wrap weighted down with sand bags can be used.
Key considerations for feeding silage
Silage should be analysed for the first time within six weeks when the clamp is stable, and samples taken monthly thereafter.
“Don’t create a big clamp face. If it takes more than four days to use a face, consideration should be given to splitting it in two. And keep the shear grab sharp and the clamp face as tight as possible.”
Troughs should be easy to clean and there are alternative feed surfaces such as stainless steel which have proved to be effective.
