
Guide to understanding a beef killing-out sheet
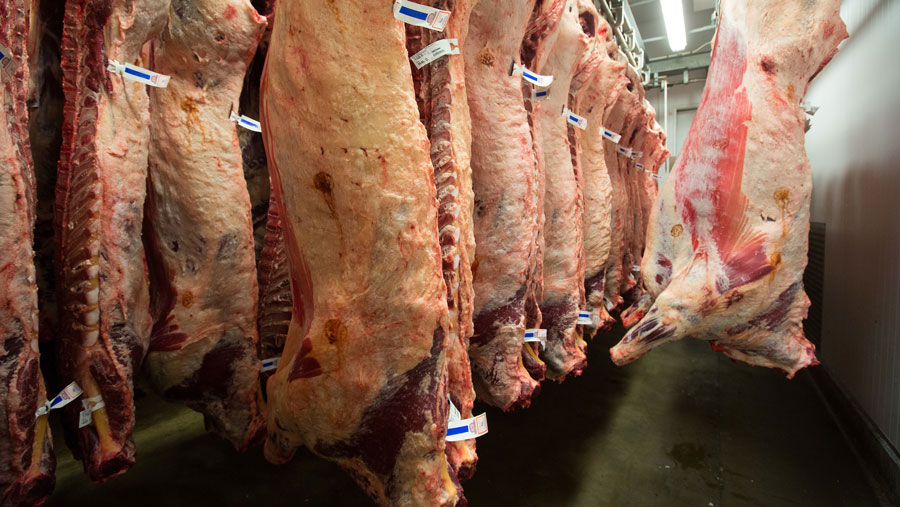 © Tim Scrivener
 Taking the information from the kill sheet, and using some basic sums, can reveal a heap of information about production and efficiency.
All too often cattle are sent to slaughter either light or too fit, with almost half (49%) of all prime beef animals processed in 2019 failing to meet market specifications.
Producing overfat cattle costs farmers far more in feeding than any financial gain. In fact, it takes roughly four times the amount of energy for an animal to put on a kilogram of fat compared to a kilogram of lean muscle.
See also: 4 key pointers from a beef grazing trial
In this article, vet and integrated dairy beef producer/finisher Rob Drysdale from StraightLine Beef explains how to pick out and understand the key bits of information on a kill sheet.
1. Understand what the processor wants
Different processing plants operate different payment systems. It is important to know their payment grids and the penalties you will face if you present animals out of specification.
The upper and lower weight grades will vary between abattoirs, and sometimes even between breeds, so it is vital to be aware of this.
2. Assess the grade
The sweet spot to be hitting is an R4L grade or higher, so an E or a U. Any less than this, in terms of conformation (P and O) and fat class (1 or 2), or a 4H and higher, will result in penalties.
The usable meat yield reduces as you move from an E to a P grade. For example, a P-grade carcass could be made up of 35% bone versus 25% bone from an E-grade animal.
Looking solely at the grade will not really tell you much about how efficient that animal was, and whether it made you more than others. Look at the age and the weight of the animal too, as a minimum.
In the example kill sheet below (column six titled ‘grade’), the first three animals had the same specification. However, their weight varied from 298-311.50kg. The most efficient was animal number three, as it was four months younger than animal one, yet it was only 1kg lighter and it was the same specification.
The best grade on the sheet is animal nine, as this got the best weight and an adequate grade in the shortest space of time. The worst animal was animal number four as it was one of the oldest animals and was clearly being fed to try to get it to an adequate weight.
3. Look at carcass gain
Carcass gain per day of life will tell you whether that animal has grown efficiently over its lifetime.
It is particularly useful for dairy-beef buyers looking for healthy, quick-finishing cattle or store finishers that have not been privy to the growth rates prior to buying the stock. It can help you assess where to buy your best animals from in future.
Feed conversion efficiency drops as an animal ages, so a 10-month-old animal weighing 300kg will take less feed and time to finish compared to the same weight at 15 months.
Carcass gain is calculated using the formula: carcass weight kg (cold)/ No. of days alive (you can work this out using columns five and eight of the kill sheet, below). The aim is to produce a carcass gain over 0.5kg, which equates to at least 1kg of gain a day liveweight.
4. Cold weight
The cold weight (see column five of kill sheet, below) is what a farmer is paid on and, therefore, should be used in any calculations such as the killing-out percentage.
The killing-out percentage (KO%) determines how much saleable carcass weight is obtained from the live animal. It is expressed as the weight of the carcass in relation to the weight of the live animal immediately before slaughter. The target should be about 50% for dairy beef and often more than 60% for suckler beef. Farmers not recording weights cannot work out the KO%.
KO% can be affected by gut fill, with grazed cattle often having a lower KO% as they will have a larger gut fill compared to an animal fed an energy-dense diet. Bulls will also have a higher KO% compared to heifers. Remember this when comparing figures.
5. Dress specification
It is important to know what specification your abattoir is dressing to as this varies depending on the slaughterhouse. The dressing affects how much/if any fat is removed.
The dress spec will affect the cold weight and therefore the KO%. The three different specs that are used are: Standard Specification, EC Reference Specification, UK Specification (see “Beef carcass dressing specifications” for spec comparison).
Beef carcass dressing specifications |
|||
| Specification type: | |||
| Standard | EC Ref | UK | |
| Cod/udder fat The cod or udder fat is removed in its entirety. Trimming must not expose the muscle at any point. |
On | Off | Off |
| Crown fat The heavier fat deposit on the inside of the topside is removed. Trimming must not expose the muscle. |
On | Off | Off |
| Flank (bed) fat The fat deposit within the flank fat area is removed. Trimming must not expose the muscle. There must be no ‘dropping’ of the flank muscle. There must be no perforation, damage or cutting through of the outer carcass/muscle. |
On | On | Off |
| Brisket fat The brisket must be trimmed to leave a covering of fat and the muscle tissue must not be exposed. |
On | On | Off |
| Thin skirt The fleshy part of the thin skirt is removed back to the ribs at the division between the thorax and abdomen. No further trim of the abdominal membrane is permitted. Any fat on the inside of the pleura, between the ribs, must be left attached. |
On | Off | Off |
6. Side one and side two
Carcasses are split in two for ease of handling and to remove offal.
If condemnations are highlighted, this can tell you on what side of the carcass and how much of the carcass may have been condemned.
For example, if an abscess is found, this will be highlighted on a separate sheet, and by comparing the weights of each side, you will roughly be able to calculate how much of the carcass was condemned.
7. Dress to specification
This will tell you whether all the necessary bits of fat for the specification have been removed.
8. Category
This will highlight the sex of the animal and may also be titled sex (see column two of the kill sheet, above). For example, Z = young bull, A = bull, C = steer and E = heifer.
9. Inspector
In abattoirs there is an independent inspector employed by the Meat and Livestock Commission to grade the carcass. Each inspector has their individual ID, and in the example, the inspector’s number is 63.
The grade of the carcass may vary depending on the inspector due to individual subjectivity.
Video image analysis (VIA) is used by a handful of abattoirs in the UK and does remove the subjectivity. However, it can be harder to hit the “sweet spot” with VIA as the grading grid is larger and more complex.
Sweet spot is the weight, grade and fat class that yields the most money for your animal and will vary from processor to processor depending on their requirements.
10. Date of birth
This shows how old the animal was at slaughter and how long it has been on the farm. If you are taking animals right through, then you can draw comparisons between animals.
The younger the animal, the more efficient it is at converting feed. Older animals require more food per kg of gain.
Going forward, with carbon footprinting becoming more of a focus, there is nothing stopping supermarkets using the kill sheet to work out the carbon footprint per kg of beef.
Notes page
Any health anomalies will be noted on a separate notes page. This will detail the eartag number and the problem.
Problems could include injection-site abscesses, liver fluke (active and old) and lung lesions. While you are not penalised on these, it does highlight areas where you could have lost production. If there is evidence of active liver fluke, then immediate actions can be taken to protect other animals in the herd or flock grazing those areas.
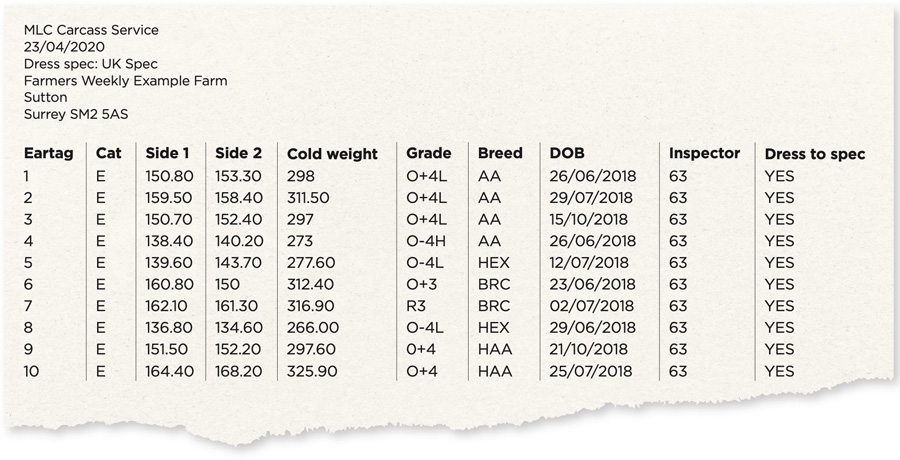
An example of a kill sheet.