How to make a comprehensive soil profile on-farm
 © MAG/David Jones
 Understanding the health and characteristics of soils by conducting a soil profile helps growers identify key issues, such as compaction, nutrient deficiencies, and drainage problems.
It leads to informed decisions about rotations, cover cropping and soil management practices, and is the first step to monitoring changes in soil health and making adjustments to improve productivity and sustainability.
According to Canadian agricultural engineer Odette Ménard, many growers don’t spend enough time soil profiling their fields.
See also: Soil health pivotal for new Arable Insights farmers
How and when to profile soil
“How much time do you spend taking care of your tractors and machinery?” she asks.
“How much time do you spend doing a soil profile? It should be the same answer. You can farm without a tractor, but you cannot farm without land.
“If you don’t know what is going on in your soil profile, it won’t be easy to adopt or choose the right strategies so that we can improve.”
Always do at least two soil profiles in a field, she says.
Analysing soil profiles from a good part of a field and a poorer performing area will help give the comparative information to understand why there is a difference.
Soil profiling should be carried out when there are roots in the ground. In Canada, that means August to October, but in the UK April through June would be better.
Do it yourself, she stresses. “I want the farmer to dig, because the first step in a soil profile is the knee-test.
“When it’s getting hard [to push the spade deeper], it’s the moment you know the root is not going to be able to go there. It’s already telling us a lot.”
The hole should be at least 75cm deep, she says. As well as digging, touch is important: “Smell the soil and look at the colour.”
The first exercise is to split the soil into different horizons. “Not in the pedology way, but in the agricultural way.”
To do this put a knife at the bottom of the soil profile and pull up. “This tells me if there is any compaction. I need to know where it is,” Odette says.
“Then keep pulling and at one point it will become easier to pull again. Mark those spots in your soil profile as you will need to study both horizons.”
Alternatively, colour can be an effective way to split horizons, although compacted layers can occur within the same coloured layer, she notes.
Soil porosity
Next, look at soil porosity. “Does the soil have spaces in it so the roots can grow? Are there any big micro- or macro-pores? Take lots of notes and assess every horizon.
“Then look at structure. If the soil has a very laminar structure, like sheets of paper on top of each other, the soil will be very easily compacted, for example.
“You need to understand that when you think about tyre pressures and weight, and whether the soil will be vulnerable.
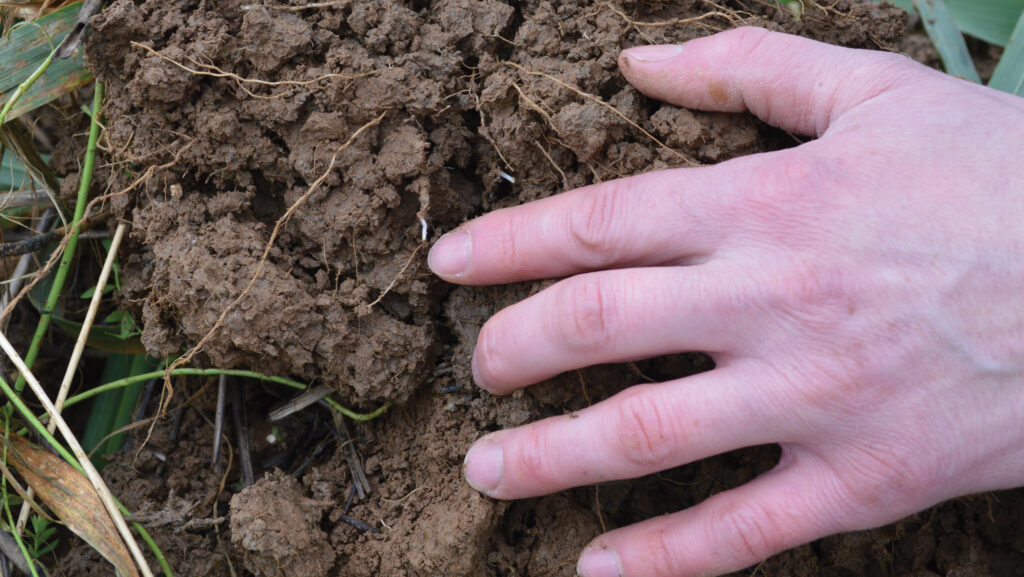
“After you’ve looked, take a piece of soil in your hand, and break it with your thumb – not crushing over and over – to see how it crumbles.
“If it has different size aggregates, then the structure is good. If there are just big lumps the structure is too coarse.”
Check what the roots look like and how they are growing, she advises, checking if they are growing downwards, are white, and if they are round or flat.
Flat roots could indicate compaction, she suggests. “Again, write that all down.”
After characterising the soil, the next stage is quantifying those visualisations, she says.
While laboratory analysis can help with quantification, Odette prefers to use simple tests that can be carried out on-farm.
“So it is simple stuff – infiltration, structural stability, bulk density and microbial life.”

© Curva de Luz/Alamy Stock Photo
Infiltration test
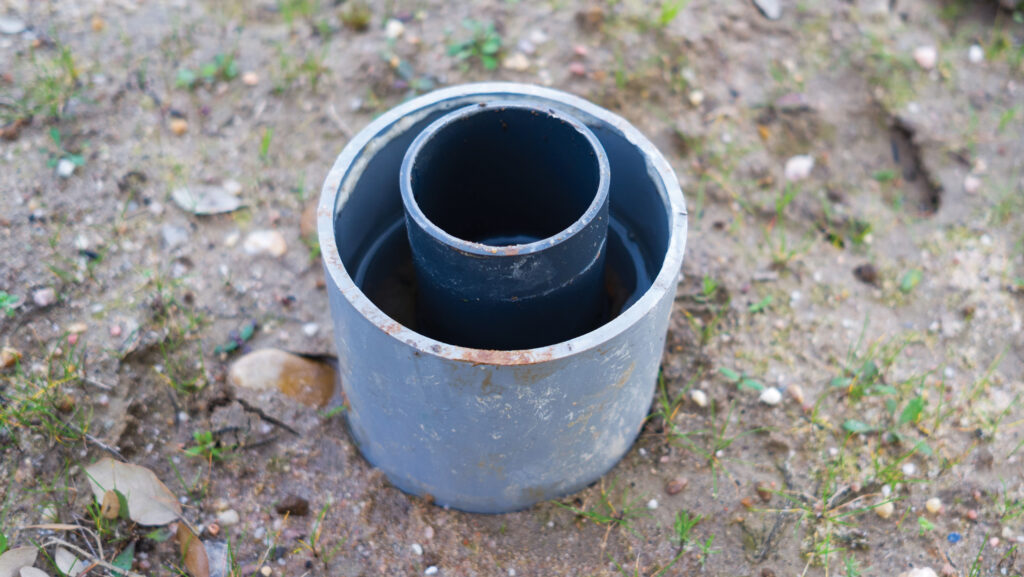
For infiltration, Odette recommends farmers use two cylinders of 10cm and 15cm diameter for the double-ring test, which in her experience, gives the same answer as more sophisticated laboratory tests.
Again, she recommends repeating the test for each horizon, recounting when a farmer wanted to put a drain back in his field where infiltration was poor.
“Infiltration at the surface took 90 minutes to get 2cm of water into the soil. Then we repeated at 40cm deep and it took eight minutes.
“So it was nothing to do with drainage and everything to do with a compacted layer.
“If this farmer had done a soil profile before calling for drainage, it would have cost him CA$20,000 [just over £11,000] less.”
Infiltration is key, because as well as being informative about water movement in the soil, it provides knowledge about water holding capacity, she says.
Soil with poor infiltration will lose water to evaporation or run-off, which will not be available to replenish soil reserves.
In contrast, soils with good structure and infiltration rates will maximise the amount of water available for plants to take up, either through roots or capillary pore action.
About 45% of water in soils is available for plants to take up, she says, but soils with good microbial life, especially mycorrhizal fungi, are able to access roughly 25% more water held by the soil.
Bulk density
For bulk density use a cylinder of known volume – at least 180cu cm. Dry the soil.
“Take the weight, dry for 30 seconds in a microwave, and take the weight again. If it is the same weight three times in succession it is dry.”
Bulk density will vary with soil type and tells you about the intensity of any compaction. Higher bulk densities than ideal for the soil type will reduce or stop root growth.
“By doing bulk densities for different horizons I know where there is bad compaction and helps define the strategy to use – will roots cope or should we subsoil?”
Aggregate stability
Aggregate stability gives good information on soil structure stability and erosion risk.
There are various methods available to test it, from wet sieving and rainfall simulation to various measures of dispersion.
There’s even a free phone app, Slakes, developed by the Soil Heath Institute.
Measure biological activity using the underwear test. “It needs to be 100% cotton. Cotton has about the same carbon to nitrogen ratio as microbes, which is why they’re going to attack it.”
Odette suggests burying them in soil for about eight weeks. “Make your own protocol, but always use the same comparison. So if it is 15 June one year, do the same next year.”
Aggregate stability and biological activity are linked, she says. “If there is poor aggregate stability it needs more glue.
The glue – glomalin – is produced by the micro-organisms that live around the roots feeding on the exudates from plants that result from photosynthesis using the sun’s energy.”
Glomalin typically lasts a few weeks to a month or two in the soil, which is why cover crops and living roots in the soil are so important as a bridge between the roots from commercial crops.
Living roots are also crucial in building soil organic matter, with roughly 45% of the carbon in the root system becoming soil organic matter, compared with just 8% of the carbon in above-ground residues.
“If you want to increase the organic matter of your soil, which in turn will help soil stability, water holding capacity and retention, having living roots is critical,” she concludes.
- Odette Ménard was speaking at Groundswell 2024
AHDB Soil health scorecard
An alternative approach could be to use the AHDB Soil Health Scorecard.
A completed scorecard using the five indicators – soil structure using Vess (visual evaluation of soil structure), pH, extractable nutrients (P, K & Mg), earthworms and soil organic matter – provides a traffic light snapshot of soil health to guide management decisions.
Both the AHDB scorecard or Odette Ménard’s suggested techniques should provide repeatable results that allow easy comparison year-on-year or field-to-field.

