
How to renovate a Master batch grain dryer
 © James Andrews
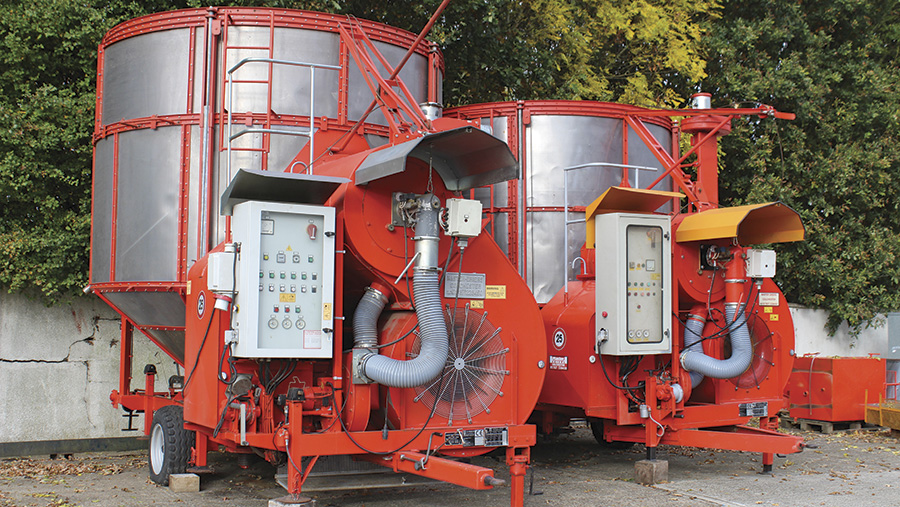
 Forking out tens of thousands of pounds on a spanking new mobile grain dryer isn’t the most exciting prospect for a lot of farmers.
Instead, for those willing to put in the effort, even the most careworn machines can be resurrected for a fraction of the price of a new replacement.
Suffolk-based importer Master Farm Services has been bringing in Italian-built Pedrotti dryers for the past 35 years and there are now an estimated 2,500 machines operating on UK farms.
See also: See the latest kit improvements at Midlands Machinery Show
Most of those are still somewhere near operational and, thanks to a comprehensive supply of replacement parts, it’s easy to keep even the oldest relics running sweet.
As well as selling new machines, Master offers a full restoration service from its workshops in Bures, Suffolk.
Even if you get its mechanics to do all the work for you, you’ll pay about half the price of a new equivalent.
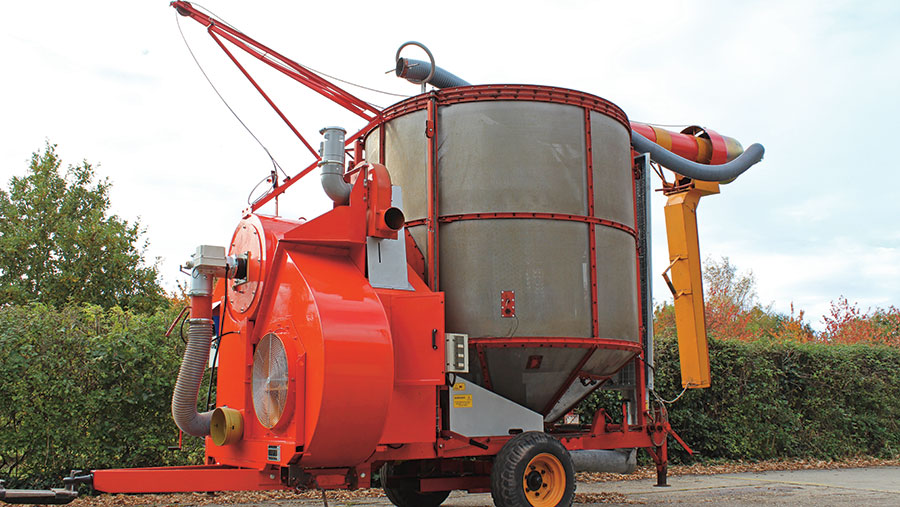
Master Farm Service’s George Young walked us round a few of the company’s projects, including a 12t machine from the mid-1990s that was undergoing a part restoration.
Chassis
Most models have plenty of areas for dust and grain to lodge, and if the dryer lives in the fresh air, this will quickly turn to a soggy mess in which tin worm will take hold.
Particular trouble spots include the joins between the stainless steel screens and the mild steel frame, as well as underneath the wooden rails that the fuel tank sits on.
The bottom box under the main auger can also rust through if it’s perpetually left with mouldy grain sitting in it.
If your machine only has a mild case of rot then you can patch up the tattiest areas.
However, the very worst examples should really be stripped down, patched up, shot blasted and repainted.

© James Andrews
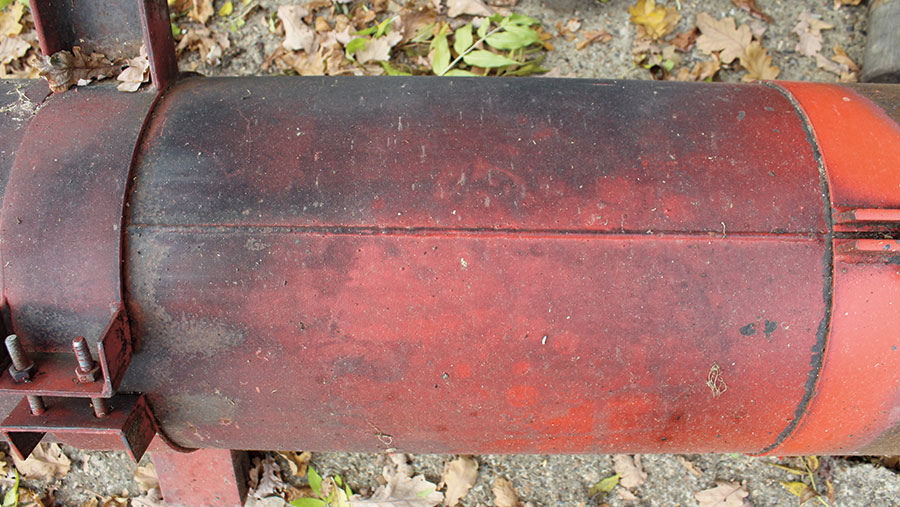
Central auger tubes
The main auger assembly is the heart of the machine and after about 4,000 hours it’s likely to show some signs of wear.
Until recently, auger tubes were constructed out of sheet metal with a single vertical weld up its length.
These tend to wear on the seam so replacements are now welded in a spiral to ensure that the welds are in line with the auger flights.
With average use, expect the auger tube to last between 4,000 and 6,000 hours. They come in two sections and it’ll set you back about £1,650 to replace both in a 12t machine.
© James Andrews
Central auger
Central auger wear varies significantly, with some looking well worn after 4,000 hours and others hanging on until 8,000 hours.
If flights on the base of the auger are razor sharp then it could do with changing.
It’s possible to re-flight the central tube, but it’s difficult to balance it correctly and the small additional cost to get the full item means it’s not generally worth the effort.
Replacing both sections costs about £2,000.

© James Andrews
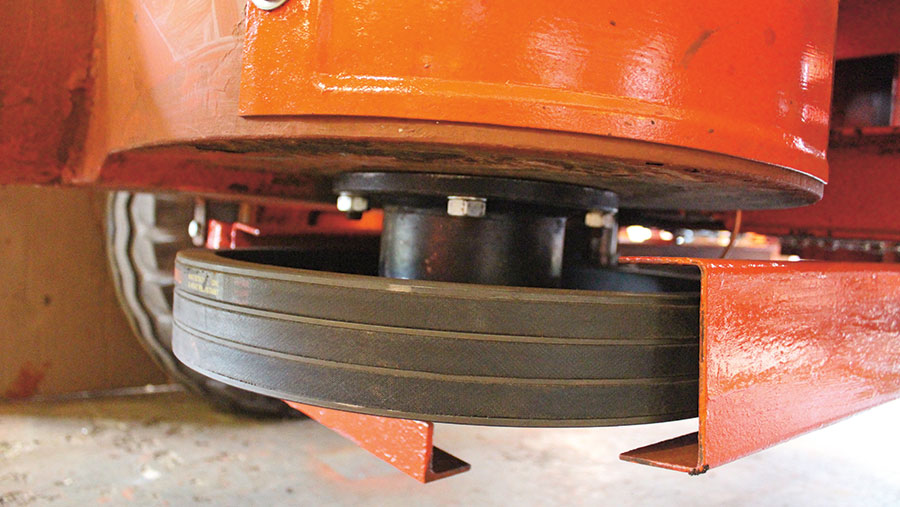
Bottom auger bearing
The bearing at the base of the central auger is often one of the first to wear out.
If you can hear the auger hitting the tube or you can see movement in the bottom drive pulley, it’s probably had its day.
The bearing can be removed with the central auger in place by pulling off the bottom drive pulley and then getting the pullers on the bearing itself.
The part is cheap, but if it’s been run with a shot bearing for too long, the seat on the bottom auger pin can get damaged.
If this has happened, a new pin can be welded into the tube at a cost of about £130.
© James Andrews
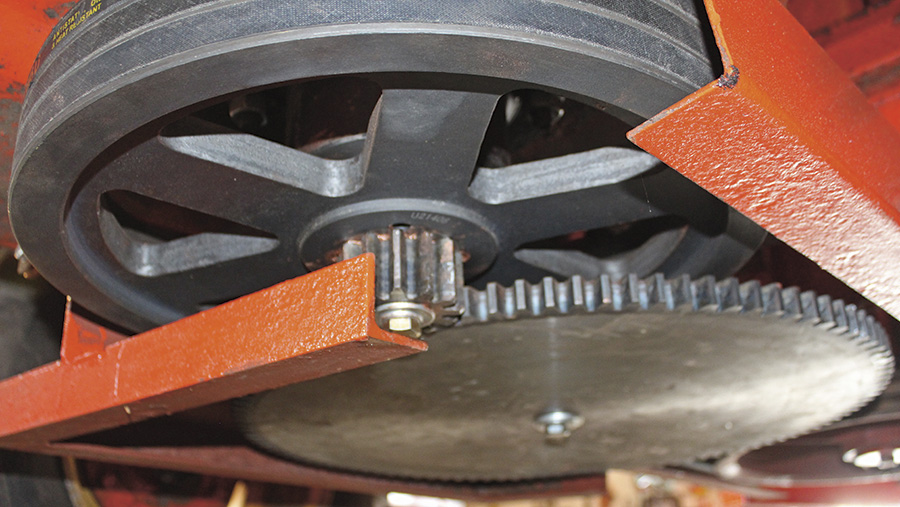
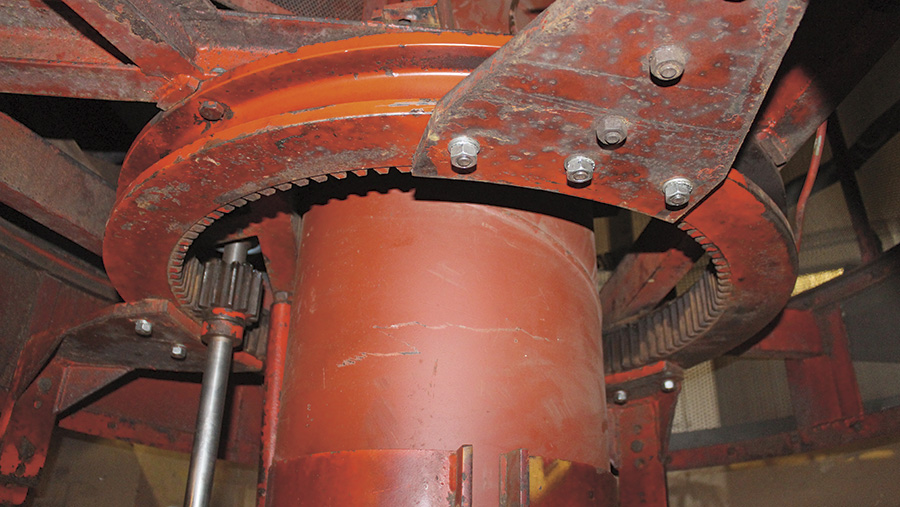
Agitator drive
The agitator is driven via a small and large cog arrangement that takes power off the main drive pulley.
© James Andrews
After a couple of thousand hours, the teeth on the smaller of the two gears are likely to have worn to sharp points so it’ll need replacing.
At £50 it’s a fairly cheap part and it’s worth doing before it starts to damage the larger gear, which costs a less palatable £480.
Slew ring
The agitator arms are mounted off a large slew ring that’s driven from the small and large gear arrangement mentioned above.
This runs on ball bearings that need to be kept well greased, and when the bearings are shot they need to be replaced.
This is a fiddly, but inexpensive job.
If the dryer is used for a long period with duff bearings then the slew ring could be damaged beyond repair and a new one will set you back about £1,500.
Fan bearing
Master dryers run a large main fan, which has a bearing at the front and rear. These are both common replacement parts and are fairly inexpensive.
The front bearing assembly usually comes with a new carrier so you don’t need to worry about using finesse when thrashing the old one off.

© James Andrews
The rear bearing is a slightly more fiddly affair and involves removing the drive pulley for the burner fan.
Intake hopper
Intake hoppers tend to get some stick and many will have been patched up over the years. In particular, watch out for wear in the tube where the intake auger joins the bottom auger.
On older machines, the augers aren’t supported at this point so they can vibrate and cause excessive wear.
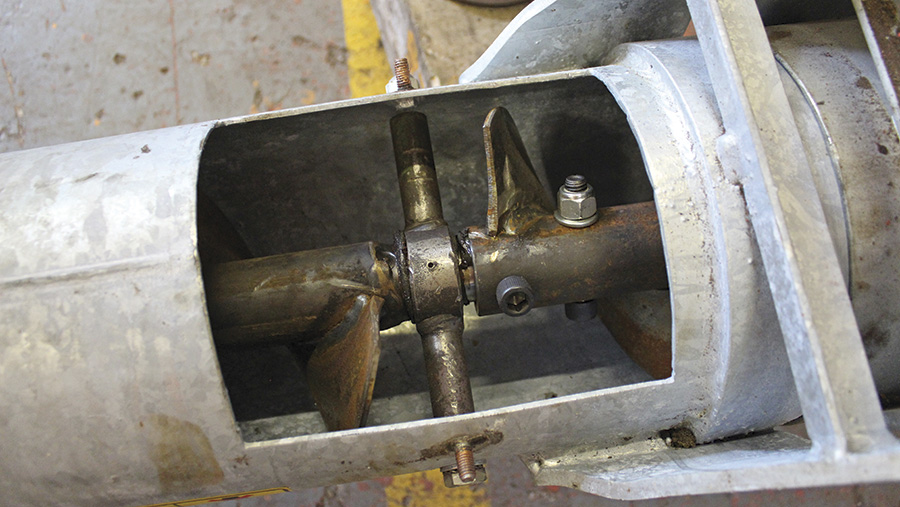
© James Andrews
Replacement intake hoppers now have a central bearing to stop this happening and they’re galvanised, too.
If you’re keen you could also fit one of these bearings to an older model.
Main gearbox
The main gearbox turns the drive from the pto 90deg and sends it down to the central auger pulleys.
This rarely gives trouble, unless the bearing in the pulley directly below it gives way and isn’t replaced.
If this happens the shaft starts to vibrate, which damages the seal and eventually causes the gearbox to drop its oil and seize up.
© James Andrews
Patient engineers should be able to rebuild it or you can buy a replacement for £1,050.
Burner
Almost all Master dryers run diesel burners and it’s fairly rare to come across a gas one. Older models run on Cuenod modular units, which are pretty straightforward to look after.
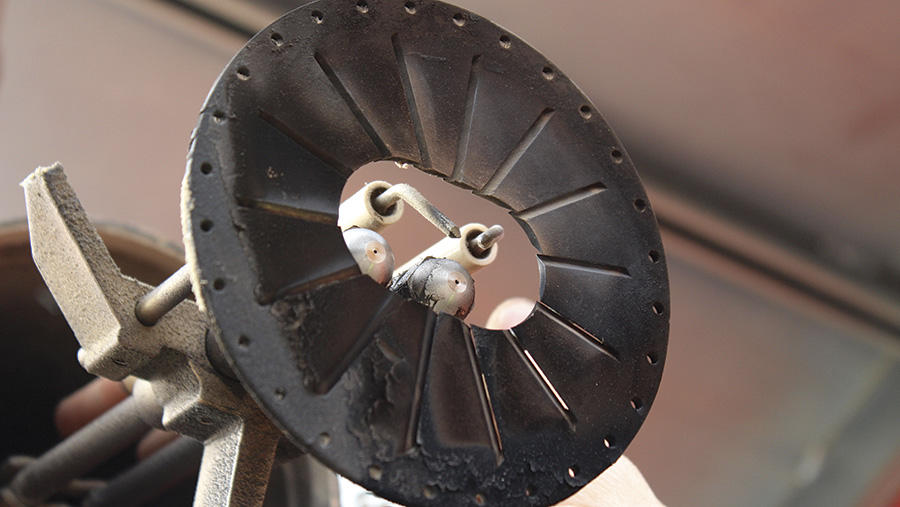
© James Andrews
However, the ignition coil, photocell and solenoids do need replacing from time to time.
If an older model isn’t firing up, the solenoids are a good place to start investigations.
Newer 12V machines have printed circuit boards (PC cards) in both the main control box and the burner ignition unit, which are two of the most common causes of misfiring.
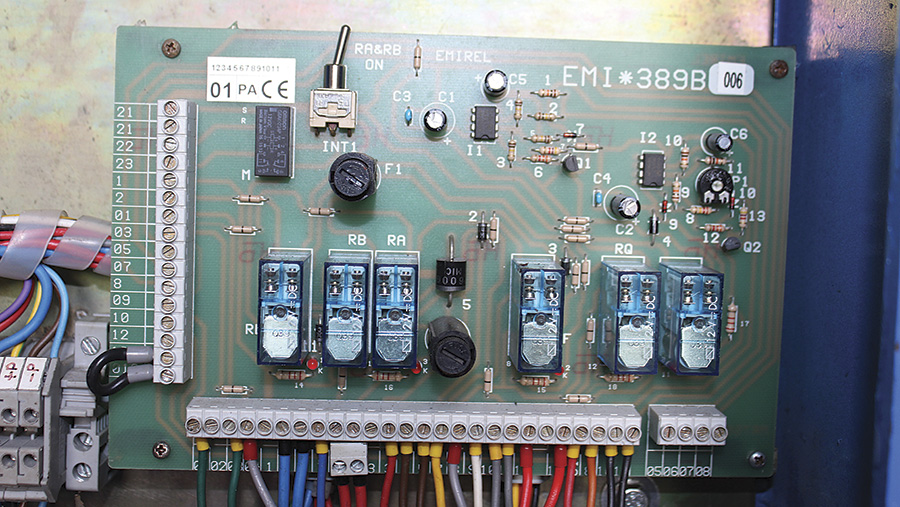
James Andrews
Thankfully, they’re fairly simple to replace and they cost about £80.
Almost all burners (apart from the very newest) run twin jets and these should ideally be cleaned and serviced once a season.
They do also wear and will eventually need to be replaced.
If the burner isn’t running cleanly, these could be your culprits.
Generators
Up until the early 1990s, most Master dryers ran on 380V electrics that were powered by an on-board generator.
These can give up the ghost and, if they’re covered in crud for long periods, there’s a greater chance they’ll short out.
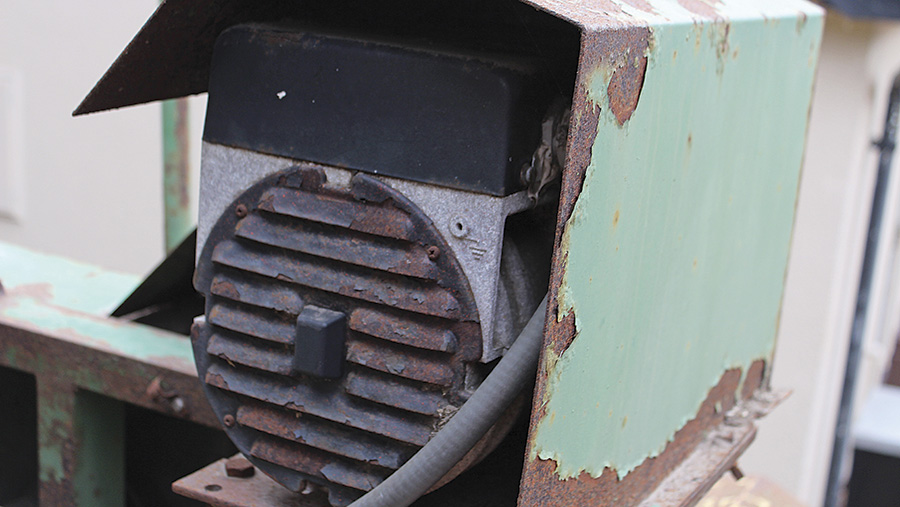
© James Andrews
It’s possible to get them rewired, but replacements are a surprisingly reasonable £500. Newer models run on a much lower-powered 12V system.
Screens
The stainless steel screens should last for decades and Master claims it has never seen a set wear out.
© James Andrews
However, if you remove the screens to repaint or repair the frame you need to be very careful when you bolt them back on so that you don’t pull creases into them.
They can also buckle if the dryer is left empty and extended in high winds.
Upgrades
Bigger capacity
It’s relatively simple to up the capacity of an old 10t dryer so that it can hold 12t.
All you need to do is replace the top 0.5m screen with a full-sized 1m section and extend the slider channels on the side.
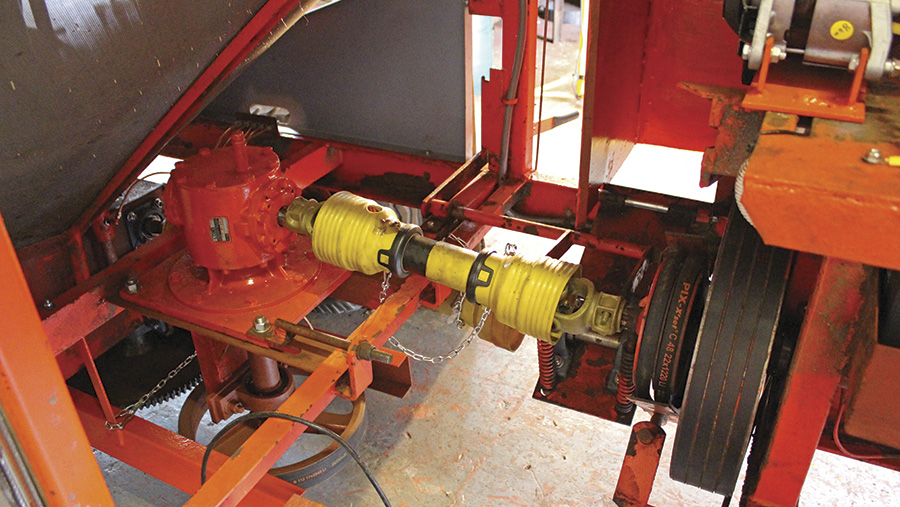
Electric drive
Most older Master dryers are pto driven, but it is possible to buy an electric drive unit that mounts off the drawbar.
According to Master, about 90% of all new dryers are now bought with electric drive as it’s so much quieter, doesn’t tie up a tractor and works well with the fully automatic set-up that many people are choosing to run.
An electric drive unit for an old pto machines costs about £3,900.
Dust extractor
If you want your dryer to make a little less mess around the yard, it’s fairly simple to add a retrofit dust extractor.
You can buy the extraction unit from Master for £3,200, which includes a fan and a replacement head for the main auger.
To get drive to it, you just add a double pulley to the burner fan drive and cut a hole in the guard for the drive belt to pass through.
Master dryer price guide
- Reconditioned pto-driven 12t with dust extraction: £15,000
- Fully reconditioned pto-driven 25t with dust extraction: £25,000
- New pto-driven 25t with dust extraction: £50,000
- New electric drive 25t with dust extraction: £55,000
Prices are approximate
Common replacement parts
- Three-phase generator for models up to early 1990s: £500
- Central auger tubes (top and bottom): £1,650
- Central auger (top and bottom): £2,000
- Bottom auger pin: £130
- Agitator drive gears: £50 (small), £480 (large)
- Slew ring: £1,500
- Agitator drive gears: £50 (small), £480 (large)
- Main gearbox: £1,050
Burner parts
- Ignition coil: £150
- Photocell: 12V, £20; 380V, £50
- Solenoids: £50
- 12V PC card: £210
Prices are approximate
