Guide to assessing your silage clamp for costly losses
Livestock farmers could be losing thousands of pounds a year from poorly clamped silage.
Recent figures suggest aerobic deterioration in clamps costs the UK agricultural industry £170m a year. In addition, losses that occur before the clamp is opened (storage losses) could easily add a further £100m a year to the bill.
And while many producers will know cost of production per tonne of fresh or dry matter, few will know the percentage losses between field and feed face and the cost of silage in terms of how much is eaten by stock.
See also: Guide to taking and analysing silage
To prevent costly losses occurring next year, farmers are being encouraged to assess their clamps now. Silage expert Dr Dave Davies of Silage Solutions explains how to assess your silage clamp.
Picture guide to common clamp problems
Silage clamp 1: A clamp with 15% losses
Silage clamp 2: A clamp with 35% losses – that’s £30/t of DM difference (clamp 1 v clamp 2) in cost by the time it gets to the animal’s mouth
Silage clamp 3: A clamp showing secondary fermentation
Looking at the top of the clamp, there are signs of secondary fermentation. This is where clostridia have turned the lactic acid into butyric acid, the pH has gone from acidic to neutral or even alkaline.
Why did this happen when the clamp appears to be consolidated and sheeted well? The reason is that there was insufficient top weight to keep the pressure on the silage during storage.
While a green mesh had been used, the clamp wasn’t finished with a dome – which means there was no tension in the mesh to keep the pressure on, so the silage deteriorated anaerobically.
Silage clamp 4: A typical waste problem
Although a thin sheet plus a black sheet has been used on this clamp, there is still a waste problem. This is much reduced in the central part, just because here a silage mat had been placed on top to keep the weight on.
The weakest part of a clamp is the top metre and the metre nearest the side walls. In most UK silage clamps, this represents about 40% of your silage (see guide to calculating the amount of silage around the edges of a clamp, opposite). If you look after the top and the sides, then the middle will more or less look after itself.
Silage clamp 5: Sheet rolled back too far
In the UK climate, rolling the sheet back too far doesn’t only reduce the dry matter of your silage – and therefore the intake because of rain.
It also introduces air further back into the silage mass and increases yeast and mould growth, reducing silage quality. In this picture, you can just see the white mould near the edge of the clamp.
Silage clamp 6: Temperature range and silage density
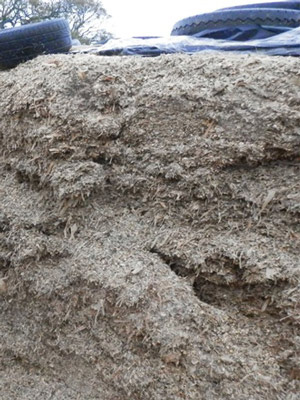 The silage in clamp 6 all looks the same. However, the temperature tells a different story and so does the analysis (see guide to taking silage temperature, page 30).
The aerobically unstable part had a density of only 441kg FM/cu m, whereas the aerobically stable part had a density of 673kg FM/cu m.
The relative ash content between different parts of the clamp can be used to estimate relative DM losses and in this case there was an additional 4.3% loss in the top 0.5m compared with the rest – but it looks perfectly OK!
Measuring clamp density
Silage density is king as it increases quality and reduces both anaerobic (storage) and aerobic (feed-out) losses.
The target should be at least 700kg FM/cu m.
Feed and additive reps or consultants will use a silage corer to sample your silage, but you can use a metal tube with a sharpened end pushed into the silage clamp face with a screwing action to sample your silage and measure the density.
Step 1: Measure diameter of corer
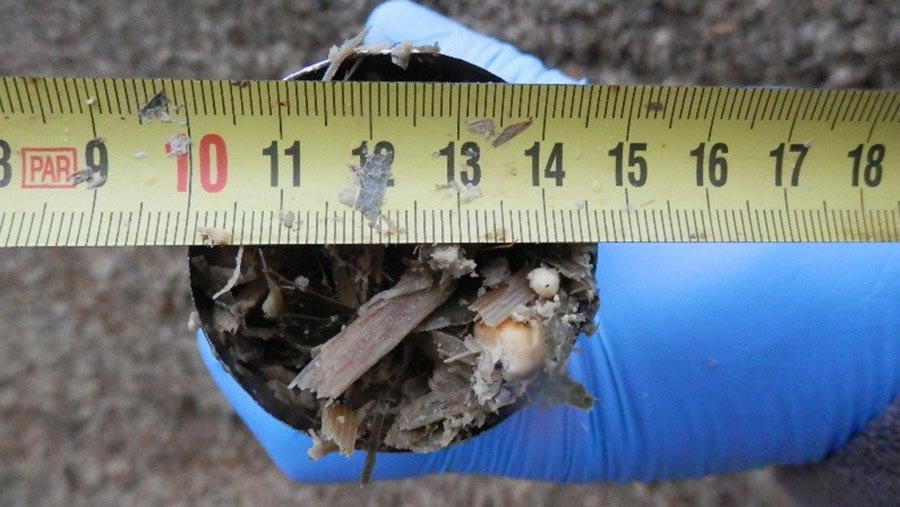 You must measure the diameter of the corer in order to work out the surface area of the core by using the following equation:
Surface area (SA) = π x diameter, with the diameter converted into metres.
In this case, SA = π x 0.047 = 0.0017sq m. (π = 3.1416.)
Step 2: Measure the depth of the hole
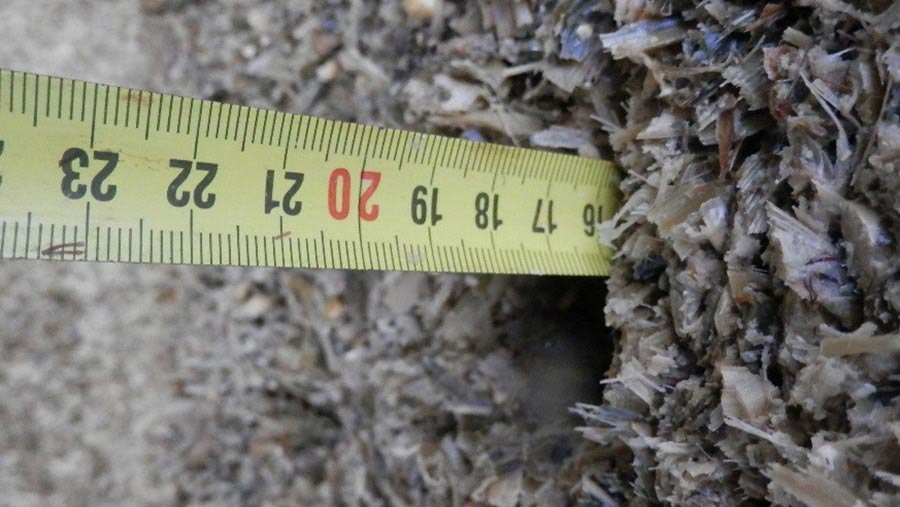 Convert this measurement to metres. Then use this equation to find the volume of your core
Volume = SA x depth
In this case, 0.0017 x 0.16 = 0.00028sq m.
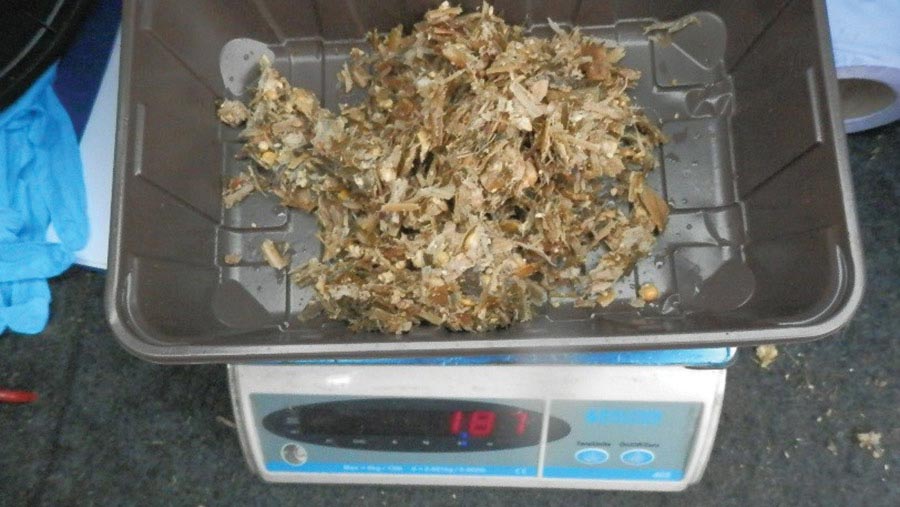
Step 3. Measure mass of silage
Then you must measure the mass of the silage from your core and convert this into kilograms. Use the following formula to then work out the density:
Density = mass/volume.
In this case, 0.187/0.00028 = 673kg FM/cu m.
Guide to taking silage temperature
Silage temperature is an important measurement, but beware of the reps using thermal imaging cameras as this technique doesn’t always tell the truth.
It can sometimes miss an aerobic stability problem and at other times it overestimates the issue. It is better, instead, to use two thermometer probes of two different lengths.
There is no correct temperature for what the bulk of your silage should be, because it depends on a number of things – such as how hot the day was when you filled the clamp and how close to the top you measure it.
A lot of the heat from the day of harvest will be retained in a well-compacted silage clamp; conversely, maize silage made on a cold autumn day can remain at a low temperature even if fed out in a hot summer.
Step 1. Temperature probes
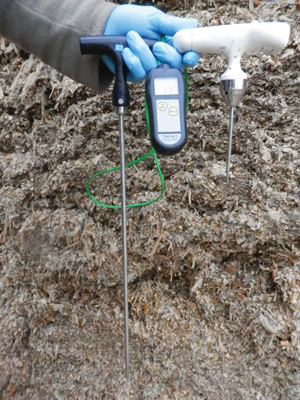 Use two temperature probes – one long one (about 50cm) and one short one (about 12 cm).
This will allow you to measure the temperature simultaneously at two different depths.
Step 2. What do the results tell you?
Temperatures can tell you how aerobically stable your silage clamp is.
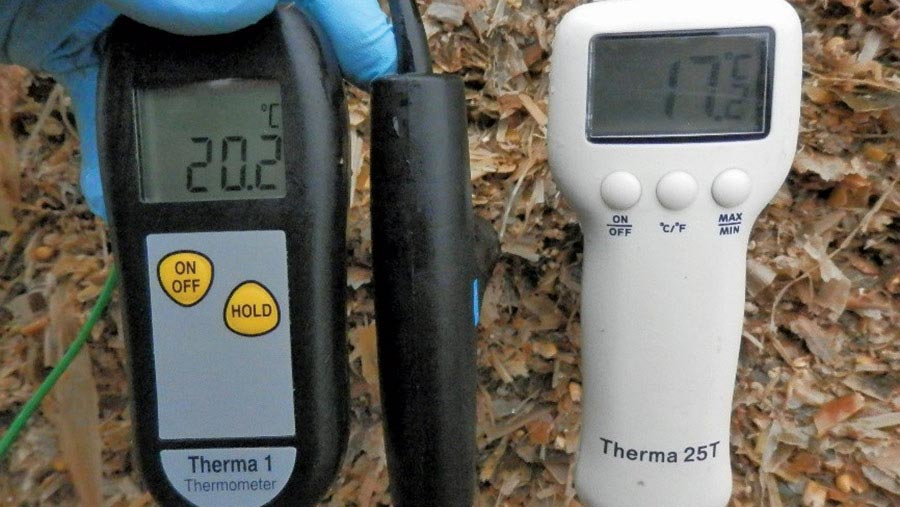
Here we have a measurement of 20.2C on the long probe and 17.2C on the short – so the temperature is decreasing towards the clamp face.
This shows that this part of the clamp is aerobically stable, which is what every farmer wants
However, a measurement of 20.3C on the long probe and 23.6C on the short probes means the temperature is increasing towards the clamp face.
This shows that this part of the clamp is not aerobically stable and the silage energy is being lost as CO2, water and heat.


