
Video: How to properly set up a fertiliser spreader
 © Jonathan Page
 Spring fertiliser applications are crucial to getting crop growth off to the best start possible, and making sure your spreading equipment is up to the job is the most important aspect of this.
An incorrectly calibrated spreader, along with poor quality fertiliser, can lead to some areas of a field being under-fertilised and other areas overdosed, ultimately meaning the full benefits of any nutrients applied are not delivered to the crop.
In 2015, roughly one-quarter of farmers who were using a spreader to apply fertiliser confessed that they never check the accuracy of their kit, according to the British Survey of Fertiliser Practice (PDF).
On top of this, only 37% of growers get their spreader tested annually using catch trays.
See also: How to calibrate your slug pellet spreader
Aside from the obvious damage this can do to a crop’s yield prospects, trials have shown that badly spread fertiliser can dramatically downgrade the Hagberg Falling Number of milling wheat, and apart from anything else, bad practice can affect conservation field margins and lead to contamination of water courses.
Farmers Weekly joined forces with Jim Hammond, engineer at SCS Spreader and Sprayer Testing, to get a step-by-step guide to thoroughly testing and setting up a fertiliser spreader to ensure accurate and even application.
Watch the video tutorial with Mr Hammond and see the step-by-step below for more detail.
1. Assess the product
There are four factors that will affect the way that any fertiliser product will spread – the shape, size, strength and weight of the material.
© Jonathan Page
Mr Hammond explains the shape of a fertiliser granule is not something that can be tested for, but the other three factors can be judged to give a good idea of how the product will perform when being applied out in the field.
First, weigh a sample of the product that will be applied to get a bulk density measurement in kg/litre.
To do this, simply fill a litre measuring cylinder full and weigh it.
Make sure that the material is level at the top and remember to deduct the weight of the cylinder.
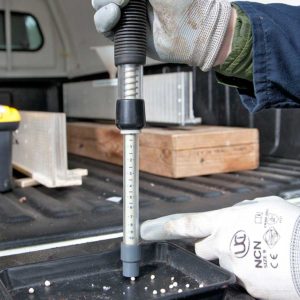
Next check the size of the granules using a grader box with four compartments.
Different fertilisers will have a different range of granule sizes and very few fertilisers will all be the same size.
Fill the end section with the material and shake to divide the product up into the various sizes of that sample.

© Jonathan Page
Once the sample has settled in the various compartments of the grader box, note down the proportion of the sample that falls into each section.
The smaller the granule, the less far it will be thrown by the spreader.
© Jonathan Page
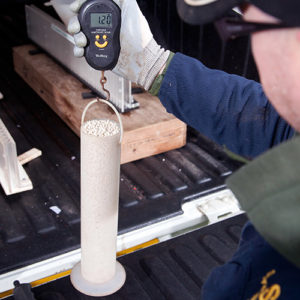
Finally, assess the strength of granules by using a strength tester to crush a sample of individual granules one at a time.
Place the tester on top of a granule and press down until it breaks.
Do this to 10 different granules and take an average measurement that shows how many kilos of force it takes for the granules to shatter.
This is important because granules need to be able to withstand the force of the spreader vane hitting them so that they can be propelled to a decent distance without breaking.
Sometimes if a fertiliser bag has been open for a while the product will soften and will be more likely to smash when the spreader vane hits them, meaning the granules will not spread as far.
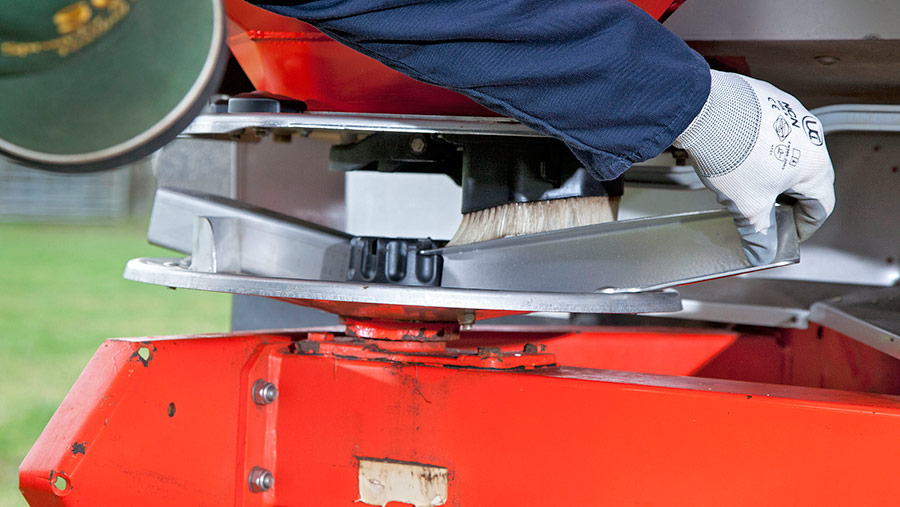
2. Give your machine the once over
Make sure your spreader is in good working order.
Start by assessing the disc and vane of the spreader, check that everything is clean, not pitted, warped or damaged.
© Jonathan Page
Also check the driveline to make sure there is no play in it and there isn’t any play in the individual disc bearings either.
See also: Video: Ultimate guide to good slug pellet application

© Jonathan Page
Check that the drop on guides are intact and check by eye that the discs are level on the machine. Also ensure the headland mechanism is working correctly and isn’t damaged.
© Jonathan Page
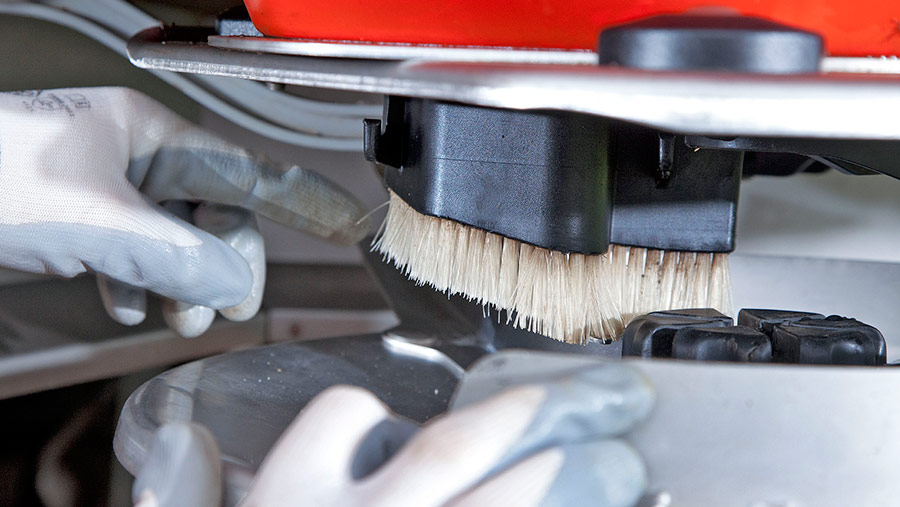
Lower the machine and inspect inside to check on the condition of the agitators in the bottom.
Mr Hammond explains it is best to get one person to turn each disc while another person looks inside to see that the agitators are turning properly and in the correct direction.

© Jonathan Page
Use a measuring tape to check the spreading height of the machine per the manufacturer’s guidelines.
All spreaders have different spreading heights and will need to be measured from different points so make sure you know where this is on your own machine first.
3. Power input
© Jonathan Page
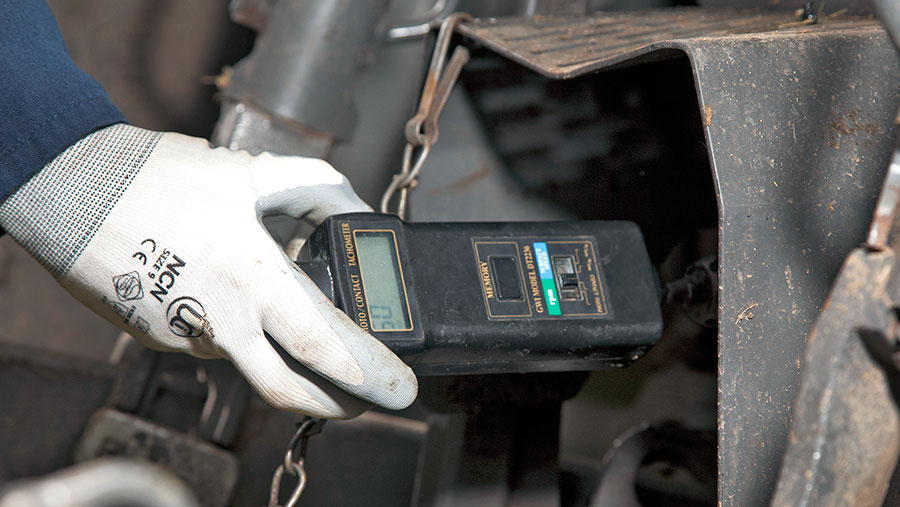
“The power input into the spreader is the single most important factor in determining whether it will spread correctly,” says Mr Hammond.
“If this is wrong, then all other settings will likely be wrong too.”
The pto speed of the tractor running the spreader needs to be double checked to ensure the shaft speed is the same as the read out on the dashboard. Use a tachometer to take a speed reading.
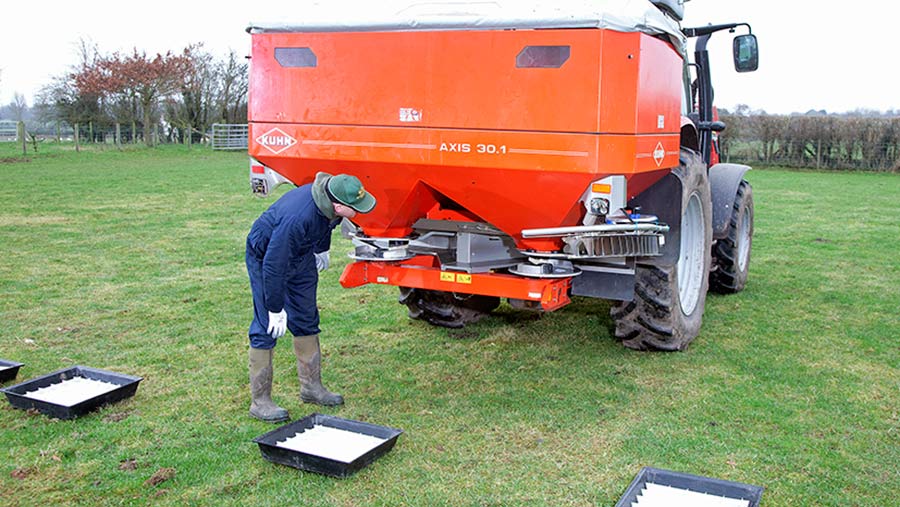
4. Spread pattern tray test
© Jonathan Page
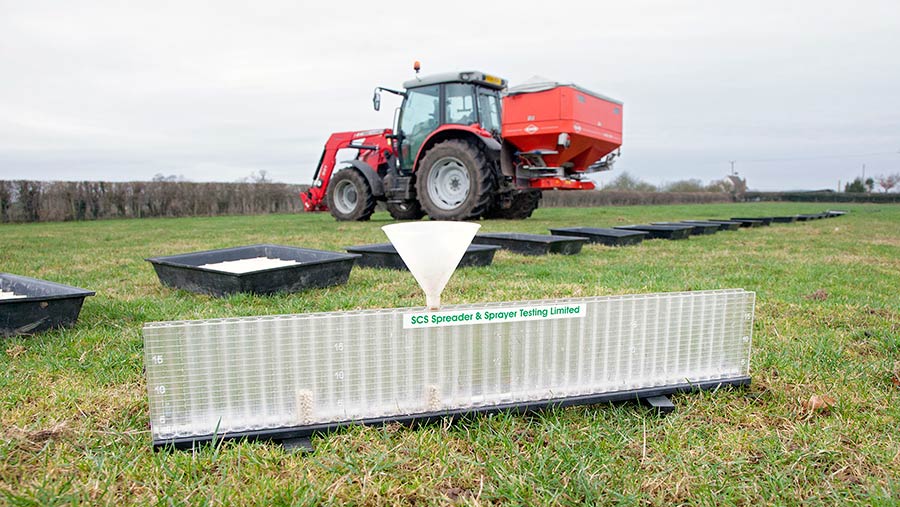
For a 24m spreader, put down a pellet tray for each metre of the spread either side of the machine, placing two trays together at the halfway point (12m).
See also: Video: How to sample your soils for analysis

© Jonathan Page
Make one pass through the middle of the catch trays with the spreader running, then assess the spread pattern using a set of measuring tubes.

© Jonathan Page
Start in the centre and empty each tray into the corresponding tube – each tube represents one metre across the spread pattern.
At the halfway point of each side, fold the pattern back on the inside to replicate driving the next tramline over.
“When we reach our halfway point where our overlap kicks in, we have two touching trays and the contents of both trays into the same tube,” says Mr Hammond.
“Then as we carry on out we fold the rest of the pattern back on the inside moving our funnel back the centre and that gives us a simulation of driving the next pass.”
This is because granule numbers naturally tail off towards edges and by overlapping with the next pass in the field, an even covering should be achieved.
5. Assess the spread pattern
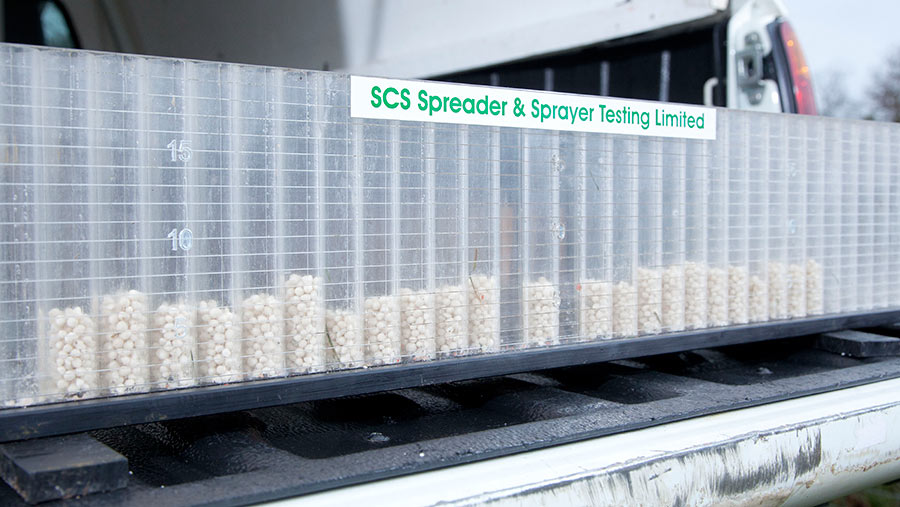
Having collected the material into the tubes, there should be a roughly even number of granules in each.
Avoid having too much material directly behind the spreader and not enough at the edges for example.
© Jonathan Page
“We’re looking for a nice average of the same sort of amount of the material in each tube, also being equal left to right,” notes Mr Hammond.
For more information on fertiliser spreader calibration, visit the National Sprayer Testing Scheme (NSTS) website and the SCS Spreader and Spreader Testing website.
