
6-step guide to successful maize establishment
The need for strong maize establishment was highlighted last year with growers enduring one of their worst growing seasons, as crops struggled reach maturity.
Last year 19% of the total maize area in England was grown for anaerobic digestate plants and that figure is expected to rise again this season as more growers attempt the crop for the first time.
Independent agronomist and maize guru Simon Draper stresses how vitally important it is to get good crop establishment is when growing maize for biogas or for livestock feed in this six-step guide.
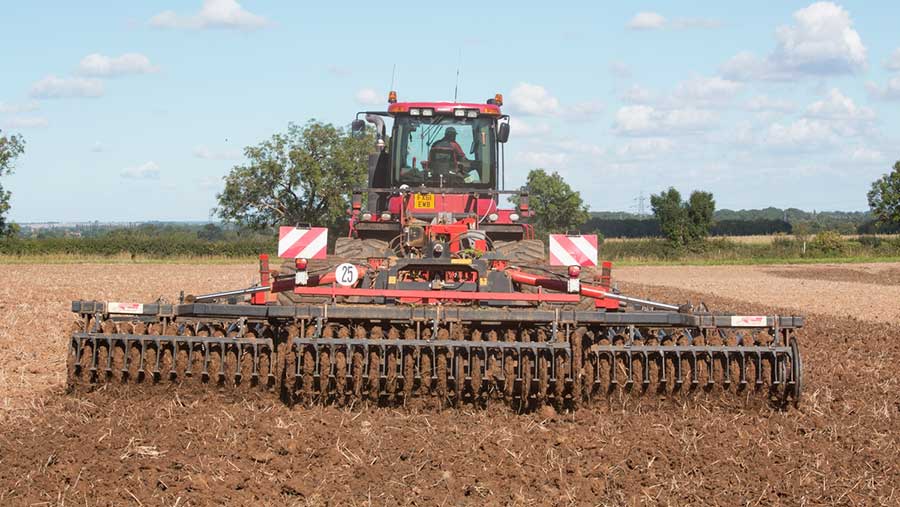
1. Soil structure

©Tim Scrivener
Maize is well-known for being a lazy rooting plant, with underground obstacles like compaction and stones impeding on root development.
Mr Draper says the roots of a maize plant can venture as deep down into the soil as the crop grows in height to find water and nutrients – but that’s only if the soil structure allows it.
“Fifty-five percent of your yield is down to soil structure and drilling, so if you get that wrong you’ve effectively messed up your crop,” he explains.
“Maize is a very weak rooter and if hits compacted soil it will just give up.”
See also: Advice on selecting maize varieties for biogas
Five years worth of trials conducted in France found there is a 30-35% yield penalty for drilling maize into compacted soils.
To prevent this, Mr Draper advocates grabbing a spade, heading out into the field and digging inspection pits to search for any structural issues which could impact on rooting and subsequent crop yields.
“If there is a compaction layer then you need to use a subsoiler to break up the plough pan, which will typically be at a depth of 10-12in (25-30cm).
“Don’t go deeper than this because you will break the natural channels in the soil that crop roots can follow.
“You just need to a fully broken plough pan to allow the plants to root deeper and this will help the crop cope in a dry summer.”
To achieve good subsoiling results, Mr Draper advises separating the cultivator legs at one and a half times the the subsoiling depth, if using standard subsoiler legs.
For winged subsoiler legs he recommends spacing them twice as wide as the planned cultivation depth with the angle set at 110deg to avoid creating an even worse pan.
2. Seed-bed preparation
© Tim Scrivener
Seed-bed quality is important and needs to be considered in tandem with drilling date, says Mr Draper.
“A rough seed-bed is needed if you are drilling in April because you’ll need to have good drainage – any waterlogging will really harm establishment. If you are planning on drilling in May you’ll need a finer bed to retain more moisture.”
A moist seed-bed will also help maximise the efficacy of a pre-emergence residual herbicide spray.
French research into the effect different cultivations have on maize establishment found that a ploughed seed-bed resulted in faster plant emergence when compared to min-tilled and strip-tilled seed-beds.
“This is because the ploughed soil is softer and the seed is drilled deeper. It gave a faster emergence and higher plant population. Remember, maize is a very weak rooter and won’t push against tough soil.”
3. Drilling date and forward speed

© Tim Scrivener
It is crucial to drill maize after a successive run of seven days where soil temperature is hitting 10C when measured at 9am.
Mr Draper says the temperature measurements should be taken at a 7-8cm depth and a field-by-field basis as there can be significant variations.
Picking a drilling date can be a fine balance – too early with not enough warmth in the soil and the seed won’t germinate, too late and the crop may not have enough time to reach maturity before harvest.
“You should be drilling as soon as you can but it needs to be after you hit the right soil temperatures,” Mr Draper explains.
“If you leave drilling for too long you could risk not having enough time to accumulate the 2,200 heat units that the crop needs in a year to hit that heat units target and reach maturity.”
Drilling speed is another important consideration that growers can forget about.
Driving too fast negatively impacts establishment by causing fluctuations in sowing depth, distribution and seed density.
This will lead to irregular plant establishment and can cost growers a significant portion of overall crop yield.
“Unequal spacing causes problems as maize can be it’s own worst enemy. You may end up with rows of short and tall plants when spacing isn’t equal because the rows end up competing against each other,” he notes.
“Speed also means that the seed is drilled at increasingly variable depths the faster you go. Research shows that drilling too fast equals a 40% yields loss from poor establishment.”
If growers are using a contractor to drill maize, Mr Draper says it pays to make sure the job is done at the appropriate speed of between 6-8kph.
4. Seed rates and row widths

© Tim Scrivener
Standard maize row widths are 75cm apart, but Mr Draper says that 50cm spacing should now be considered to help growers obtain higher yields.
Trials have found that 50cm spaced rows make for a faster growing crop with tasseling occurring three days earlier than conventional row widths.
These slightly narrower rows also encourage the maize plants to grow taller, as they fight for sunlight with neighbouring plants.
“Generally speaking, these 50cm rows with higher seed rates give a higher yield. You get about 2t/ha more dry matter yield and about 0.5t/ha more starch yield, compared to standard widths,” Mr Draper notes.
“I think rows at 50cm width with a higher seed rate than standard of 120,000 seeds/ha is the way forward.”
Meanwhile, the same row spacing research showed that there was nothing to be gained by increasing seed rates on a 75cm row and doing so actually decreases dry matter yield, so in these instances Mr Draper says it is best to keep the seed rate at 80,000/ha.
5. Starter fertiliser and nutrient needs

© Tim Scrivener
As with any other crop, nutrition is a big factor in building yield and independent grassland consultant George Fisher tells Crops that 100kg/ha of nitrogen is needed to hit a 16t/ha yield.
This makes soil nitrogen testing an important first step to ensure the right nutrient levels are available when the crop needs it.
“It is worth measuring the soil nitrogen supply but you also need to know how much N is applied with any organic manures,” says Mr Fisher.
He recommends testing the soil nitrogen supply in March and adjusting accordingly to help control fertiliser use and potentially reduce the bagged fertiliser costs.
“It is very important not to over apply N for the obvious reasons concerning nitrate vulnerable zones (NVZs) but also the N-max is quite tight for maize. Make sure that what you’re doing is accurate.”
He adds that crop nitrogen levels are also incredibly important when it comes to growing maize for anaerobic digestion plants.
Ross Leadbeater, farm advisor with CF Fertilisers, says this is why manure analysis is critical because there is such a wide variation in N, P and K levels. He also suggests growers should consider their application timings.
“You should be putting the majority of your N and P on the seed-bed rather than waiting until second leaf,” he adds.
He reports that maize yields respond well to sulphur applications and advocates applying 20-50kg/ha of sulphur on light to medium soils or land with low organic matter content for a 15% uplift in yield, based on trial figures.
6. Weed control

Mayweed in maize crop. © Tim Scrivener
Getting on top of weeds early on will allow maize to grow away easily from the competition, says Syngenta’s field technical manager Iain Hamilton.
“It is very important that we adopt an early approach otherwise the crop will suffer irreparable yield damage in heavy weed infested fields.”
He highlights the first 30 days leading up to the four leaf stage of plant growth as the critical period to prevent yield loss.
Growers must have at least brought weeds under control by this point, if not totally killed them off.
He recommends using a pre-emergence herbicide like Syngenta’s Dual Gold (S-metolachlor) at 1.4 litres/ha, which gives a different mode of action for grassweed control compared to those used in combinable crops.
Where growers face difficult weeds, he says Stomp (pendimethalin) can be included as a “top up” at 2 litres/ha and will improve control of mayweed, barnyards grass weeds and fat hen.
“Applying on to moist seed-beds will aid residual herbicide coverage and you should avoid spraying dry, cloddy soils.
“By leaf four stage the majority of weeds will have germinated and this is when you need to have achieved good control by.
Mr Hamilton says a pre-emergence spray is particularly important where there are high weed populations or when drilling early, as there will be a longer time for the crop to fight with weeds throughout the season.
For post-emergence broad-leaved weed control he recommends Calaris (mesotrione + terbuthylazine) at 1.5 litres/ha and nicosulfuron-based product like Milagro for control of more stubborn grassweeds.
